|
Apple Time Giveaway  It’s cold in Okieland!! Who would have believed this past summer, as we suffered through 60 some odd days of triple digit temps, that we could ever reach 30 degrees! It’s glorious. The sun is shining, we got a little rain yesterday and the air is clear. Good times! In this cold weather, this wonderful chicken dish is hot, fast and filling. Accompanied by hearty Indian Basmati rice and fried spinach you’ll think you are in Calcutta. Mr. Fix-It loved this dish and ate two helpings. I think you’ll love it too because it is so easy to fix. So here you go: 4 boneless, skinless chicken breasts, cut into cubes or strips 2 tablespoons olive oil 1 small onion chopped 2 cloves garlic minced or 2 tsps garlic paste 1 14.5 oz can crushed tomatoes 2 tablespoons yellow curry powder 1/2 cup coconut milk salt and pepper to taste 3/4 c. flour 1/4 c. cornstarch 1/4 tsp tumeric 1/2 tsp. soda 1 egg 1/4 – 1/2 cup ice water  Pour olive oil into large skillet  Add chicken and cook on medium high until lightly browned but not cooked all the way through. Remove from skillet and set aside.  Add onions to the skillet  And garlic. I have found this wonderful stuff at Walmart. It is in the produce section. There are a variety of organic herbs in paste form. How cool is that? It takes two teaspoons of this garlic paste. Cook until onions are tender and slightly clear  Reintroduce lightly cooked chicken to the skillet with the onion and garlic and add tomatoes. I am using home canned tomatoes here, that I pulsed in the blender for a few seconds. Stir until ingredients are mixed.  Add two tbslps curry powder and stir until curry is mixed throughout. Simmer the mixture for 30 – 40 minutes, stirring occassionally, until thickened and chicken is cooked and tender. Start your rice.  You can find coconut milk at any grocery store. Shake the can and then pour out 1/2 cup. Store the rest in the frig in a refrigerator dish.  Add coconut milk and stir to incorporate. Allow to simmer 10 more minutes, stirring occassionally.  While the curry is cooking, mix flour, corn starch, tumeric and soda in a bowl and add beaten egg. Slowly add 1/4 cup ice water and stir. Add more water as necessary to form a nice, thick batter like pancake batter. Start a skillet or pan of hot oil about 3″ deep and heat to 350º.  Take a handful of fresh spinach and dip the entire handful into the batter.  It’s messy, I know. It doesn’t matter if all of the spinach is covered. The object is to make all the leaves of spinach stick together.  Drop battered clump of spinach into hot oil and fry on one side until browned and then turn. Drain on a rack over a paper towel.  Put rice onto plates and spoon curry over rice. Add spinach and a salad and you are done!  |
|
|
Oklahoma Pastry Cloth™ Company on Facebook
|
|
 |
|
|
Archive for the ‘Meats and Main Dishes’ Category
Quick Curried Chicken
Thursday, November 3rd, 2011
Quick BBQ Wings
Thursday, October 27th, 2011
|
Apple Time Giveaway  Last night was supposed to be Game 6 of the World Series, but it got rained out. We are happy here in Okie Land, though, because evidently, St. Louis sent us that rain!! All night long. It was wonderful. It smells so good outside and it is very cool. Finally, plenty of wet stuff. It’s about time!! Of course, this is the time for all things football too and we Okies put aside everything for Saturday OU or OSU games. Got appendicitis? Tough beans. You’ll just have to wait until the game is over. No doctors available. And when OU faces OSU? Oh my. It’s the Hatfields and the McCoys, however, my son-in-law, an OSU Cowboy, graciously defers to my daughter, the OU Sooner, because he likes his teeth with which to eat. And speaking of eating, here’s a really quick and easy way to have your wings and eat them too, while glued to the television, watching those ball games. It’s something I do for Mr. Fix-It that’s quick and doesn’t need babying. They are tender and yummy and messy to eat!! The same thing can be done with strips of chicken breast for “boneless wings”. For 12 wing parts – Using fresh wings, divide at the two joints and use the drumstick and forearm portions. Use the pointed wing end for chicken stock. These wing portions can be purchased this frozen as well. 12 wing portions  Place wings into a plastic dish that has a lid and add bbq sauce. I am using Head Country sauce which is produced right here in Ponca City, OK.  Next, add honey. Hint: Rinse measuring cup with warm water (do not dry) and then pour in honey. The honey comes out of the measuring cup easier.  Add 1/2 tsp garlic powder  And 1/4 tsp thyme  Snap on the lid and shake until all of the pieces are covered with the sauce mixture.  Place the chicken onto a greased baking sheet and spoon about half of the leftover sauce mix over the pieces. Bake at 350º for 30 minutes. Remove from oven and spoon rest of the mixture onto the pieces and return to the oven to bake for 15 to 20 more minutes until brown and tender.  Golden brown and melt in your mouth good.  |
|
|
Oklahoma Pastry Cloth™ Company on Facebook
|
|
 |
|
|
Spring Ravioli in the Fall
Monday, October 10th, 2011
 The internet has been down for two days. Hence a late post. So sorry – but that’s technology for you!! Fall has finally made its way into Oklahoma and we are all breathing a sigh of relief. The triple digit temps are gone and it’s just hard to remember how it felt. We got 2 – 4 inches of rain in our area over the past couple of days and it’s even hard to remember the drought. But the fact of the matter remains that we have been in a drought and we have had triple digit temperatures and we did lose our garden and a couple of fruit trees. And worst of all, for the first time ever, we had no tomatoes. Now that’s just plain sad not to have tomatoes. Tomatoes go with everything and in everything so I have always canned boatloads of tomatoes for the winter. None this year. But have no fear!! Red Gold® tomatoes came to the rescue. First, I have to tell you about my new “love affair” with the Red Gold® Tomato company. I have most often used that brand of tomato ever since I first discovered it. I can not tell a lie though, if Surefine goes on sale, I snatch those up too!! But the Red Gold® tomatoes are by far the best canned tomatoes on the market – as close to fresh as you can get. So trust me, I had been using them long before I ever had any contact with them. However, about two weeks ago I got the nicest email from a Cristy with the marketing firm that handles the Red Gold® Tomato Company. She said that she had come across the blog and that she thought we would be a perfect fit for one of their Red Gold® Tomato Giveaway packages. The only request? Try some of the recipes in their new cookbook that would be included. I willingly agreed and also offered to post what recipes I will try every now and again. Then I promptly forgot about it.  Last Wednesday, this awesome cardboard box arrived that had a big tomato with the Red Gold seal on the outside. I opened it to find another box even cooler. It looked like a crate of gorgeous red tomatoes.  I finally got that box opened to find all kinds of neat items….a variety of canned tomatoes, refrigerator magnet, clip magnet, cookbook, key ring, a thumb drive with a tomato on the end (that is now the official Oklahoma Pastry Cloth™ thumb drive) and a lovely red canvas Red Gold® Tomato shopping bag coincidentally in the Oklahoma Pastry Cloth™ red. And evidently, they had gotten word that Mr. Fix-It loves cars, including model ones, because included was a to scale, heavy-duty special edition model of a 2004 Chevrolet SS Convertible – yellow with a Red Gold® emblem. Now what man couldn’t love that?! And to beat everything, Red Gold® has put their canned tomatoes on sale for “Buy 10 and get $5 off At The Register.” The sale goes off here in Okieland after Tuesday, October 11th. But you can continue to make use of their coupon that you can print off at the Red Gold® website for $1 off of three cans. Think of that. If you use that at Homeland, where coupons are doubled, you get 10 cans of tomatoes for $2.50 minus $2 off from the coupon, which leaves you with 10 cans of tomatoes for 50¢!!! You had better believe that I took advantage of that sale and rounded up cans of their different kinds of tomatoes to be carried out in my own, matching Red Gold Tomatoes Grocery bag. I was just too, too shopping coordinated! As far as a recipe, I decided to try this particular one in the cookbook. It calls for fresh, spring veggies, but you can use frozen if fresh is not available. I did and it was delicious. And it calls for fresh ravioli like you buy in the cooler case at any store. However, since I am the “make it yourself if you don’t have it since you live way out in the country kinda gal” I did just that. So here you go and I won’t be doing a printable recipe this time since it is from their book that can be purchased online: 2 tsps olive oil 1 cup fresh green beans, cut into 1 ½” pieces 1 small yellow bell pepper (green is fine too) 1 (14.5 oz) can Red Gold® Diced Tomatoes Italian with Basil, Oregano and Garlic ½ tsp salt 1 pound package fresh cheese ravioli ½ cup sour cream 3 tablespoons basil pesto 2 tsp grated lemon zest Substitutions: 4 oz fresh asparagus cut into 1” pieces and 4 ozs snap pea pods instead of green beans. For ravioli, use Noodle Dough recipe here at the blog.  Once noodle dough is mixed, put it onto a floured surface – preferably an Oklahoma Pastry Cloth™ – and gently flour to form a ball. Cut the ball in half to form two balls.  Roll each ball out into about a 6″ x 12″ rectangle  Place 1″ squares of Asiago cheese onto one rectangle, three across and four down  Place other rectangle of dough over the rectangle with cheese and allow to sit in the open air until the dough is slightly dry. This makes it easier to cut.  With a ravioli cutter or a knife, cut between rows of cheese squares to form ravioli. If using a knife, crimp edges with a fork.  Drop raviolis one-by-one into a two quart pot of salted boiling water with a tblsp of olive oil added to the water. Cook for 10 – 15 minutes until done and slightly chewy.  Heat two teaspoons of olive oil in a skillet and add green beans and yellow pepper ( I had to use a green pepper) Sauté for 5 minutes, stirring frequently, until crisp-tender.  Stir in undrained can of Red Gold® tomatoes and salt. Stir and cook for 3 minutes, stirring occasionally.  In a bowl, combine sour cream, pesto and lemon zest and mix well.  Add sour cream mixture to the tomato and green bean mixture and stir until incorporated  Gently add cooked ravioli and stir  Serve garnished with shredded parmesan or asiago cheese and accompanied by garlic toast and a raspberry vinaigrette salad with fresh raspberries! Oh yeah!! Tasty, tasty!! And the leftovers are good too!!  |
|
|
Oklahoma Pastry Cloth™ Company on Facebook
|
|
 |
|
|
Quick Beef in Wine Sauce
Tuesday, September 6th, 2011
|
It is a beautiful day today. It’s cold! Can you believe it? Three days ago it was 104º in this part of Okie Land and this morning it is 50º!! Fall is on its way. Yahoo! Maybe some rain too? Please? Texas and Oklahoma are in bad shape and I’m sure that you are hearing about the horrible fires in Texas yesterday and today. Both states have been ravaged by flames this summer and everyone is ready for some wet stuff. I thought I’d take a departure from all things canning and give you a really quick and easy recipe for these Fall days. With football games, parades, fairs and the works, quick is a good thing when it comes to cooking! And even better, this recipe is low-calorie and will satisfy any Weight Watchers or SparkPeople menu! You can use any lean cut of meat that is your favorite, but I like to use rump roast, sirloin tip or round steak. I actually make this when I am also making beef jerky, saving a pound of thin-sliced meat out for this recipe and drying the rest. Slice the meat against the grain as was shown in my making jerky post. Once you have sliced the meat, sprinkle it with meat tenderizer, garlic powder and a little salt and put it into a plastic bag. Put that in the frig and let it absorb the flavors and tenderizer for at least 12 hours. The nice thing about this is that you can slice up your meat the day prior to needing it, put it in the frig and then have it ready the next evening to cook and serve. So here’s what I do:
 Slice meat thin across the grain  Place into a plastic bag. Sprinkle to cover pieces with meat tenderizer, garlic and a little salt. Shake it around in the bag and then place in frig to soak for at least overnight. Can soak as long as 24 hours.  Chop onions and green peppers  In a skillet, sauté onions and peppers in two tablespoons of olive oil until tender and lightly browned.  Add garlic and toss among veggies. Don’t fry. You are just releasing the flavor. Spoon veggies into a bowl, leaving oil in skillet.  Add meat to the oil and quickly stir on high heat to brown all sides.  When beef is mostly brown, add veggies and toss  Mix 1 1/2 cup of water with gravy mix and add to beef and vegetables. Stir  Add wine  Stir as you bring it to a boil. Continue stirring until smooth and well-mixed  Cover and place into a 350º oven and bake for 35 – 40 minutes or until meat is tender.  Serve over rice. Yummy. Don’t forget to post, in the comment section, your favorite name for the Name the Blog Contest semi-finalists. They are as follows: |
|
|
Oklahoma Pastry Cloth™ Company on Facebook
|
|
 |
|
|
Making Jerky
Friday, August 19th, 2011
 Have you ever read the novel Sacajawea by Anna Lee Waldo? It’s a huge work that had to have taken her years to write. I read it a very long time ago. I think it was published in 1978. I learned quite a bit about the everyday life of our early Native Americans and for some reason, one of the things that stuck out to me was the process of making pemmican. Being a jerky lover, her discription of the leather pouches of this high energy food sounded good to me. I would crave beef jerky while reading the book! One of the things that I really found fascinating was Waldo’s description of the ceremonial butchering of buffalo after a big hunt. According to Waldo, the hunters would go to the first downed buffalo and begin the butchering process, taking the heart and performing what seems to be similar to the ancient Jewish “wave offering”. They would raise the heart to their Great Spirit, to the four corners of the earth – To the sky (the North) and then toward the ground (to the South) and then to the right (to the East) and to the left (to the West), just like the Israelites would do. And if you think about it – in the form of a cross. Interesting, huh? Well, anyway, Pemmican was the Native American form of today’s energy or protein food. It consisted of thin strips of dried jerky made from whatever game was available: deer, buffalo, moose, elk, etc, and then mixed with pounded and powdered dehydrated fruits and nuts from the area -Blueberries, cranberries, Cherries, currants and chokeberries to name a few. Bone marrow fat was also added and the mixture was stored in leather pouches. Sounds like just the thing for a long hike? Mr. Fix-It and I have been making jerky forever. We’re that old! Our boys especially love grabbing some to take home with them when they come for a visit. I use rump roasts to make my beef jerky, but you can use flank steak and round steak as well. Venison and Elk work great too. The following is my recipe and method:
 I am using rump roast in these pictures. Start with 3 lbs of meat and trim all fat from the rump roasts and then cut them into sections about 1″ x 2″. It is important that you identify which way the grain is running. You will be slicing across the grain. In the piece to the right, you can see the grain of the meat running lengthwise. In the piece to the left, the meat has been cut so that the ends of the grain are showing and will continue to be sliced that way.  I am using a sharp boning knife to thinly slice the meat. I keep a steel and sharpner close by to keep an edge on my knife.  You can make smaller pieces too by making cubes to slice instead of longer pieces.  I’ve wound up with nearly 2 1/2 lbs of meat strips  I cover the top of the strips with meat tenderizer, stir to incorporate it into all of the meat and then allow to sit for about 30 minutes.  In a separate bowl add 2/3 cup of worcestershire sauce  Add 1/3 cup soy sauce  Mix in 2 Tablespoons of brown sugar  And 2 teaspoons of black pepper, 1 teaspoon onion powder and 1 teaspoon garlic powder and if you like your jerky a little hot, add 1/2 teaspoon of red pepper flakes  Then 1 teaspoon Liquid Smoke which can be purchased at any grocery store. Stir all ingredients until mixed well  Pour the marinade over the meat and stir until all pieces are coated. Cover and place in the refrigerator to marinate for 5 hours, stirring every so often.  After 5 hours, the meat will be dark with the marinade having been absorbed.  Place the strips of meat onto the trays of the dehydrator and cover. Dry for 12 – 15 hours.  Store in plastic bags or in quart jars that can be vacuum sealed for added freshness. |
|
|
Oklahoma Pastry Cloth™ Company on Facebook
|
|
 |
|
|
Canning Beef Stew
Tuesday, July 12th, 2011
 How hot is it? It is so hot in Oklahoma the snakes are looking for air conditioning and they’re cold blooded!! It so hot here that the nectarines are going straight from the tree into jars as jam. It’s so hot that the Gila Monsters have moved to Oklahoma from the Mohave Desert because it’s warmer here! Yeah, we’re setting records. The disturbing news for the rest of you is what this is doing to part of your food supply. Grain and cotton crops have simply burned up, causing both to rise in price. As a result, grain is becoming cost prohibitive for ranchers for their livestock. Grass is gone and so many ranchers are having to resort to expensive hay as well. I just talked with a friend, in south-central Oklahoma, who owns a very large cattle ranch and she said they are preparing to sell their entire herd of cows. She said the cows are losing weight so fast that they must be sold this week or she and her family will take an even worse beating. There is no grass and there is no water. I see cheap beef in the grocery stores in the shortrun, from ranchers selling off herds, and a shortage of beef/high prices in the longrun, so plan accordingly!! One would think that in this furnace that is the midwest, one wouldn’t even think of hot meals. But planning ahead is the stuff that makes us prairie folk able to contend with the unexpected. Using garden staples that have managed to survive to can foods for the winter is a great way to use these days indoors. I have been finding beef on sale and so, I’ve been putting up a Fall and Winter supply of beef stew, a veritable meal in a jar! Just open a jar, heat the stew in a pot, mix up a batch of cornbread and you’ve got supper! And if the electricty goes out in one of our famous ice storms, the wood stove or the grill make perfect heat sources for a pot of stew accompanied by bread or crackers. So here is how I do my beef stew for Mr. Fix-It. He loves having this around because he can fix it himself! (carrots, celery, potatoes, onion, etc)
 Pat 10 lbs of meat dry with paper towel. I use either chuck roast or rump roast, depending on what’s on sale. Today I’m using chuck roast.  This is a rump roast. If you will notice, the chuck roast has more fat and more loss, but it is also more flaky.  Cut meat into cubes  Remove fat and membranes by lifting as you cut underneath. As you lift, this gives more area to slice under the membrane or fat and also helps to release them from the meat.  Lightly salt the meat  Add a little of the meat at a time to a very large stock pot that is on medium heat. Brown and add more meat until most meat cubes are lightly browned on at least one side. Juices will begin releasing.  Add 4 1/2 pounds of mixed veggies. I am using potatoes, carrots, onions and celery. You can use whatever amounts of each that you prefer and you can add other vegetables according to taste.  Add water to cover  Add garlic powder  Add thyme  Add bay leaf  Add beef bouillon  Mix package of brown gravy with 1/2 cup water and add to the stew, stirring. At this point, if you like wine or burgandy in your beef stew, add 1/2 cup. Mr. Fix-It likes his without.  Cover and allow to simmer vigorously 1 hour, adding water to keep at the same level and stirring occassionally to keep from sticking.  Mix 1/2 cup corn starch with one cup of cold water. I start out with this much and add more if I need more thickening. I usually wind up using 3/4 cup corn starch with 1 1/2 cup water, however, I like to start out with less and adding more if needed. Do not make the broth too thick. It can always be reduced after opening a jar and bringing to a boil. If you get your broth too thick, it will thicken more in the processing and will become way too thick.  Stir continually as you pour into boiling stew broth to keep from lumping.  Find and remove bay leaf. Place stew into jars, dividing broth evenly between jars. Leave 1″ headspace.  Using a canning spatula or knife, remove any air bubbles by running around the inside perimeter of the jars.  Wipe the rims of the jars to remove any juices or oils  Add lids that have been warming in a pan of nearly boiling water  Add rings, tightening and then backing off just a hair  Place jars into canner, cover and process for 1 hour 30 minutes for quarts and 1 hour 15 minutes for pints at 10 lbs of pressure  Meanwhile, place all the trimmings into a pot and cover with water. Boil until trimmings are cooked down to very tender, continually adding water as needed. Strain broth from the trimmings and add broth to pint jars. Add 1/2 tsp salt to each pint and process with any extra jars of beef stew to make canned beef broth.  Place trimmings, a carrot and about 1/4 cup oatmeal into food processor or blender and turn into a puree. You can put this into jars too, with extra water, leaving 1 inch of head space to can. Or you can freeze it. Use it as canned dog food! Nothing has been wasted. |
|
Oklahoma Pastry Cloth™ Company on Facebook
|
 |
Ham Spread From Your Canned Ham
Friday, July 8th, 2011
|
In the previous cannng post, I showed you how I can leftover ham from a fully cooked shank, butt or whole ham. I thought that I would show you a couple of things that I do with that cooked ham. Today, I’ll demonstrate how I use a jar of canned ham to make ham spread – or as we in the south call it: Potted Meat. I always kid Mr. Fix-It, who loves ham spread, that it looks like it is pre-chewed. I guess that you can chop it as chunky as you like, but Mr. Fix-It likes it totally pre-chewed!  First, I open a pint jar of canned ham, drain it of all liquid and put the meat into my food processor. You can also do this with a hand chopper, a knife or carefully in your blender if you like.  I add 1/4 cup of chopped celery  Add 3 to 4 tablespoons of mayonnaise (Depending on how moist you want it and I use light) with 2 teaspoons of regular mustard  Next I add two tablespoons of sweet pickle relish  I process all these ingredients together until I have a spread. You do not have to chop yours up as fine. In fact, if you would prefer larger chunks of ham, process the other ingredients first and then add the ham to pulse just until chopped. BTW, sometimes, instead of canning the ham, I process it as the deviled ham spread here and can that in 8 oz jars for 1 hour and 15 minutes at 10 lbs pressure. It’s pretty nifty to have on hand to open in a pinch.  Mr. Fix-It likes it one of two ways: Either on Ritz crackers or spread on whole wheat bread, with lettuce and tomato. All you have to chew is the crackers or the bread and trimmings!! 🙂 |
|
Oklahoma Pastry Cloth™ Company on Facebook
|
 |
Dilled Salmon
Thursday, June 23rd, 2011
 I love wild Alaskan salmon. I understand that it is supposed to be really good for you with all those Omega fatty acids (why not Alpha fatty acids??) that are supposed to coat your heart and grease your brain, but I just like it because it tastes good. When I was a kid, my dad would go fishing with his buddies up in Maine for fresh water salmon and it was a treat indeed to watch my mom stuff one of the big fishes with dressing, truss it up like a corset and place it on the grill to slowly cook over charcoal. Oh my. Talk about heavenly. Topped with a cucumber sour cream sauce, that fish melted in your mouth like butter. So, I’ve had a love affair with salmon for a long time. It included lying on the floor, chin cupped in hands while riveted to the black and white tv, watching the Walt Disney hour explain how these trout-on-steroids swim upstream and jump over dams in a quest for a mate that would put E-Harmony to shame. I was always fascinated when the grizzly bear caught a wayward fish and carried it to shore flipping and flopping in the bear’s mouth. And so, speaking of putting salmon into the mouth, the following is my own recipe for baking salmon filets for a quick and pretty dinner. It doesn’t heat up your kitchen in summer because it doesn’t take long to bake the fish and it’s a hearty, warm meal in winter when Ol’ Man Winter is knocking at the door.   Mix mayo, thyme, garlic powder, salt, onion and dill in a bowl until well incorporated. I am using the Frontier Simply Organic spices at the website here. They are potent!!  When thoroughly mixed, take 1/3 cup of the mixture and place into another bowl and set aside.  Add 1/4 cup of white wine to the remaining mixture and cream well  Lightly pepper fillets. Place fillets on a greased or nonstick cookie sheet or into a greased glass baking dishand spoon wine mixture over cuts until all of it is used up. Bake in 350º oven for 20 – 25 minutes until the meat flake when lifted with a fork.  Serve with your favorite side dishes and top fillets with a dollop of the leftover mayo mixture. Yum! |
|
Oklahoma Pastry Cloth™ Company on Facebook
|
 |
Shrimp Etouffée
Thursday, June 16th, 2011
  When I was in high school, my family spent a glorious week in New Orleans while my father spoke at an education convention there. We stayed in a beautiful, vintage home called the Lamothe House that was the traditional French style home surrounding a courtyard of gardens. I remember that the beds were also French with the tall, mahogany headboards spanning the wall to the ceiling and topped by an ornate mahogany half canopy. We felt pampered and awed by the opulence. That was in the early ’70’s and this gorgeous home is still a thriving bed and breakfast. Seeing the Preservation Hall jazz band with Billie and Dee Dee was a treat in an old, ramshackle building with wooden floors and folding chairs. Beignets at the Café Du Monde and meals at The Court of the Two Sisters, Antoine’s and several others that are no longer in business, started me on my love affair with French cuisine and all things Cajun. My favorite is Crawfish Bisque and that recipe will come later, but just for a quick summer meal, I thought I’d show how I make shrimp etouffée. I make a cajun seasoning mix that I store in a glass jar and use as needed. How hot you like your food determines how much cayenne pepper you use. I’m a weenie and Mr. Fix-It has had to swear off of hot food as the doctor has demanded, so cayenne is limited for us but it can be Katie-Bar-The-Door for you if you are brave. Hope you enjoy the recipes. Place all ingredients into a quart jar with a lid. Shake jar until all ingredients are well mixed. Store covered and use as any commercial seasoning.
 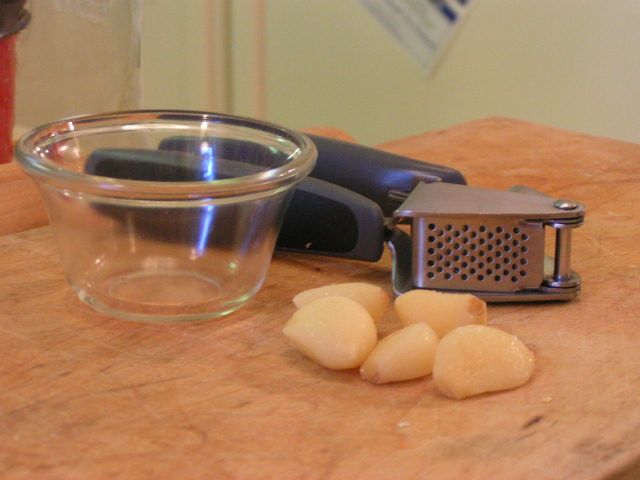 Press or chop 5 cloves of garlic and set aside 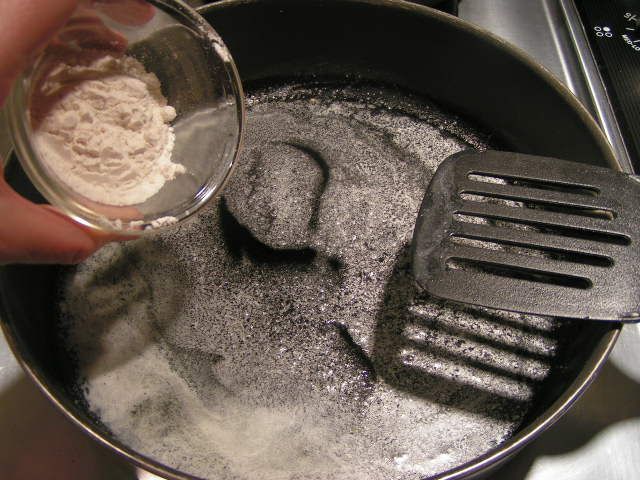 In a large, deep skillet, melt butter and add flour to make a roue 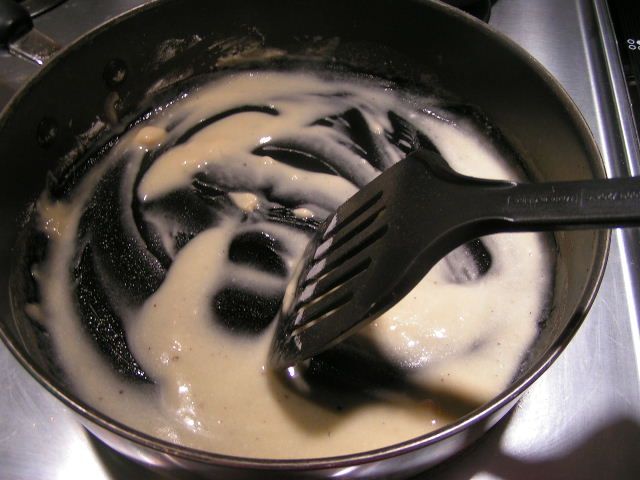 Stir flour into butter until a smooth paste is created 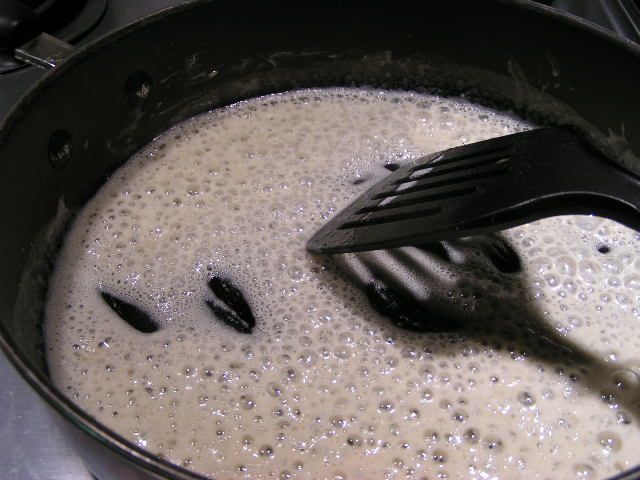 Cook on high heat, continually stirring. The roue will go from a thick paste to a thinner mixture and be very bubbly. 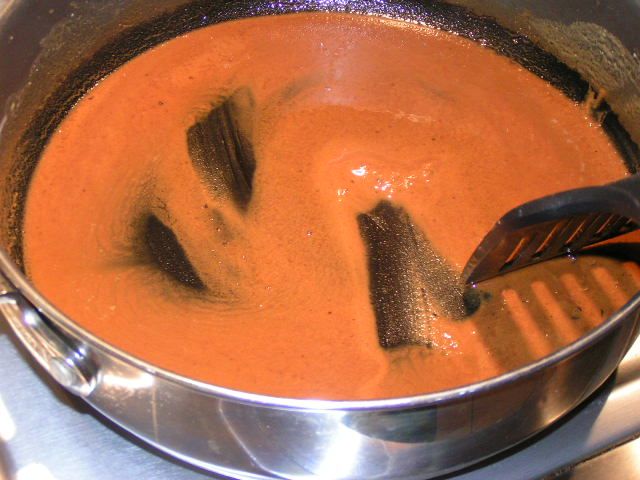 Continue stirring and cooking until the color of the roue is a deep caramel color. It will smell slightly burned. Set off of heat. 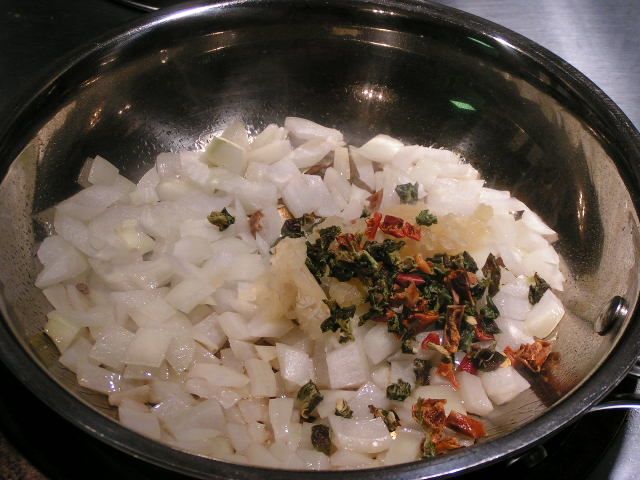 In a second skillet, sauté onions, garlic, bell pepper and celery in 1 Tblsp olive oil. I am using dried peppers and celery here, but fresh is great. 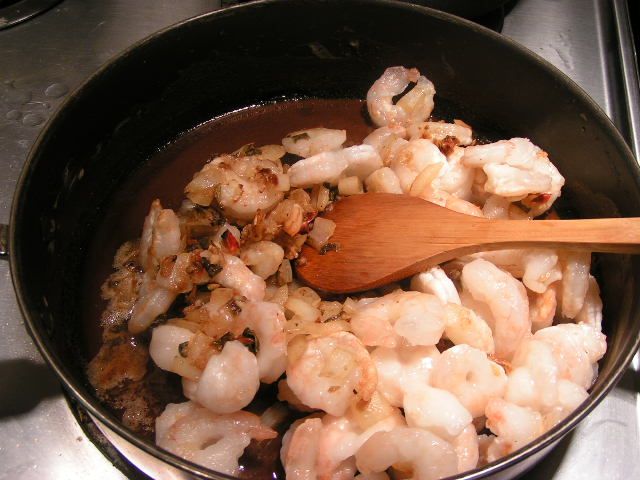 When onions are clear and tender, place skillet with roue back onto heat. Add veggies and shrimp and stir. 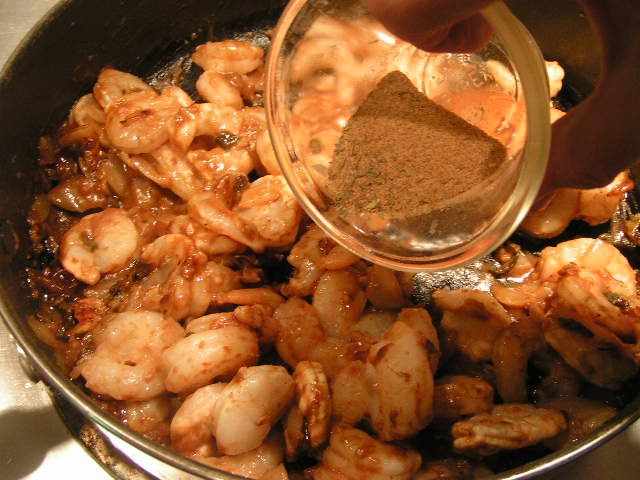 Add 1 Tblsp Cajun seasoning from mixture in recipe above. 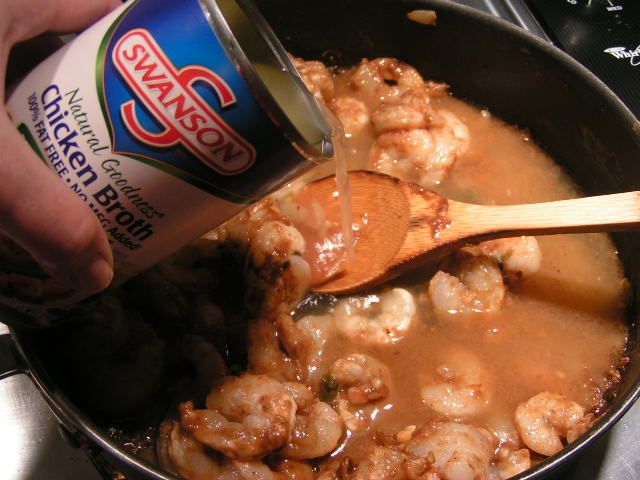 Add can of chicken broth 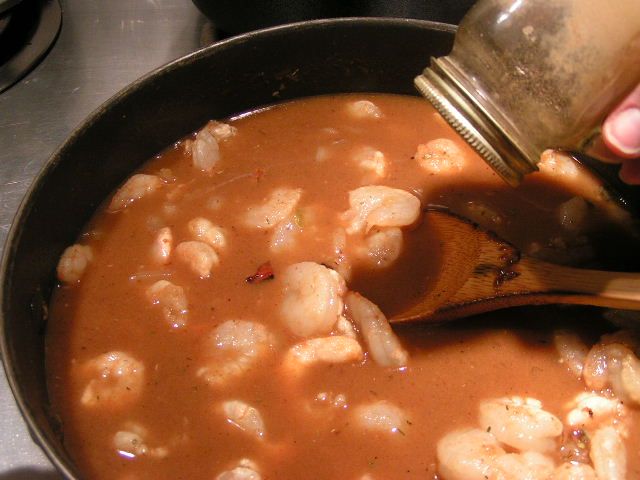 Add more black pepper to taste. We think that you can’t have too much black pepper! Simmer until liquid is reduced to a nice, thick gravy. 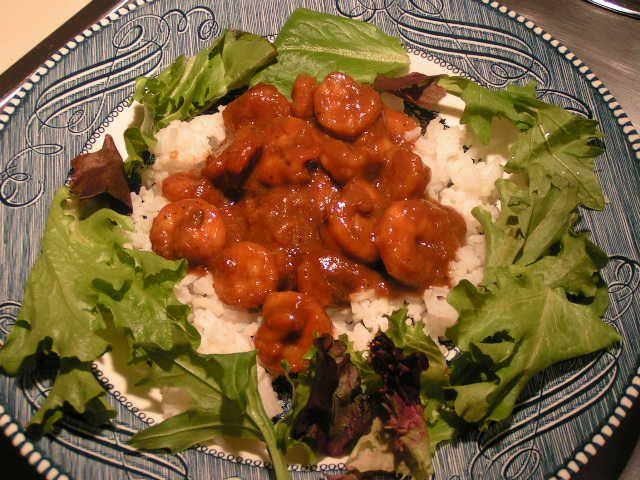  Serve Etouffée hot, over rice. Serves 4  |
|
Oklahoma Pastry Cloth™ Company on Facebook
|
 |
Summer Sandwich
Wednesday, June 1st, 2011
|
It’s been really hot today. A wet blanket over a sweat lodge couldn’t be any heavier than this afternoon’s humidity. I really didn’t want to heat up the kitchen too much and when it gets hot, we kinda lose our appetite. Sandwiches sounded good to me, but Mr. Fix-It likes something a little more substantial. So, I put my brain in gear and started assessing my alternatives.  I got four chicken tenders out of the freezer and let them thaw just until I was able to cut them. Then I placed each tender on its side and sliced it almost in half, butterflying it.  I sprinkled evenly over both sides of the butterflies, thyme, garlic powder, paprika, salt and pepper  Finally, I sprinkled a total of a teaspoon of sugar over the four tenders  In a skillet, I browned the chicken in 1/2 tablespoon of butter and 1/2 tablespoon of olive oil  I turned the pieces and browned them on the other side  Four slices of homemade whole wheat sandwich bread would be my sandwich base  I sprayed one side of each slice with olive oil  I got this grill at WalMart several years ago on clearance. It’s a pretty good sized grill. It isn’t the George Foreman brand but works just as well. I melted a tablespoon of butter on the bottom grill and then used a brush to brush it over both surfaces.  First, I put two slices of bread, olive oil side down, onto the grill and put two of the butterflied chicken tenders on each slice. I used provolone cheese here, but asiago is good, as is swiss or sharp cheddar.  Then I put our favorite spreads on the other slice of bread (olive oil side out). Here, Mr. Fix-It reqested my hot sauce which is 1 part Chinese Chili sauce to 2 parts mayo. I mixed my own spread using 1 tablespoon of mayo with 1 tablespoon of Marzetti Italian with Blue Cheese Crumbles. Yum! The spreads went onto the slices of bread which were then placed on top of the rest of the sandwich. The grill was closed tightly and the sandwiches were cooked until they were nice and crispy on the outside. I took them off the grill and added fresh lettuce out of the garden and fresh onions out of the garden. We haven’t got tomatoes yet, so we had to do without (can’t stomach the store bought ones) and with homemade pickles added, it was super!!  |
|
Oklahoma Pastry Cloth™ Company on Facebook
|
|
leaving a comment below!  |

 Homestead Revival
 Paratus Familia
 Rural Revolution