 
Ingredients: 1/3 cup butter 3 large eggs 1 cup live culture yogurt 1 tsp soda 1 tsp ground allspice 1 tsp ground cloves 1 tsp ground cinnamon 1 tsp ground ginger 1 cup of your favorite berry jam (I used strawberry) 1 cup chopped pecans 1 Duncan Hines Moist Deluxe white cake mix Lemon Curd from Recipe (Best if made ahead of time and chilled) Icing: 1-8oz pkg cream cheese 1 stick of butter (cream together) Beat in 1 lb box of powdered sugar 1 tsp vanilla 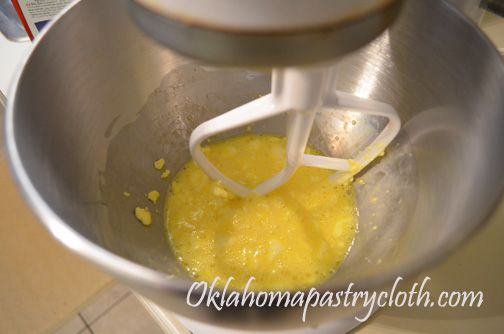 Cream the butter with a mixer and add eggs. Beat until smooth. 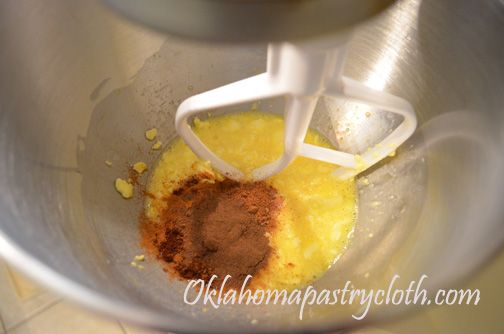 Add spices and blend well 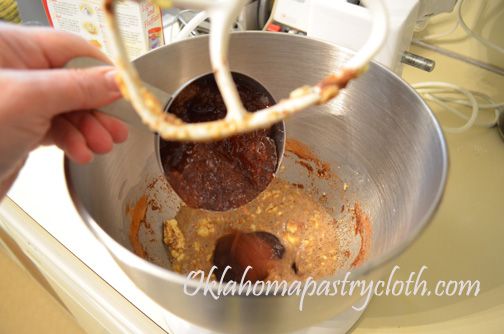 Add jam and continue to beat  Add yogurt. Cream together with other ingredients  Add box of cake mix and beat well until smooth. Stir in nuts. Pour batter into cupcake papers that are supported in muffin tins or pour into a greased and floured 9 x 13 sheet cake pan. Bake at 350º for 20 – 25 minutes or until a knife or toothpick comes out clean.  While the cupcakes are warm, using a scoop or apple corer, core out a hole in the middle of each cupcake  Fill each hole with lemon curd that has been made from the linked recipe. Place in the refrigerator or a cool, dry place. Make Butter Cream Cheese Icing 
 |
|
| |
|
Oklahoma Pastry Cloth™ Company on Facebook
|
|
 |
|
|
|
Archive for the ‘Let’s Cook!’ Category
Yogurt In A Jam
Tuesday, March 19th, 2013
Yogurt: The Answer To Everything!
Tuesday, March 5th, 2013
  Anybody remember Precious Pup? He’d eat something and then wrap his arms around himself, let out an “mmmmmm” and float up up into the air in gastronomical bliss. Well, let me tell you: That was Mr. Fix-It the other day as he munched on my accidental biscuits. I say ‘accidental’ because I had to improvise on my usual biscuit recipe in the hopes that I would still come out with the semblance of those southern treats. Mr. Fix-It was in the mood for biscuits and I, always wanting to please my man, dashed to the kitchen to whip out a batch of my own recipe. I had posted that recipe here a number of years ago, with step-by-step photos, but I’ll let you in on the secret of what I did differently. It all started with the absence of buttermilk. Now, everybody knows that the enterprising cook can substitute a cup of milk that has been poured over a tbsp of vinegar and then warmed to room temperature, for a cup of buttermilk. And that makes pretty good “buttermilk” biscuits – but I didn’t want “pretty good”. I wanted “big grin, lip smackin’, darn great” buttermilk biscuits. As you know, I’ve been on a yogurt kick and have been throwing the stuff into anything for which I can safely find an excuse. I decided that biscuits might be my next great experiment. I was right. Oh my gosh. Those were absolutely the best, most awesome, pastrymagical (my own word) things you ever put in your mouth. With homemade grape jelly or apple butter – they were proverbially ‘to die for’. So here you go. See what you think. I use my homemade yogurt, but if you use ‘store bought’n’ I recommend StoneyField plain if you can get it. 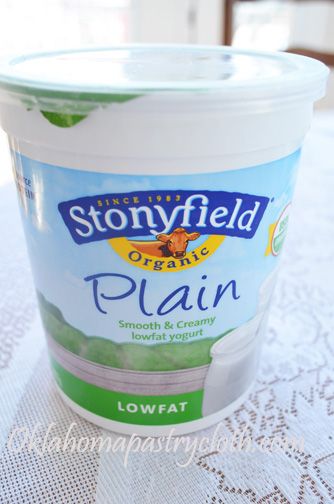 Ingredients: 2 cups all purpose flour 1 Tbsp + 1 tsp baking powder 1/2 tsp baking soda 1 tsp salt 6 tablespoons shortening 1 cup plain yogurt 2-3 Tbsp milk Directions: Preheat oven to 450º. Add all dry ingredients together and cut shortening in with a pastry cutter/blender, two butter knives or a fork until the mixture resembles crumbs. Add yogurt and stir until totally incorporated. Add enough of the milk to form a soft, sticky dough. Place onto floured Oklahoma Pastry Cloth™ and drop lightly and pick up a number of times to form a soft ball. Roll out to 1 inch thick circle and cut biscuits. On a baking sheet, pour either olive oil, coconut oil, sunflower oil or peanut oil to lightly coat the surface. Place biscuits side-by-side, not quite touching, putting the tops into the oil and then turning to place biscuits with oily tops up. Bake for 13-15 minutes until golden brown. Brush tops with melted butter and serve hot.     |
|
| |
|
Oklahoma Pastry Cloth™ Company on Facebook
|
|
 |
|
|
|
I Am Woman!!
Thursday, February 7th, 2013
 Don’t forget to leave a comment to enter the Valentine’s Day Giveaway! Winner will be chosen on Monday, Feb. 11, for a basket of Prairie Blessings Soaps, handmade right here at the Oklahoma Pastry Cloth™ digs. 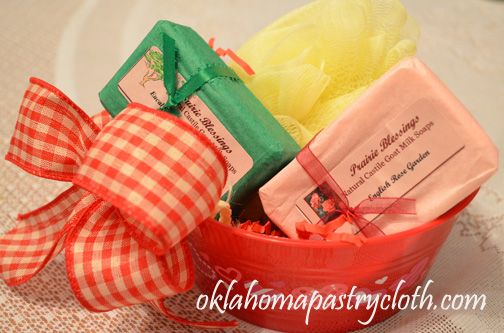 It was time to go to the chiropractor – a part of my week to which I aways look forward. I feel soooo good after a visit to Dr. Ryan and so it is no effort to make the long drive to his office. But I got into my car – my relatively new car – and turned on the key to absolutely no sound at all. No click. No whir. No nothing. The battery was dead. Why was the battery dead? Because there just has been no battery invented, to my knowledge, that stays charged when the dumb driver leaves the key turned to auxillary for a couple of days. Of course, Mr. Fix-It wasn’t here. In fact, he wasn’t even in the near city. He was two hours away. I called him on his cell phone and he asked what all men ask: “Why is the battery dead?” And I actually thought about spinning a yarn of an alien spaceship that landed in the front yard and sent out weird electronic waves that killed every battery in the area…”I KNOW dear. That’s just crazy isn’t it? I wouldn’t have believed it if I hadn’t seen it with my own eyes!!” But I didn’t. I told him the truth and took my lumps of typical male explanations on how I must be more careful and observant about taking the key out of the ignition. Which I should. We discussed my options, including an attempt, on my part, to roll the car onto the driveway next to my son-in-law’s sporty Monte Carlo that is visiting us on vacation due to a blown head gasket (I’m pretty sure that’s worse than a dead battery) – problem being, that the Monte Carlo’s hood is the equivalent of a slab of granite and can only be lifted by a pair of Olympic weightlifting champions. My fate was sealed to pedestrianism, 40 miles from the doctor’s office and 25 miles from any semblance of civilization. My friend pointed out that I could call the insurance company and make use of the ‘roadside assistance plan’ for which we pay. She was so logical in her reasoning, “It’s what you pay good money for!” However, I was experiencing a twinge of that sin that has brought down complete societies in one, fell swoop…..Pride. I did not want to have to drag some poor schlub all the way out to the boonies for a 5 minute job required by a stupid female who doesn’t pay attention. Now, there is nothing more inventive or creative than a woman in trouble. If the government would just put a group of women in a room and tell them that the national debt will cause chocolate to become nonexistent by the end of the year, within two weeks, those women would have the debt paid off, the credit card cut up and Washington, D.C. employees eating mashed potato sandwiches from sack lunches. So when I discovered a car battery sitting on a work bench, my little brain began to form a plan. While the Monte Carlo hood is granite, a car battery is a close second in weight. Those suckers are heavy….and dirty…and oily. I donned a full apron to protect my clothes, which added a floral accent to my situation, and tried to lift the square box. It did not budge. I quickly figured out that one must emit that same “arrrhhhh” that weightlifters’ grunt at the point of assuming full impact of a heavy object in order to make it move. I did so, and lifted the battery into my arms, struggling on buckling legs to transport it in front of my little Nissan Versa. Realizing that I could not hold the battery and bend over to place it on the floor, without dropping it and sending acid all over me and my pretty, floral apron, I looked for a “stand” on which to place it. Fortunately, there was a stack of boxes of canning jars and so this acted as my table on which to place the battery. Next, came the job of opening the hood and as I had never done that to this particular car, I had to get a flashlight and then use the engineering skills that I don’t have, to figure out how-in-the-world the latch worked. Of course, it couldn’t be just a simple latch. No. It had to be one that had multiple levers that acted in concert with the movement of the main clamp, which had to be pressed in a direction that made absolutely no sense. Finally, getting the hood up, I couldn’t find that little stick thingy that holds the hood in place. I searched everywhere, with the blood draining out of my arms while I held the hood above my head to keep it from slamming down on my body for someone to discover the hideous picture of a car that had eaten its owner. That engineering skill, that I don’t have, whispered to me to find the hole in the hood and then trace that directly below to the frame where the stick had to be in order to fit into the hole. I searched and searched on the hood for that recepticle and probably looked directly at the little stick thingy, clamped across the hood, at least a dozen times. It finally screamed at me, “I’m right here, stupid!!!” and I managed to support the hood. Then came the scariest part: Electricity. I had the jumper cables ready, and I knew that black went to black and red to red and that black is negative and red is positive which is soooo confusing since in the business world, black is positive and red is negative (just try to run a bank account in the red and convince your bank that’s a positive thing – well – yeah – the government does that). I carefully placed the clamps on the posts of the two batteries, gritting my teeth in expectation that I was about to arc weld the frame of my car to every steel component of the motor. Surprisingly, there wasn’t even a spark and when I turned the key in the ignition, the car started!!! I did my best imitation of a “goal post dance” and wanted to growl like Tool Time Tim. Yessss! I might as well have invented the automobile with the sense of achievement I felt. And speaking of a sense of achievement. I discovered something rather wonderful this week. Most of you are probably not as ancient as I, and probably don’t remember Dannon’s Fruit On The Bottom Yogurt. That was a staple for me throughout my college years. I would go to the student union cafeteria and load up on cups of Dannon Apricot and keep that in my little frig for late nights at the Art Barn or studying for a test. But Dannon Fruit In the Bottom Yogurt went away. There was something about that yogurt with the tart chunks of apricot and the lumps of yogurt that burst in your mouth between smooth and creamy spoonfuls. Anyway, the other day, in making yogurt, a brilliant idea hit me. I have tons of apricot jam made from the bounty of Sir Flying Ace’s apricot tree. I put a couple of tablespoons of that jam into the bottom of my yogurt cups. Then, in my pan of warmed milk, I added vanilla and stevia to flavor the milk and then did my usual adding a little warmed milk to the starter, pouring that mixture back into the milk. I poured the milk and starter mixture over the jam into the cups and placed the cups in my yogurt maker. Oh my gosh!!!! When cooled in the frig and then gently mixed to bring the fruit up from the bottom, that yogurt tasted exactly like that which I ate in college. It is wonderful. I have now tried it with homemade strawberry and blueberry jams as well. 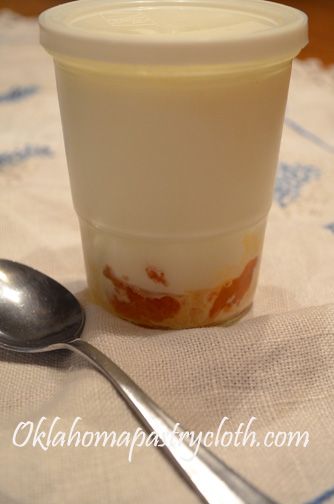 But to beat everything, I was out of buttermilk the other day and on a whim, decided to use that yogurt instead, for a batch of pancakes for Mr. Fix-It. I sustituted exactly the same amount of the fruit yogurt for the amount of buttermilk I would have used. Mr. Fix-It has said that he wants me to make pancakes that way from now on. They were amazing. So here is my recipe. I am sure that you can use just plain yogurt the same way, but that fruit really made some wonderful flapjacks!! One note: The yogurt must be live culture. The blended yogurts and those with additives won’t work. Ingredients: 1 large egg 1 1/4 cup yogurt 1/2 tsp soda 1 1/4 cups sifted flour 1/2 tsp vanilla 2 tbsp melted butter 1 tsp baking powder 1/2 tsp salt chopped pecans (optional) Printable Recipe Sift together flour, baking powder and salt and set aside. In a mixing bowl with a whisk, beat together egg and yogurt until smooth. Add baking soda and mix. Add flour mixture and stir until smooth. Add vanilla and butter. If batter is too thick, add enough water to give it the consistency of hot pudding.  Pour batter onto a hot, well-oiled griddle, heating to around 350º. Sprinkle with chopped pecans. Cook until brown and turn to cook the other side.  Serve with butter and syrup. Good eatin’!!!  |
|
| |
|
Oklahoma Pastry Cloth™ Company on Facebook
|
|
 |
|
|
|
Double The Fun and Chicken
Saturday, January 26th, 2013
 Hi all. Haven’t been able to stand writing much lately. Writer’s block has reared its ugly head and then another issue just gave me more excuses. Most of you know that I have Graves and Hashimoto’s Diseases with the accompanying Thyroid Eye Disease (also known as TED). Lately, focusing on a computer screen for any amount of time has not been fun. I’ve tried. Best intentions and all that kinda thing. My eyes throb, burn and tear up and then, everybody wants to know what I’m upset about and what should send me into tears. Of course, assuring, “nothing,” doesn’t cut it and pretty soon, discussions of Prozac and other drugs of comotosity (is that a word?) become whispers behind my back where my “mom’s eye in the back of my head” is also throbbing, burning and tearing up. I then win the day and all involved relax as I pile ice onto my face, over a sleep mask, and I lay down on the couch to listen to the clickity clack of the Wheel of Fortune wheel. Ya know, something gets lost in that show when one can’t see the board and can only hear the ‘dings’ of the letters turning and the squeals of the contestants. Just not much brain stimulation there. And there’s no use looking because with the occassional double vision of TED, when a contestant buys a vowel, two show up side-by-side along with double consonents and the board looks like Russian! Last night, I asked Mr. Fix-It if he noticed the firelike flames of the headlights of oncoming traffic. He looked sideways at me like I was crazy and said that there were no firelike flames. Huh. January is Thyroid Disease Awareness Month. Now, a year ago, I would have giggled and said, “Are you kidding? They have a month dedicated to the thyroid, of which nobody cares? Sheesh.” But things sure do change when you become one of the stories told by the countless number of people in all parts of the world who have been struck with these really aggravating autoimmune diseases. All of a sudden, you get this primal urge to wear a ribbon or get pledges and walk or something. You try all kinds of natural remedies and keep a journal of what works and what doesn’t work. I have to say that I have discovered that my Rosemary/Peppermint with Sage soap seems to sooth my painful eyes and keeps them from being so red. That’s pretty cool. Literally. But suffice it to say that one feels a new empathy for people who are struggling with diseases that are not necessarily life threatening but that are life altering. I went into Walmart awhile back and the checker was peering with difficulty at the price of my item. One eye was droopy and the other was terribly swollen and watery. I knew immediately that she had TED and I felt such a pain for her having to stand there, trying to see what wasn’t going to be easily seen. I wanted to just grab her to take her to a recliner for an ice pack and relief. I have been blessed. My eyes are not that bad yet. It is very possible that my day will come or it may not, but God has been gracious in allowing me just enough discomfort to keep me humble and not so serious a case so that it keeps me grateful. “For when I am weak, then I am strong.” (II Corinthians 12:10) But I’m still kind of impatient about sitting in front of a computer screen!! 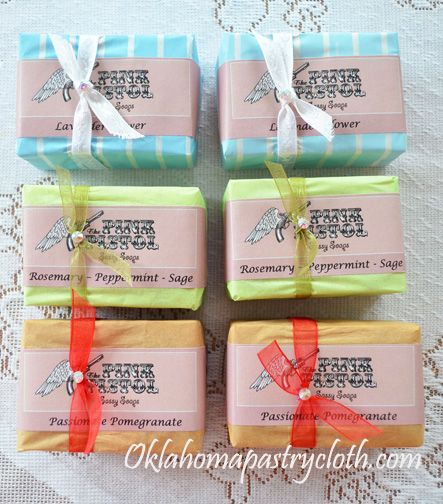 Many things have been happening over the past month…pretty exciting things, in fact. We have the privilege of welcoming Eric and Denyce and their wonderful site Breadtopia.com. They have decided to carry the Oklahoma Pastry Cloth™ at their Iowa business. Be sure to hop over and check out their site and their great baking blog. You will learn a lot! Then, the gift store, The Pink Pistol, recently opened in Tishomingo, Oklahoma by country music singer Miranda Lambert, is carrying our soaps packaged especially for them. Privately labeled for The Pink Pistol, the soaps have swarovski crystals centered on the ribbon that ties around the package of pastel tissue paper for a tidy gift with ‘bling’! We have been humming here, producing like Lucy and Ethel in the chocolate bon bon factory and just as organized!! (note my sarcasm) So please accept my apology for the long absence. A combination of writer’s block, eye problems and sheer burnout have plagued this blogger granny. I’m thinking of getting a bottle of Vitameatavegamin. In the interim, reader Lacey from Texas, sent a recipe that Mr. Fix-It and I really liked. It is very easy and very tasty and REALLY fast. The recipe actually calls for chicken thighs with the bone in, but since we especially like white meat, I used boneless chicken breasts, cut into chunks. I think that next time, I will cut the breasts into strips but you can use any part of the chicken you like!! Thank you, Lacey, for a new recipe! 1 1/2 lbs chicken thighs or boneless breasts 1/2 cup Dijon mustard 1/4 cup Maple syrup 1 Tablespoon Rice/rice wine vinegar Fresh rosemary Salt and pepper Line a baking dish with aluminum foil and preheat oven to 450º  In a bowl, mix mustard, maple syrup and vinegar until creamy. 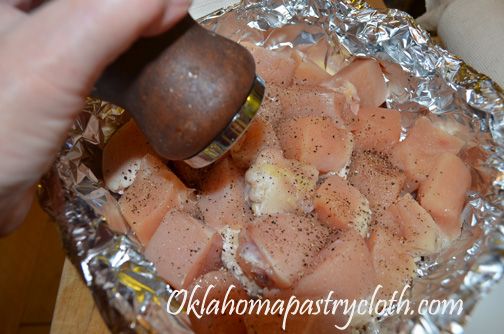 Place chicken pieces into foil lined casserole dish and salt and pepper chicken 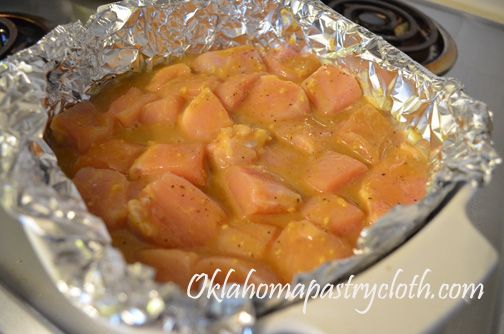 Pour the sauce mixture over the chicken and turn pieces to dredge in the sauce.  Bake at 450º for 40 minutes, basting with the sauce halfway through the cooking. For breast strips, it may not take 40 minutes until done.  Remove the chicken from the oven and allow to cool for 5 minutes. Serve portions, spooning sauce over the meat and sprinkling fresh rosemary leaves liberally over the pieces. This is an important addition!!  I served the chicken over rice – but heh – that’s just me. We eat so much rice, we should invest in a rice paddy!! Enjoy!!  |
|
| |
|
Oklahoma Pastry Cloth™ Company on Facebook
|
|
 |
|
|
|
You’ll Eat It Like Popcorn!!
Monday, December 31st, 2012
 I sure hope that everyone’s Christmas was beautiful, meaningful and filled with love. Our home was a little quieter this year, as much of the family was unable to make it due to weather, but those of us who were together had a lot of fun. The grandbaby was here and so all was well. Can’t go wrong with a one year old and her first real Christmas!!  The tree was bare underneath until presents magically appeared Christmas morning! They must have come by train. I can’t resist waxing philosophical after this past holiday season. Shopping was a truly different experience this year. I don’t know if I have just become more observant or if my patience isn’t what it used to be or if I just naturally see the absurd in my surroundings, but I picked up on a phenomenom at the department stores that I just hadn’t noticed before. People don’t read signs. The best way to get an individual to do exactly what you don’t want them to do is to put up a sign and watch them do the exact opposite – like the lady who was trying to force a baby stroller, full of baby, onto an escalator beside the sign that stated, unequivically, “Absolutely no strollers on the escalator!!!”. It’s like people’s minds go into reading in a foreign language because they obviously don’t understand the English before them. “Je ne comprend pas.” “No comprende.” “Me no speaka de English.” Now, I try very hard to be a patient line-stander. The reality of today’s society is that we stand in lines. We stand in lines at checkout stands. We stand in line for concert tickets. And we even purposely CHOOSE to stand in lines on Black Friday at 3:00 in the morning just to be first to make a dive for a Doggy Doo game where the child who gets three piles of dog poop on his shovel first, wins the game. I’m not sure if this teaches a child environmental responsibility or the best way to get worms, but it was certainly popular at Toys R Us. But I digress. I really do try to be a very patient line-stander. I use the time in line to pray for those people in front of me or for the checkout personnel. I browse over the titles of the magazines and make mental notes of Jennifer Aniston’s latest flame and what Vladimir Putin’s alien baby looks like. But on Christmas Eve afternoon, I’m ashamed to say, I kind of lost my patience – and I tapped my foot in frustration. I needed one, measly item that I had forgotten in all of my weeks and weeks of careful planning and lists (yeah, right). A run into Walmart gave me that item – and cheaply I might add – and I decided to go through the express ‘self-checkout’ line because it said “express”. Now, express to me means “faster” or “quicker” or at least “moderately speedier than nonexpress”. It means that the normal person would recognize the word and take it to dictate the necessity to have just a few items. Oh no. People on Christmas Eve can’t read. I think that they read the word “express” and think that it gives them permission to express themselves about every, single item of the 300 in their basket as they swipe them across the barcode reader. In the particular line in which I was standing, one such woman was at the stand with a buggy piled so high with purchases that she had to get a second buggy in which to place her finished bags because there was no room in the first buggy. There were 6 more people between me and her and these six people each had a maximum of 5 items. The first woman did not know how to use the scanner and contemplated each item, of her pile of approximately 400 things, to determine where in the world she was supposed to swipe for a price. She announced the price as there was final success and carefully moved to the next of her 600 items. The man in front of me held tightly to an ice scraper of which he must have been sorely in need because he tenaciously stood in this line with the optimism of Eeyore. He turned to me, rolled his eyes and said, “You would think that they would put ’10 Items or Less’ on the sign.” I thought to myself that if the word “Express” hadn’t been interpreted correctly, what made him think that this woman could count (with her basket heaping with 700 items)?! Out of the corner of my eye, I saw that the self-checkout to my left and in front of me was miraculously void of all but one customer. I hated to do it to the young man in front of me, but I made a beeline for that stand, careful not to knock him to the ground in my escape. I was also careful not to look smug at my stroke of luck. The woman, who was checking out at that moment, pulled out her card and pressed, “Finish and Pay”, right under the sign that stated, “Credit card, Debit card or Cash Only”. She ran the red card through the reader and promptly got a “Read Error” flashing light. She contemplated the card and tried again. Same response. She turned to her daughter and said, “I guess it wants me to pay the balance first and then use the gift card.” Gift card? The sign didn’t say anything about a gift card. But then, it didn’t say anything about a check either which didn’t stop her from writing one and trying to force it into the cash recepticle of the machine. The check was spit back out and a voice screeched, “Please wait for assistance!!” 15 minutes later, the store clerk, after working on the machine with no resolution, and continually reprimanding the customer for attempting to use a gift card on the machine, flatly stated, “Just go to my stand and I’ll have to check you out there.” She promptly wiped out the entire order and left the lane open for me and my one item. I quickly paid, turned to look at the line of people which had formed behind me and then, as I headed toward the exit, I noticed the young man with his ice scraper still standing in line behind the same lady with the two baskets who was evidently working on item number 800. I have a recipe for which my family stands in line. It is our traditional “New Year’s Day We Have To Have It To Watch Football Games” recipe. I always wind up making two batches – one before Christmas to give as gifts to neighbors and then one for munching. I have been making this for as long as I can remember and it is one of the recipes that you will find in my family cookbook at the shopping page. I really think that you will enjoy it if you like toffee popcorn and nuts crossed with Cracker Jacks. It is truly yummy. Oh, and my favorite popcorn to use in this is the Act II Butter Lovers brand. It takes 3 – 4 bags of popped corn to make a recipe. I pop it and then make sure to remove any unpopped kernels. This brand has no trans fats and quite a bit of the good fats. Candied Popcorn and Nuts Ingredients: 5 Quarts freshly popped corn 1 cup salted cocktail peanuts 1 cup butter (you have to use the real thing!) 2 cups packed light brown sugar 1/2 cup traditional pancake syrup like Karo 1/2 tsp baking soda 1/2 tsp vanilla 1/8 tsp butter flavoring (optional) Variation: Use pecans or roasted almonds instead of peanuts Preheat oven to 250º  In a very large bowl, place popcorn and nuts and toss  In a medium sauce pan, melt butter with brown sugar and syrup and bring to a boil. 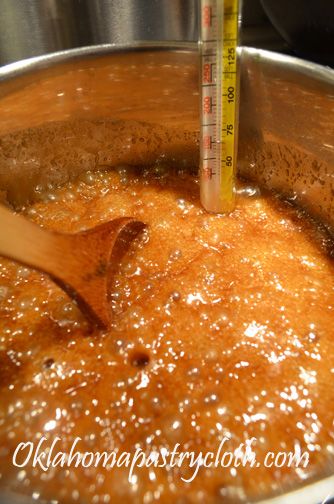 Boil until the mixture reaches the soft ball stage. You can check this with a candy thermometer or by dropping a little of the syrup into a bowl of ice and water. Feel to see if the syrup forms a soft ball in the cold water. 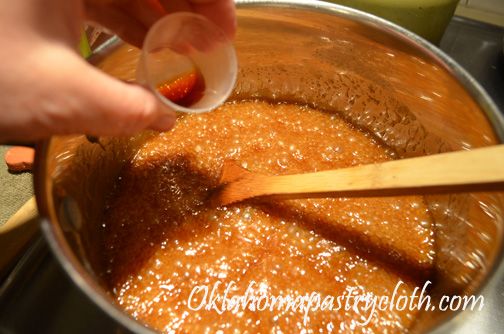 When the soft ball stage is reached, remove the syrup from heat and stir in vanilla  And add the soda, stirring quickly. The soda will make the mixture start to bubble and turn to a foamy light tan color  Pour the mixture over the popcorn and nuts and then begin turning and mixing the popcorn and peanuts to coat  When all of the popcorn and nuts are coated, spread the mixture onto a large, buttered cookie sheet and bake in 250º oven for about an hour, stirring and turning about every 15 minutes to keep it from burning. When done, remove from oven and quickly transfer the hot popcorn by spatula to an airtight container. The popcorn will be a little sticky, but it will come off of the cookie sheet easily. It gets harder to remove as the popcorn candy begins to harden. Once the toffee coating has hardened, shake the popcorn to break it into individual pieces.  This is all that is left of the batch that I just made. Oh wait. No. I’m sorry. I just ate it!!  |
|
| |
|
Oklahoma Pastry Cloth™ Company on Facebook
|
|
 |
|
|
|
Finger Food Never Looked So Pretty!
Friday, December 21st, 2012
 December 1st, my granddaughter turned 1 year old and she got a tea party deluxe. Her mom pinked everything up, made banners and lots of tasty finger food, with beautiful cupcakes filled with lemon curd. It was a lovely day with friends and relatives. My contribution was open-faced, cucumber sandwiches and I thought I’d share those with you today. You can substitute any of your favorite sandwich spreads for this recipe – tuna or chicken salad, ham salad, pimento cheese, etc. I just think these sandwiches are so fresh tasting. The secret to the prettiest sandwiches is the shape of your bread. You can make a large loaf of bread and cut shapes out with cookie cutters, or you can bake bread in bread tubes and come out with crusty shapes that are pretty and tasty. Or, you can purchase honey whole wheat bread and use cookie cutters on that. Here, I used my standard bread recipe and doubled the amount of honey in it. Also, I added a whole egg. I apologize for the lack of photos in this recipe. It is one of the many earliest posts that lost all photos and I am slowly restoring each post. I will get to the bread post eventually!! But the recipe and instructions are there. This bread recipe, after baked, can be frozen and that is what I will be doing with my tubes of bread to hold them for Christmas day. I will thaw them and slice them and then add different toppings for a lovely assortment of open-faced sandwiches. You can find bread tubes on Ebay.com or Amazon.com or Pamperedchef.com or in any kitchen shop. Of course, you can use mini loaf pans too. 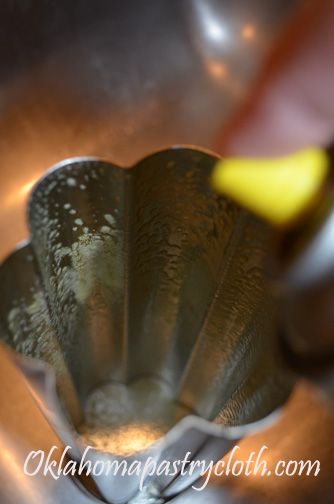 First, spray mini loaf pans or bread tubes, with one end cap attached, with spray olive oil, making sure that all areas are covered. 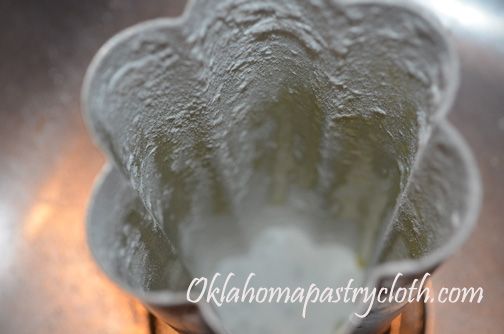 Flour the pans generously so that all surfaces are floured. 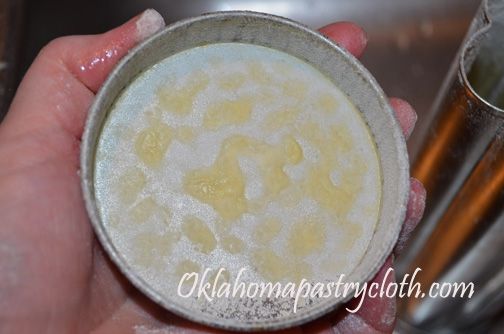 Oil and flour the other end cap to the bread tubes. 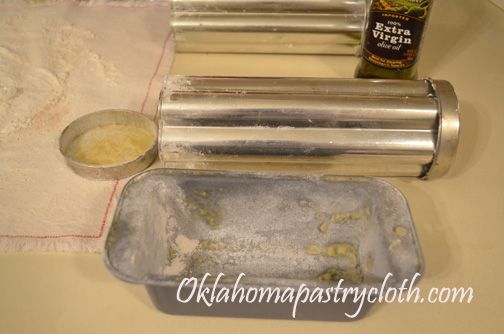 Here are two flower shaped bread tubes and a mini loaf pan prepared. 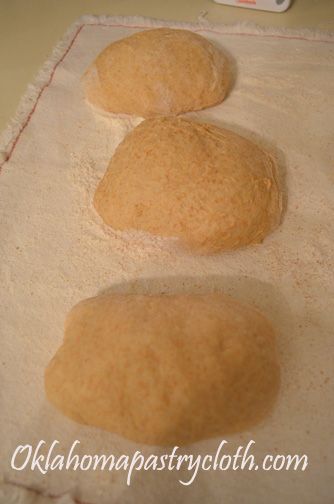 After making the bread dough, divide it into two or three sections, depending on the size of your pans. You may notice that the sections are on an Oklahoma Pastry Cloth™, except I got in a hurry and didn’t notice that I floured it upside down!! The pastry cloth will work on the right side or the wrong side. 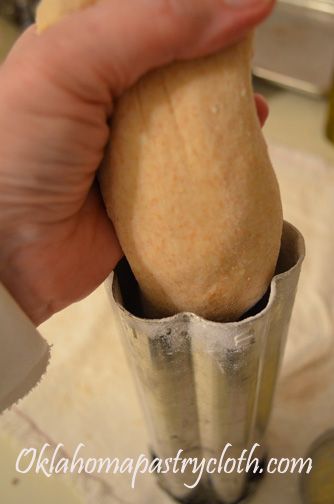 Roll the sections to fit inside of the tubes, or shape for loaves and place into pans 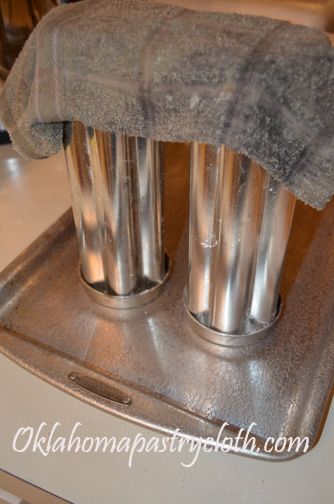 Place the bread tubes upright onto a baking sheet and cover with a warm, wet towel. Allow to rise in a warm place. I turn my oven on to 150º, let it heat up and then turn the oven off, placing the dough into the warmed oven.  When the dough rises nearly to the top of the tube, it is ready to bake. 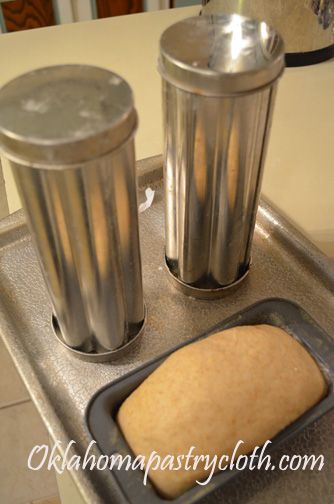 Preheat the oven to 350º and place the other end caps that have been oiled and floured, onto the bread tubes. Bake for twice the length of time normally used for a loaf of bread. The dough takes longer to bake in the bread tubes than in a standard loaf pan. In this case, I baked the bread in the mini loaf pans for 20 minutes and that in the tubes for 40 minutes. 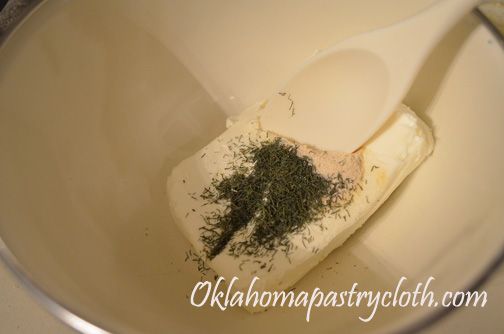 In the meantime, for cucumber sandwiches, you will need: Ingredients: 1 8 oz package softened creamed cheese 1/4 tsp garlic powder Salt to taste 1/2 tsp dried dill cucumber slices sliced olives for garnishing Place the first four of these ingredients into a mixing bowl.  Mix the cheese and spices until well-blended. You can use a wooden spoon or small hand mixer  When the bread comes out of the oven, allow it to cool until you can handle the metal bread tubes. Remove the end caps and using a butter knife, carefully loosen any edges of bread dough. Push the bread out of the tube and allow it to continue cooling on a rack. If making mini loaves, lift the loaves out of the pans. 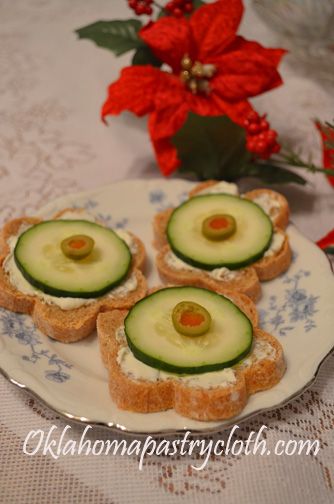 Using a serrated knife, slice the loaves of bread about 1/4″ thick and spread cream cheese mixture onto each slice. Place a slice of cucumber on top of the cheese and garnish with a slice of olive. Aren’t they pretty? And they taste good too!!  |
|
| |
|
Oklahoma Pastry Cloth™ Company on Facebook
|
|
 |
|
|
|
The “Toity” Without The “Hoity”!
Friday, December 14th, 2012
  Just 5 days to go!! Don’t forget to comment to enter this month’s giveaway for the treats pictured above. Just in time for Christmas: Shortbread cookie mix and a set of cookie cutters to make a cookie Christmas tree!! I told you in my last post that I would put up some “finger food” ideas for the holiday entertaining season and this is the next in that list. Hope you can use it!! A long time ago, an employer took me and friends to a restaurant in Knoxville, Tennessee. It was quite an experience for a younger person who didn’t have two pennies to rub together. There were no prices on the menu and so I have no idea how much the meal cost. However, I’ll bet that the bill would be considered astronomical even today! Appetizers were ordered first and I chowed down on the Crab Louis on crackers. I had never had caviar and made a pig of myself. As has always been my habit, I took mental notes of the tastes and the ingredients as the flavors slid over my taste buds. I have no clue what I had for dinner and dessert. I just remember the appetizers! And of course, when I went back to the real world of the lowly, young wife of a farmer, I experimented until I created that appetizer to use for my own entertainment occassions. It may seem like a bit of work, but the neat thing is that you can make the sauce days ahead of time and just keep it in the frig where the longer it sits, the more the flavors combine. You can cook the crab ahead of time or you can use frozen claw meat or lump crab meat. Assembling the treat just takes a matter of minutes so it’s all in the planning! You will impress your guests and they will think that you are really posh. Do we use that word anymore??? For a lighter version, you can use light mayonnaise and the low-fat half and half. And if you think that I spent a bunch of money on caviar, think again! Shhhhhhhh. It was on the top shelf at Walmart with the canned oysters, canned shrimp and canned tuna!! That means that anyone can serve the “Toity” without it being so “Hoity”!! Ingredients: Louis Sauce: 1/2 cup mayonnaise 2 Tbsp heavy cream (or half and half) 2 Tbsp Heinz Chili Sauce 1 tsp Worcestershire sauce 1/4 tsp shredded, fresh horseradish 2 Tbsp finely chopped green pepper 2 Tbsp finely chopped green onion 1 Tbsp freshly squeezed lemon juice Other Ingredients: 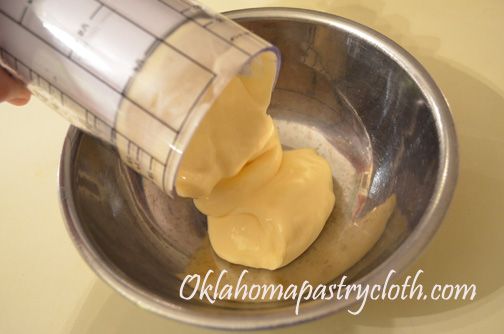 In a small mixing bowl, add mayonnaise 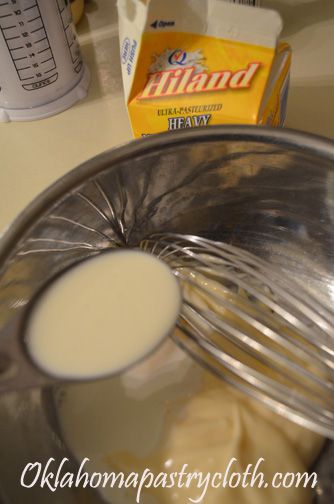 Add cream 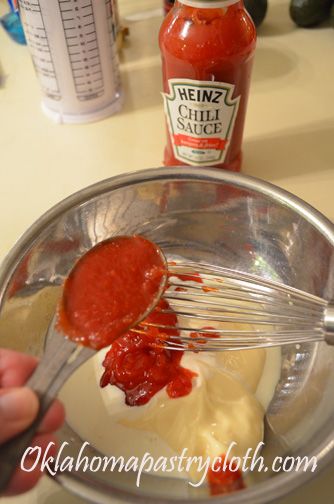 And chili sauce, worcestershire sauce and horseradish  Add chopped green pepper and green onions 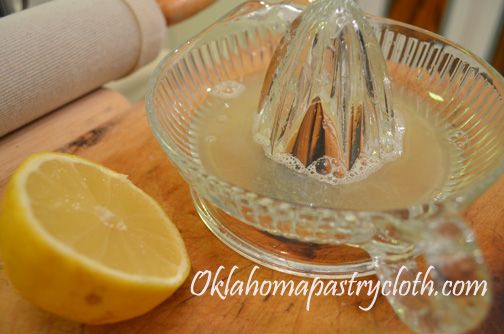 Pour in 1 Tbsp lemon juice  Mix all ingredients together until sauce is smooth. Place in the refrigerator to cool. May be made several days ahead of time. This sauce is very good as a substitute for tartar sauce with fried or baked fish or shrimp.  Steam enough crab to make one cup of meat when cracked. For a quicker preparation, frozen lump or claw meat is acceptable too. 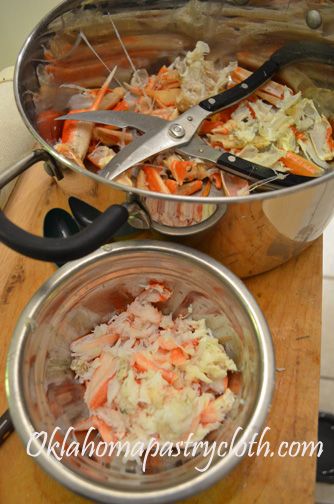 Shell the crab using kitchen shears and a nut pick. 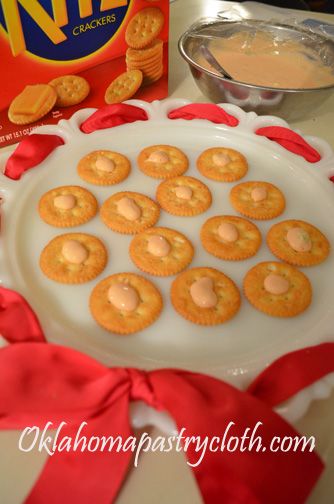 Place crackers on a plate and put a small dollop of sauce in the center of each cracker.  Toss one tablespoon melted butter with the crab  Put a mound of crab onto the cracker and into the sauce.  Place another small dollop of sauce on top of the mound of crab  Add a small mound of caviar onto the sauce.  And there you have it. Tasty appetizers!!  |
|
| |
|
Oklahoma Pastry Cloth™ Company on Facebook
|
|
 |
|
|
|
Virginia – Texas – Oklahoma – Whatever!
Monday, December 10th, 2012
  Don’t forget to comment to enter this month’s giveaway for the treats pictured above. Just in time for Christmas: Shortbread cookie mix and a set of cookie cutters to make a cookie Christmas tree!! Tis the season to be eating…or that’s the way it is around here. Between Thanksgiving and New Years Day, Americans consume more calories than any other time of the year, but based on all of the holiday pastry baking going on all over the rest of the world, I’m thinkin’ we aren’t alone!! Office parties, neighborhood get-togethers, church luncheons and private bashes make up the months of November through January 1st, and finger foods and hors d’oeuvres occupy every hostess’ or host’s brain. Of course, these days, the fat content and calories are considered as well – maybe! I thought that for the next few posts, I would give you some of our favorite goodies that can be prepared either lower calorie or the good ol’ Southern way. I’ve been making most of these recipes for years of entertaining and they are easy and delicious. This first one was given to me by my friend, Mary, wayyyyy back in the late 1970’s. Having grown up in Virginia, Mary was proud of her state and her heritage and treated me to this concoction called Virginia Hot Dip. I loved it and immediately got her recipe. That IS the official name – however, if you are from Tennessee, you can call it Tennessee Hot Dip or from Michigan – it can be Michigan Hot Dip. I think that we should just label it as the 50 state treat that it is!! So here is the recipe. It takes all of maybe 15 minutes to prepare and then 20 minutes to bake. It can be made ahead of time and kept in the refrigerator until just before time for serving, at which time it is baked and then served hot. Ingredients: (This recipe can be doubled, tripled, quadrupled and any other ‘uple’ you wish according to your crowd size) 1/2 cup chopped pecans (I use a little more) 1 Tbsp. butter (for low fat use 1 tsp) 1 8oz package cream cheese, softened (fat-free or Neufchatel is fine for lower calorie and fat) 1/2 cup sour cream (light sour cream works well too) 2 Tablespoons milk (skim or 2% for lower calorie) 1 Tablespoon minced onion 1 1/2 (2 oz) package Carl Buddig original sliced beef or any other dried beef brand 1/2 tsp garlic salt Directions: 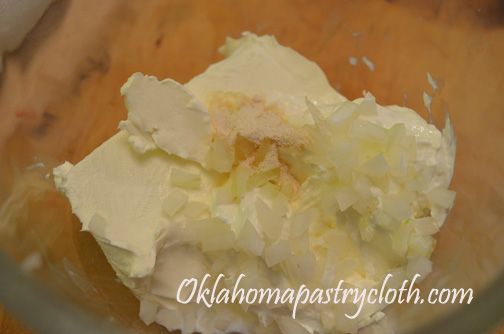 Place cream cheese, sour cream, onions, milk and garlic salt into a mixing bowl. 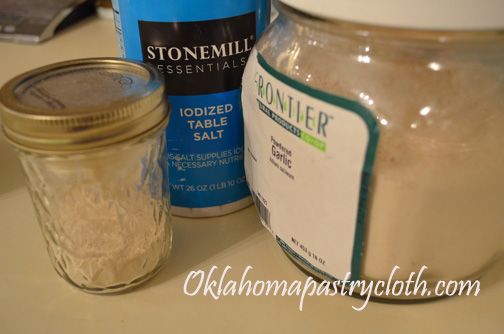 You can make your own garlic salt by adding 2 Tablespoons of salt and 1 Tablespoon of garlic powder into a small jar and shaking to mix. These amounts can be increased proportionally for larger batches. 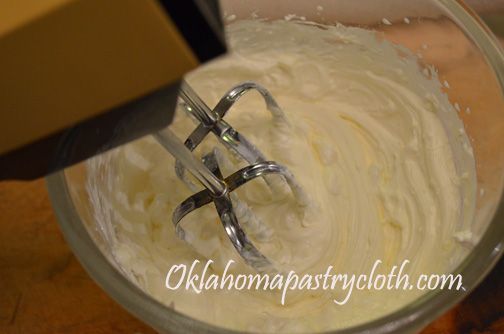 Cream ingredients until smooth 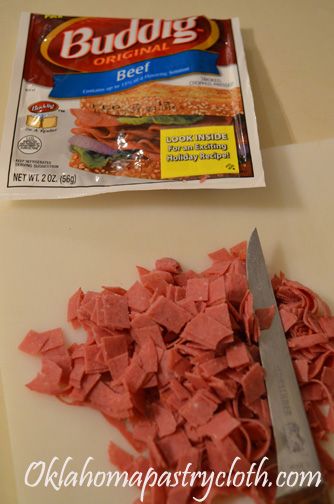 Slice and chop beef into small pieces 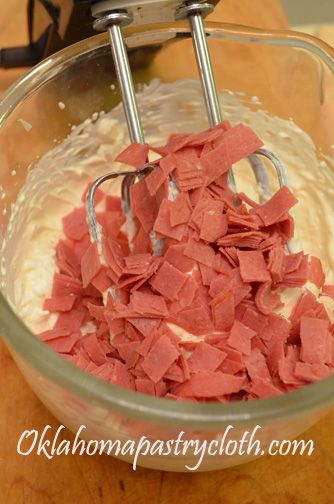 Add beef to the creamed mixer and mix well  Spoon mixture into a greased casserole dish. I use spray on olive oil to grease my dish. 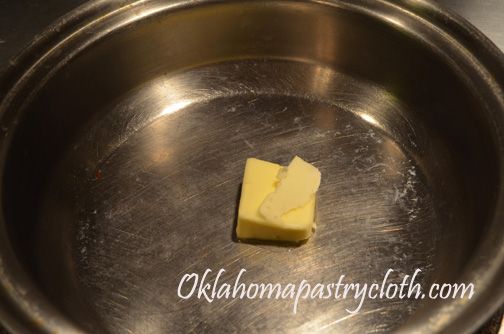 Melt butter in a skillet 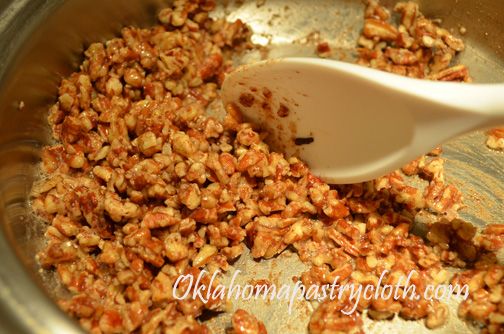 Add chopped pecans and lightly saute in the butter. 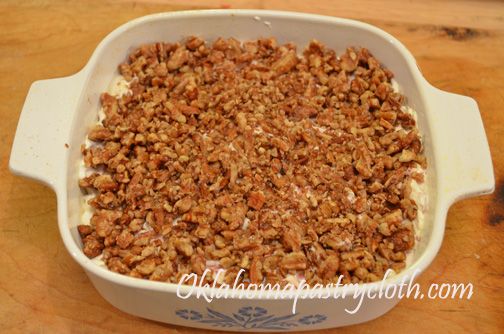 Sprinkle pecans evenly over the surface of the creamed mixture. At this point, the mixture can be chilled until it is ready to use. Just before time to serve, bake at 350º for 20 minutes and allow to cool just slightly before serving with crackers. 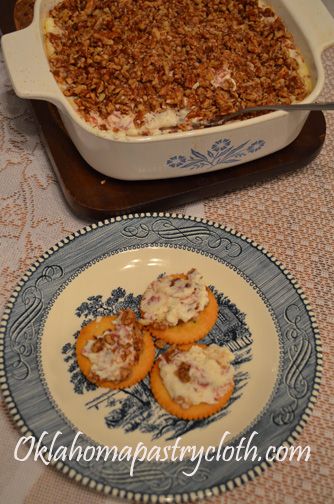 Yummy!!  |
|
| |
|
Oklahoma Pastry Cloth™ Company on Facebook
|
|
 |
|
|
|
A New Meaning To Pot Pie
Tuesday, November 20th, 2012
 I know. I know. Where have I been? Did I fall off of the earth? Did I get swallowed by a giant batch of soap? Did I get discovered by Food Network? (I wish!) While none of these scenarios is probable, the fact is that I had a variety of much less exciting happenstances occur at once. First, as I left you last time, I had a house full of teenage young men who stayed with us for 7 nights as they campaigned for our state representative. It was rather hectic here. But on top of that, my eye disease decided to rear its ugly head and I was having a hard time reading or typing for very long. It’s just no fun when you see two of everything!! And then – more company and more cooking. And then – two canning classes and a case of hives and more double vision. All in all, with excuses aside, it all boiled down to one main culprit: Writer’s block!!!! Yep. My brain has been fried. I have not had one single thing to write about. I’d start, but the words wouldn’t come and when they did, there were two of each. Soooo, I gave up. I have now chilled, rested and used not just a few ice packs and I am back in business. And speaking of business, we had a winner for our Fall Giveaway, reader and FaceBook fan, Sue Feely won two packages of our Frontier Fixin’s bread mix. Next week, right after Thanksgiving, a new giveaway will be introduced just in time for Christmas! So be watching. With this being Thanksgiving week, a time for family, memories, gratitude and turkey, I thought that I would give you a way that I like to use my leftover turkey that is pretty tasty. The recipe originated from a cookbook that I’ve had for years and is evidently no longer in print, titled “Favorite Brandname Cookbook”. I tweaked the recipe for leftover turkey but use chicken as well and home canned chicken or turkey is really great in it. If you want to can your turkey after Thanksgiving and then use it later, this is a good way to use that, but straight off the bone is fine too. I like white meat in my recipes but both white and dark work well too. It’s all a matter of preference. In this tutorial, I am using chicken, but will be making it with turkey on Friday!! And just as a note, I use dehydrated celery, mushrooms and onions and they work great. Ingredients: 1 cup sliced carrots 3/4 cup chopped onion 1/2 cup diced celery 1/2 cup chicken or turkey broth 1 can cream of chicken soup 1 pkg turkey gravy mix (if using turkey for the meat) mixed with 1 cup cold water 1 cup sour cream 3 cups cubed or shredded chicken or turkey 1/2 cup sliced mushrooms 1 teaspoon worcestershire sauce 1 teaspoon salt 1/8 teaspoon pepper Topping: 1 cup flour 2 teaspoons baking powder 1/2 teaspoon salt 2 eggs beaten 1/2 cup milk 1 Tbsp. chopped green pepper 1 Tbsp. chopped pimento 1 1/4 cups shredded cheddar cheese (sharp is good) 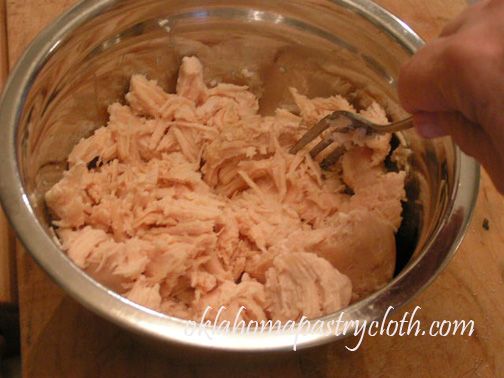 In a bowl, place the meat, either shredded or cubed. If using canned meat, it will shred. 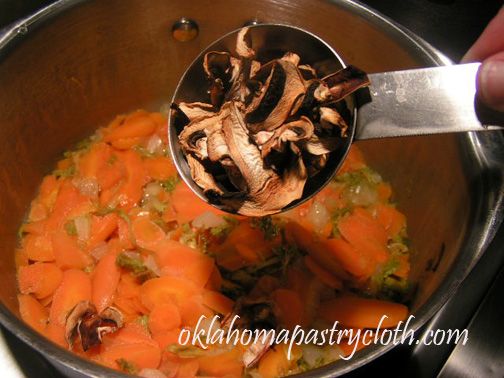 Place veggies, minus the peppers and pimentos, into a saucepan with 1/4 cup chicken broth, cover and simmer for 20 minutes. Add a little water if needed to keep from cooking dry. 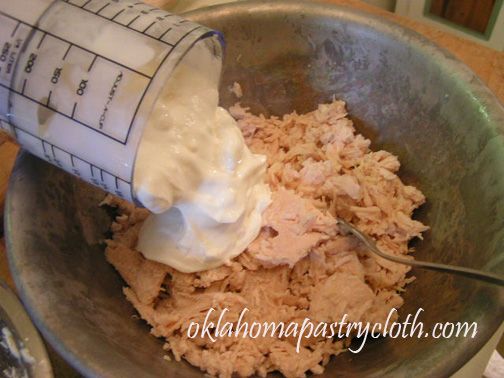 Add sour cream to the meat 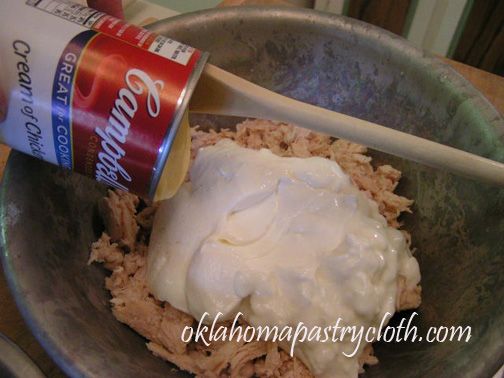 Add cream of chicken soup and turkey gravy mixed with 1 cup water to the meat and sour cream 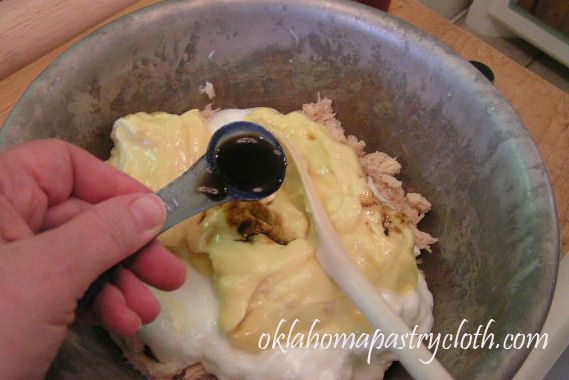 Add Worcestershire sauce, salt and pepper  Add vegetables  Add remaining 1/4 cup chicken broth and mix all ingredients well  Pour the meat mixture into a casserole dish. I am using a Pampered Chef stoneware deep dish baker here. Set dish aside. 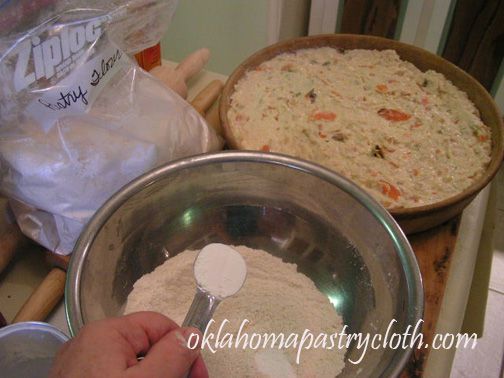 In a bowl, add flour, salt and baking powder and stir.  In a separate bowl, lightly beat eggs and milk together  Add cheese and peppers to the flour mixture and toss until the cheese is totally incorporated with the flour 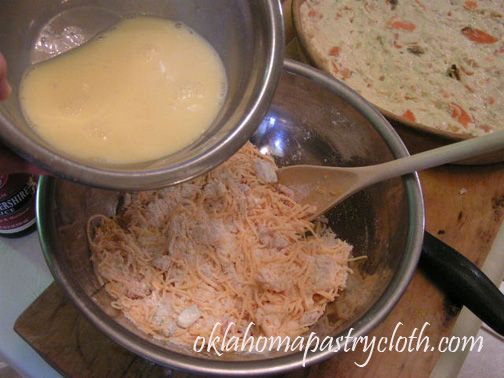 Pour egg mixture in with the flour mixture and stir well  By spoonfuls, place the batter mixture in a ring around the outside top of the meat mixture in the casserole dish. Bake for 40 – 45 minutes at 350º until golden brown.  It’s pretty and it’s good! Serve hot with a salad and you have a meal!  |
|
| |
|
Oklahoma Pastry Cloth™ Company on Facebook
|
|
 |
|
|
|
Supreme Pizza Soup
Wednesday, October 31st, 2012
 Don’t forget that today is the last day you can comment to enter our Fall Giveaway for the bread mixes!! Drawing is tomorrow!! I did a small show on Friday night in Edmond, OK and debuted the soaps. I was very pleased at the response and of course, the Oklahoma Pastry Cloth™ was a hit. It was a fun time. Last night, I had to cook for 25 young people, and considering that over half of them were young men, I figured that was the equivalent of 40 mouths. Guys eat – alot – I know that well. And what better food to fill 40 mouths on a cool night than soup? But not just any soup. This had to be a soup that would please the taste buds of the potato chip munching, coke guzzling, pizza party crowd. I found a recipe online that looked interesting, but when I made it, I was left kinda blah. Just not much taste. It was pretty, but that was the most I could say for it. So, in my usual “Let’s just dump the frig into the pot and call it supper”, I took the recipe and made it my own. 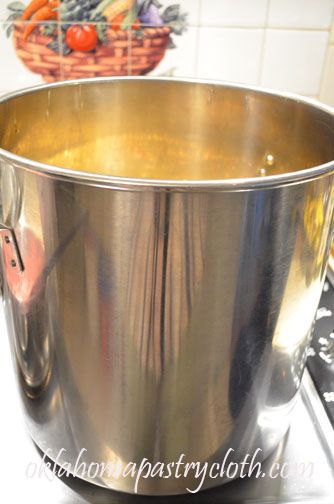 By the time I was finished, I had pizza in a pot – and I might say a really, really, really big pot. I made close to 20 quarts. I figured THAT should hold them!! So here is the result of my craziness. I have broken it down into a more reasonable amount for you that makes enough for about 8 people. Oh, and just a side note, I used my dehydrated veggies instead of fresh. They worked great. Supreme Pizza Soup Ingredients: 3/4 lb Johnsonville Sweet Italian sausage (can use the turkery or chicken sausage too) 1/2 – 1 lb ground beef 1/2 teaspoon fennel seed 1/8 teaspoon pepper 1/2 teaspoon salt 1 medium green pepper chopped 1 small onion chopped 2 tbsp. minced garlic 8 cups chicken broth 28 oz Red Gold diced tomatoes with garlic and olive oil (other brands are fine too) 1 tbsp sugar 1 1/2 tablespoons Worchestershire sauce 1 teaspoon dried basil 1 teaspoon dried thyme 1 teaspoon dried oregano 1 can Hunts 4 cheese Spaghetti Sauce 2 1/2 cups large macaroni, farfalle or your favorite pasta Parmesan Cheese Note: You can thicken this soup with cornstarch and cold water if you prefer a thicker soup. Make it first and then determine if you want it thicker. Add cornstarch mixed with cold water into boiling soup, stirring constantly to thicken.  I actually started the day before because I was going to be making so much, but you don’t have to do that. I browned the Italian sausages on both sides in a large skillet and then placed them on a baking sheet to bake at 350º for about 20 minutes. They were taken out of the oven, cooled and then put into a plastic bag in the frig to cool all the way down. This makes them easier to slice. All of the sausages were sliced realatively thinly and put into a bowl and set aside. 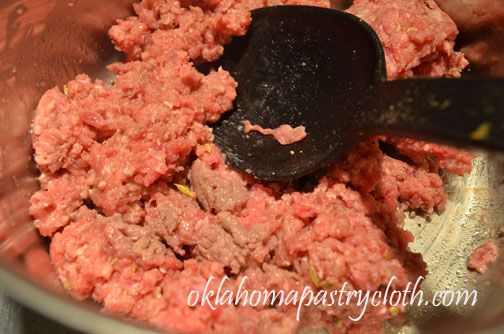 Brown the hamburger, mixing in salt and pepper and fennel seed before browning.  In a stock pot, add all ingredients except for the Italian sausage. All of the herbs here were grown in our garden and dried and are so pretty in the soup! Simmer on medium heat for two hours. Bring to a low boil and add sausage and pasta. Cook until pasta is tender, stirring occassionally to keep pasta from sticking to the bottom.  Serve with parmesan cheese sprinkled on top of the soup. Add some Italian bread and you have a meal!!  |
|
| |
|
Oklahoma Pastry Cloth™ Company on Facebook
|
|
 |
|
|
|

 Homestead Revival
 Paratus Familia
 Rural Revolution