  I grew up appreciating a good meal. And I don’t mean a peanut butter and jelly sandwich with potato chips. I mean a filet mignon at La Vendon in Quebec or an authentic meal of Sukiyaki (pronounce Ski-yah-kee) prepared by one of the international students who stayed with us from time-to-time. While others my age were buying Villager clothes (remember those?), sporting around in new Corvettes and swooning over the latest Beatles album, I was being dragged all over the country in, first, a 1959 Nash Rambler station wagon, then a ’66 blue Plymouth station wagon (with a third seat that faced backwards! THAT was safe in a rear end collision) and then a ’71 Plymouth Satellite wagon, all of which could house two adults and four girls, plus suitcases, make-up cases, games, food, drinks, pillows, a grill and maps in relative comfort if we all pretended hard enough, all the while trying new foods like we were searching for gold treasure. In high school, while friends showed off their new Bass Weejun loafers, I, in my Buster Browns, wanted to yell, “Yeah? Well, WE just got a crate of live lobsters in from Maine and they are still waving their claws!” It was all about priorities: Appearance or stomach – decisions, decisions. And so, I have had a love affair with food that has been passed down from generation to generation (just look at my family cookbook at the website) and which has made it very difficult, as I grow older, to face the fact that ‘food’ and ‘older’ don’t necessarily mesh well. Having a thyroid condition hasn’t helped matters, either, and never mind that aerobics or walking is out of the question at this stage of two broken feet!! All of a sudden, I’ve had to start paying attention to Dr. Oz’s latest diet or researching the Paleo diet, the Fungus Connection, and the South Beach diet, Weight Watchers and, my favorite, Sparkpeople.com, in order to look forward to my twilight years as something slightly smaller than a Beluga Whale. In my research, I have discovered that a Boca Burger has nothing to do with a tasty treat at the sunny beaches of Boca Raton, Florida (can we say, “Ick?”) and that a low-fat, protein shake, no matter how masked by strawberry or chocolate flavoring, is still disgustingly similar to a barium cocktail at your local gastroenterologist. While I love a salad, a perpetual menu of spinach, kale, lettuce and tomatoes renders me boringly unable to carry on a conversation about world affairs because I’m too busy visualizing a sirloin steak with mushroom gravy and mashed potatoes. I have portion control down to a science – digital scale and all. I’m so efficient that if we eat out, I can divide my meal into halves or thirds or fourths and know exactly how many calories I’m NOT getting to enjoy. But with all of my careful calorie counting, organic and all-natural food purchasing, fat/carbohydrate/protein calculating and the purposeful attempt to drown myself in gallons of filtered water (I swear that when I walk, I sound like the tide rolling in at Boca Raton, Florida) I haven’t been able to lose a single pound. In fact, I’ve gained a few more. And I have a bigger problem. I like to snack. Life is not fair. Four weeks ago, my endocrinologist made a suggestion to try something called the 5/2 Fast. She told me to research it and that she thought it might jump-start my metabolism. I started it three weeks ago and I have to admit that I am feeling really good. AND I have lost three pounds. The kicker is that I’m not having to focus so much on my daily menu. That is really, really, really nice. On Sunday, Monday, Wednesday, Friday and Saturday, I eat normal meals of 1250 to 1500 calories per day (totally lenient span there) and then on Tuesday and Thursday I do a semi-fast of 500 calories per day. That really isn’t as hard as you would think. On those two days, for breakfast, I have one egg, one piece of bacon and a half a piece of toast. For lunch I have an apple or orange and for dinner I have 3 oz of baked or grilled chicken, all of the steamed veggies I want and a small potato or 1/4 cup of mashed potatoes or 1/4 cup of rice. Knowing that I get to have normal food the next day, makes my ‘days of want’ easy to get through! My head feels clearer, although Mr. Fix-It may tell you THAT’S all in my imagination, and my insides feel better too. Really. As I said, I like to snack and so on my days of ‘fasting’ I’ve come up with a ‘snack’ that I can tolerate. I like crunchy stuff but popcorn, Cheetos and Cracker Jacks just don’t qualify as diet friendly foods. So, I’ve started cutting up celery, cauliflower, broccoli, carrots and any other veggie I have on hand and mix those pieces together in a closeable refrigerator dish. 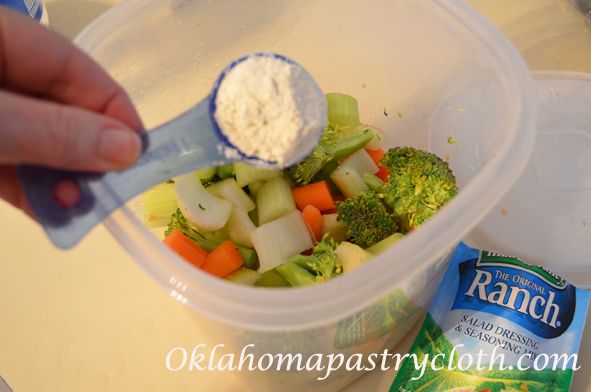 Then, I add 1 tsp to 1 tbsp. of a dry dressing mix, like Hidden Valley Ranch, and toss it in with the veggies. I taste to see how much I want. Just a little is needed because as the mixture sits, it absorbs the flavor. 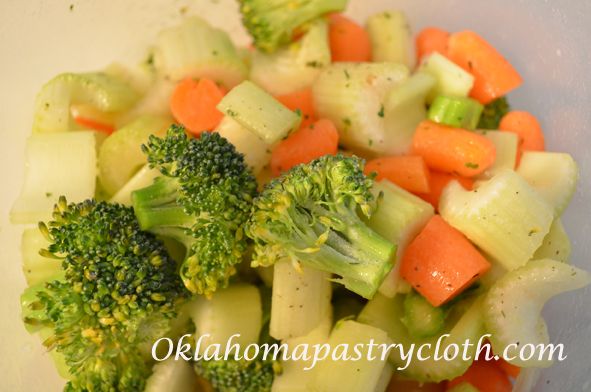  I keep this “Veggie Popcorn” (alright, I realize that popcorn IS a vegetable, but, heh) in the frig and when I get the ‘munchies’, I put some into a bowl or bag and carry it around with me. As great as I was at pretending that I was comfortable, all those years ago and packed into a car like a sardine, I’m still pretty good at pretending I’m snacking too!! I’ll keep you posted on how the 5/2 diet is working. Hopefully, by next time, I’ll be on the cover of Vogue in a svelt Villager dress and Bass Weejun loafers.  |
|
| |
|
Oklahoma Pastry Cloth™ Company on Facebook
|
|
 |
|

|
Archive for the ‘Let’s Cook!’ Category
 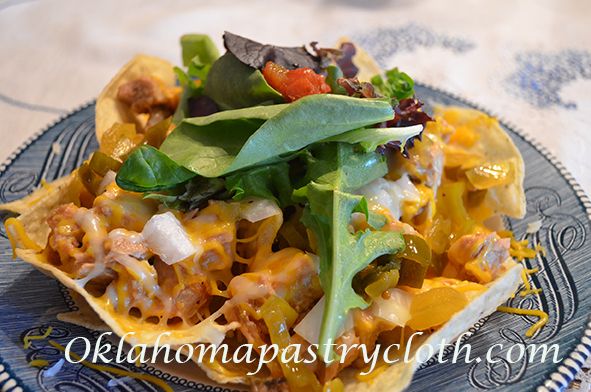  These last several months in boots, on crutches and a cane (I’m still dependent on those last two lovely pieces of equipment, much to my chagrin) have given me a deeper insight into a truth that I think we already know but don’t consider very often: While it is true that “if Mama ain’t happy, nobody’s happy,” it is much more true that “To him whose feet hurt, everything hurts.” (That’s ol’ Socrates, by the way). Have you ever noticed that when your feet hurt, your back hurts too, along with your knees, your neck and worst of all, your mood? You may be able to get through a day and sort of get things done, but when your feet hurt, you do not do your best job. With sore feet, the bulk of your intelligent thought tends to center around what you can do to alleviate the pain and get off of your feet. You can’t concentrate on what you are supposed to be doing and your responsibilities have a way of flying out of the window in favor of soothing those throbbing tootsies. Such is my life at this moment, and while I have thrown myself into the research of new and wonderful all-natural and holistic methods to attack pain and broken limbs so that I can be a know-it-all at the doctor’s office to all of the patients unfortunate enough to be sitting in my general vicinity, – “You DO know that frankincense essential oil could help relax that tight muscle, right?” – the fact is, short of giving up all semblance of reality to the likes of morphine, hurt feet hurt. It has been with this earth-shattering revelation that I have also discovered a coinciding truth: If the foundation isn’t strong, while what is built upon it may work, it will not work well or as it was intended to work. This applies to businesses, to governments and to individuals. There must be a strong foundational basis for existence or any of those entities will function in less than an optimum manner. And what is that foundation? It is God. Any entity, whether public or private or individual never functions well without a Godly foundation. They may exist and they may function, but they will never enjoy the full potential or optimum purpose for which they were intended. Many will argue with me and swear that they are doing just fine and dandy without any focus on God, but if brutal honesty came into play, there would be an admission of struggle, dissatisfaction, pain and uncertainty. I know. I’ve been there and I’ve done that. Making God the foundation simply requires the acceptance of His power and authority over all things. Human beings will always fall short of living out a perfect/Godly life, but the first step has to come in the admission that only God is in control – not man – and that He is the authority over the individual, the family, the city, the state and the nation. Without that foundation, nothing works as it should. There is only the constant focus on the pain that ensues and a desperate attempt to alleviate it. And so, on a serious note, I recognize my need to release everything to God’s authority (including my aching lower extremities) and I ask all of those in my nation to do the same, as One Nation Under God. Until we do that, nothing will work as it was intended to work. And speaking of foundations, I have an idea here for the foundation on which to use that leftover pork from the last recipe. Starting with a base of tortilla chips, you can build a meal that IS everything it is intended to be! Ingredients:
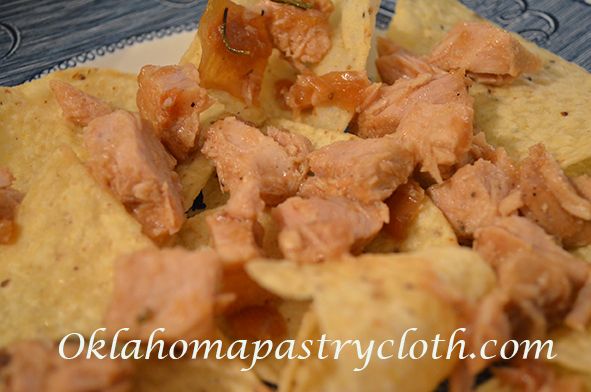 Chop pork into small 1/2″ pieces or pull into shreds. Toss with barbecue sauce until the sauce is totally incorporated. Arrange tortilla chips onto a plate and top with pork.  Sprinkle with fresh, chopped sweet onions and the two cheeses. Microwave until the cheeses are nicely melted over the meat and chips – just about 20 to 30 seconds.  Add pickled jalopeno peppers and then top with lettuces, a dollop of sour cream and a spoonful of taco sauce. Enjoy!   |
|
| |
|
Oklahoma Pastry Cloth™ Company on Facebook
|
|
 |
|

|
Walk – Don’t Run
Saturday, February 8th, 2014
 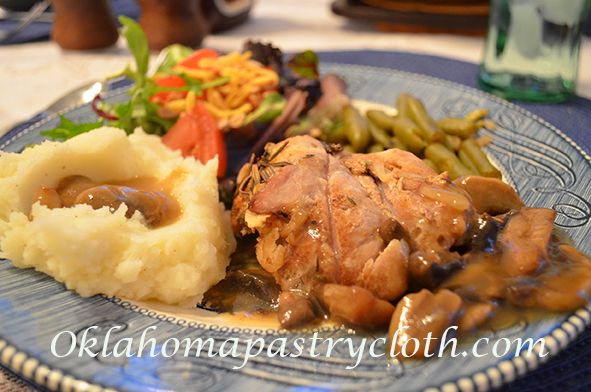  I know. I haven’t written anything since November. It was at that time that I had an “accident” of sorts, the details of which I am not at liberty to go into at this time but suffice it to say that I wound up with two broken feet, a broken ankle, two torn knees and a brain really not functioning all that well. Oh wait, that brain part was going on before the accident. Never mind. Mr. Fix-It, around the same time, had to have pretty major surgery and so, the two of us were quite a pair trying to care for each other – he couldn’t lift anything larger than a piece of toast and I couldn’t walk. It was the stuff that Lifetime Movies are made of; really bad background music and all. Creating Concepts, Enterprises managed to continue with the busy Christmas season of orders, still shipped on time and closed out 2013 with a sigh of relief (and a shuffle on my part). For two months, I rarely showed my face to the general public unless it was for a doctor’s appointment or MRI when Mr. Fix-It could drive me. I don’t live in a cabin, but I can pretty well say that I have a good clue what that kind of ‘fever’ entails!! Today, however, I am back in shoes – sort of – and am slowly getting around flat-footed and, when I first get up in the morning, doing a pretty good imitation of Quasimoto. It has been an interesting ordeal with quite a bit of pain and a greater number of jokes. You have to laugh about stuff like this. That’s the only way to deal with it sanely! God has shown me some interesting stuff during this time where life has been forced to a crawl – no pun intended. I have learned that in these times, when nothing is normal, we can hear God quite audibly because all of “life” isn’t getting in the way. It’s that “Be still and know that I AM God” kind of thing. I have been able to take time to really read and pray and I must say that my joy is even more abundant while I feel that the teaching from the Lord has increased daily. As a friend so aptly put it, God has given me “a season of quiet.” And if you know me well, ‘quiet’ does not fit into my nature very easily! I feel very blessed. I got the good news that I do not have osteoporosis – yay – and that I broke my bones because the human body and a concrete floor do not work well in a spirit of cooperation (you know, kinda like Congress. I’m waiting on a few broken bones there too!). Mr. Fix-It is all better and back to normal and the blessing of working with customers continues. So, on that note, I think it’s time for a recipe good for these cold days (is Winter EVER going away???). A yummy pork loin roast is just the ticket. Quick, easy and tasty. This serves 4 people so you can do a larger roast for more. Ingredients: 2 1/2 lb boneless pork loin roast brought to room temperature meat tenderizer (optional) cotton twine 2 tbsp. onion soup mix 1/2 tsp garlic powder 1/2 tsp thyme 1/2 tsp paprika 1 tsp rosemary leaves (fresh or dried) aluminum foil pkg chicken gravy mix 1 cup sliced fresh mushrooms 1 tbsp. butter Directions: 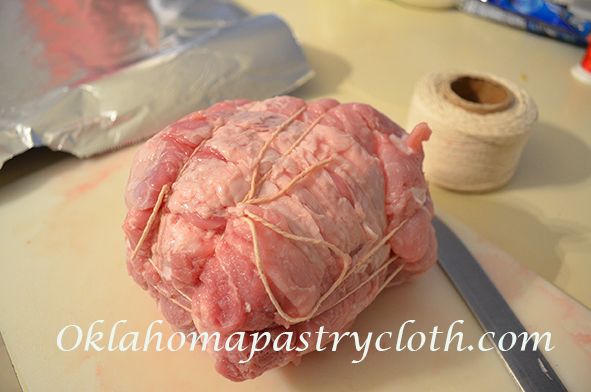 On a cutting board, slice the roast into 1″ slices, keeping them together in the original shape of the roast. You can sprinkle between the slices with meat tenderizer. This step is optional depending on if you like to use tenderizer or not. With cotton butcher’s twine, tie the roast back together. Place the roast onto the dull side of a square of aluminum foil. 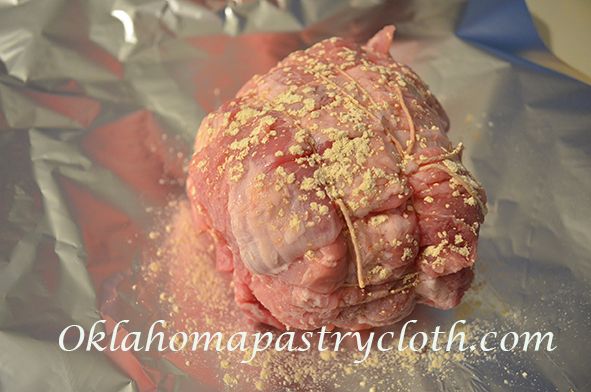 Sprinkle the outside of the roast with garlic powder 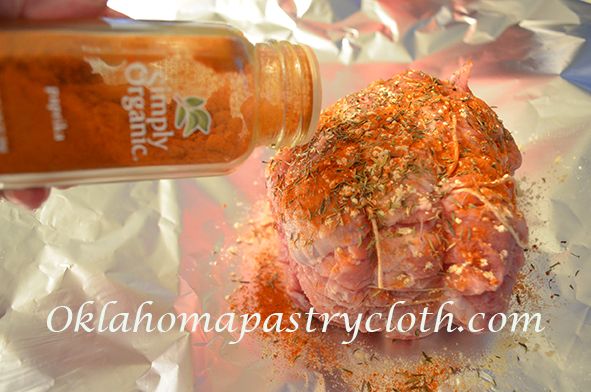 Add paprika 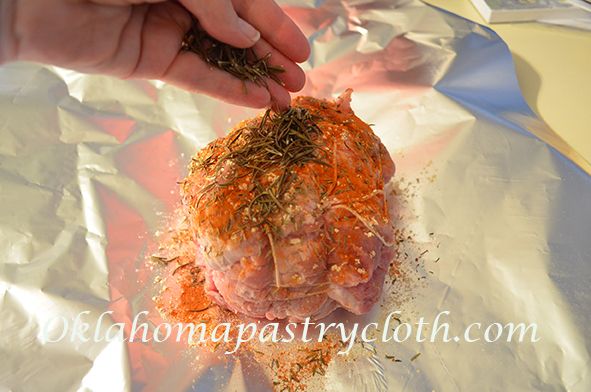 Sprinkle the top with thyme and rosemary 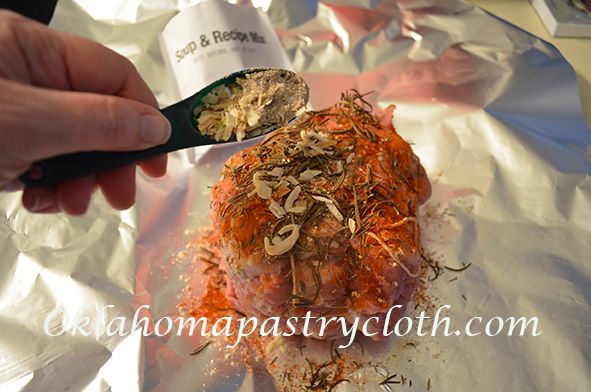 And finally top with the onion soup mix. 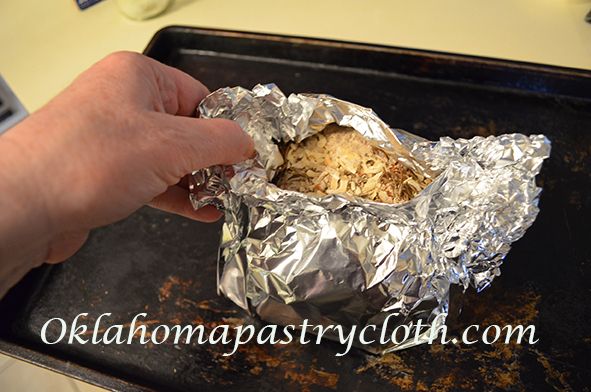 Pull the foil up around the roast and curl the edges over to leave the very top portion of the roast exposed. Place into a baking dish or sided pan and into a 325º oven for 1 1/2 to 2 hours or 30 – 45 minutes per pound. 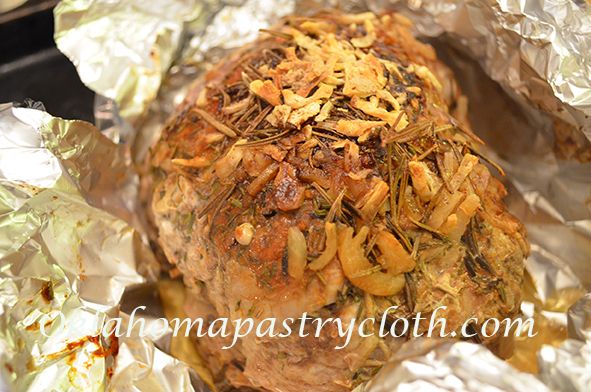 When roast is done, remove 1/2 cup of the drippings and set aside. Mix chicken gravy with one cup of water, as per directions, and set aside. 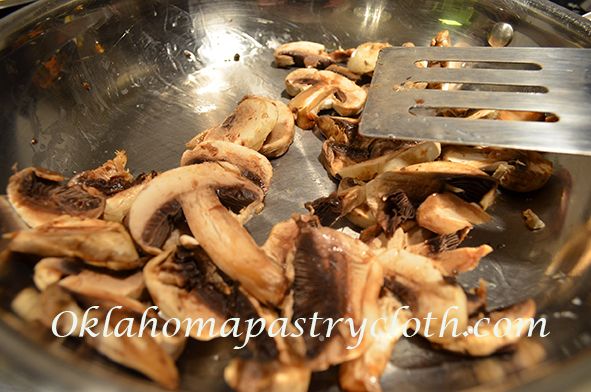 In a shallow skillet, melt butter and sauté mushroom slices until soft.  Add roast drippings and stir. Add chicken gravy mixture and stir continually until thickens slightly. Continue to simmer until gravy is the consistency of thin gravy. 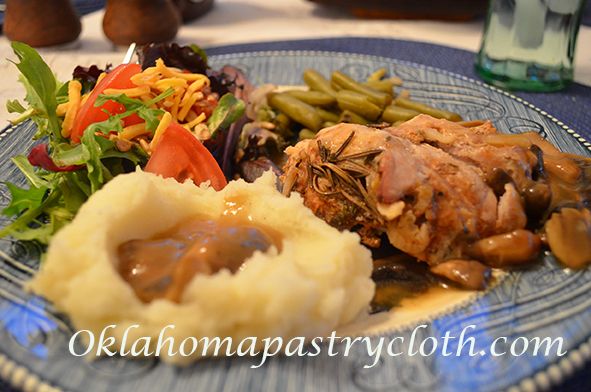  Cut strings on the roast and your slices are already made! Serve with mushroom gravy which can also be used on a side of mashed potatoes! Leftovers can be used for pork bbq sandwiches or pork nachos. Dig in!!  |
|
| |
|
Oklahoma Pastry Cloth™ Company on Facebook
|
|
 |
|

|
Waxing Commercial Cheese
Thursday, October 10th, 2013
   You know I can’t resist a sale, And so begins this shopping tale. I found a bargain sure to please, A dollar for a block of cheese! I purchased 12 and paid my dough. I’ve showed you how your cheese may can, I followed directions to a ‘T’ And so you see (you’ve got to get it!) No groans from the peanut gallery out there!! I can’t resist a little verse…a very little verse! I thought that I would show you, step-by-step how to preserve cheese that you find on sale. Mine has been sitting at room temperature for four months now and we are using it regularly. Mr. Fix-It likes this cheese on crackers and sandwiches because as it sits, it ages. Now it tastes like expensive, aged, sharp cheese. But first, I’d like to remind you about the giveaway going on. 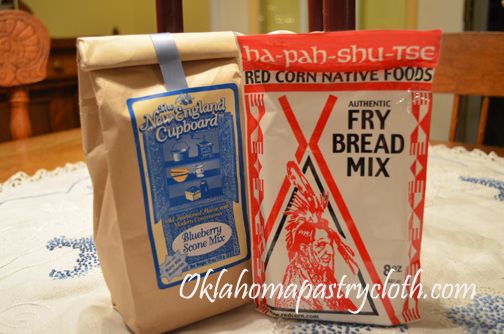 Just be sure to leave a comment below in the comment section and you’ll be entered to win our fry bread mix and a package of our blueberry scones (complete with a can of real, Maine wild blueberries). The drawing will be October 18th. 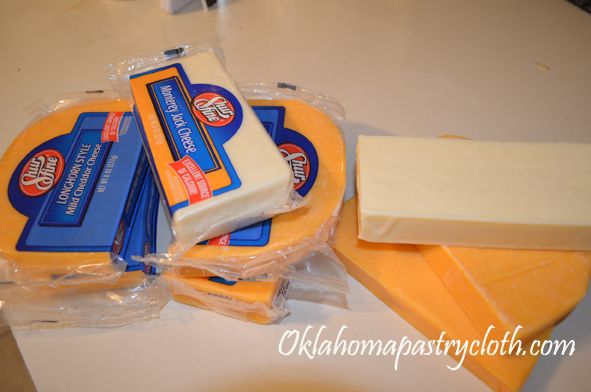  OK. Back to cheese. Any brand of cheese will work, but I happened to find the REALLY cheap kind. I grabbed mild cheddar, provolone and longhorn. All are relatively mind flavored cheeses so that when they age, they don’t become too sharp. 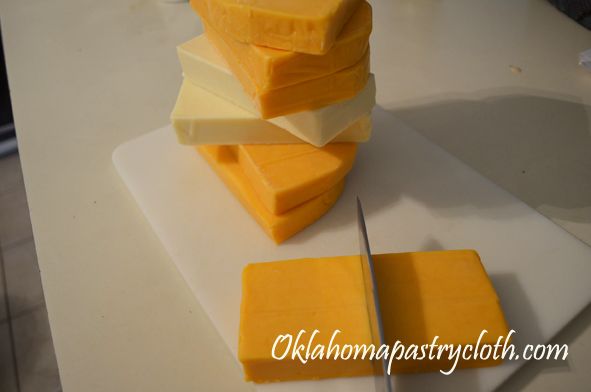 I cut the blocks in half to make 4 oz blocks for easier waxing. 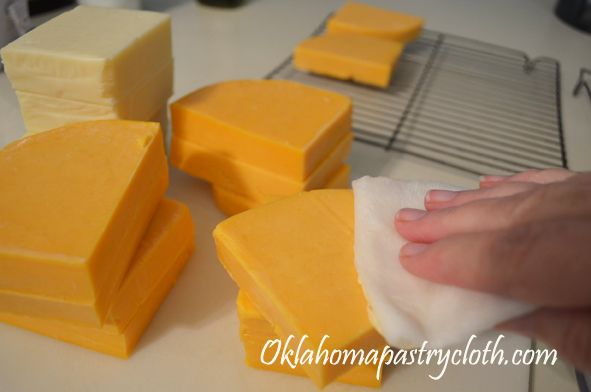 Carefully wipe each block with white vinegar to clean. If you do not have vinegar, you can use a brine mixture of 1 tsp salt to 1 cup of water. 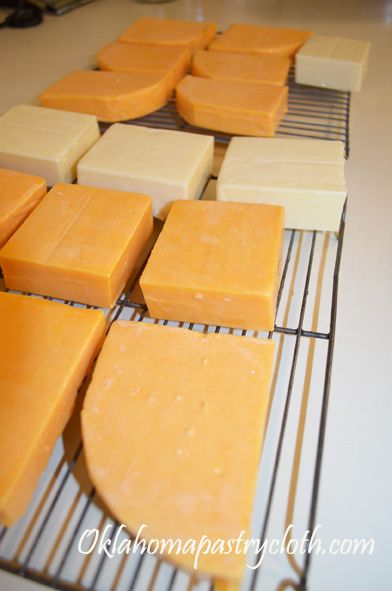 Place the cheese blocks onto cookie sheets, wax paper or paper towels and allow to dry for 48 hours. You can turn the cheese if it is not on racks. I am using metal cookie racks here, but I think that plastic racks would be better. The metal can rust or oxidize and leave lines on the cheese. I am purchasing some plastic racks for future use. 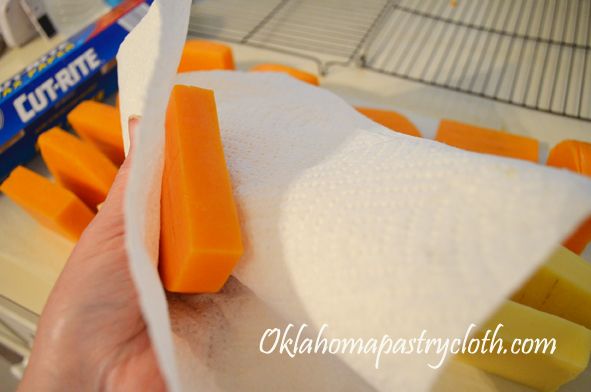 After the cheese has dried, using paper towels or cheese cloth, wipe excess oil off of each block. 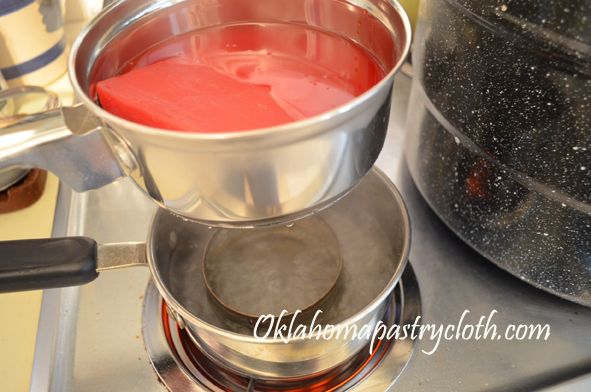 I melted the wax in a double boiler. You can purchase cheese wax online at the New England Cheese Making Supply. The wax is supposed to get as hot as possible to kill any spores and the only way to get it really hot is to put the pan directly on the stove eye on high, but that is very dangerous as the wax can catch fire or even explode. Plus, you can really get burned. So I did some research and many people are using a double boiler and getting it hot with boiling water beneath it. It is the safest way and seems to work fine. You can make a double boiler, if you don’t have one, by placing an empty tuna can in the bottom of a sauce pan, filling the pan with water and then placing a smaller pan onto the tuna can to keep it from dropping down into the first pan. 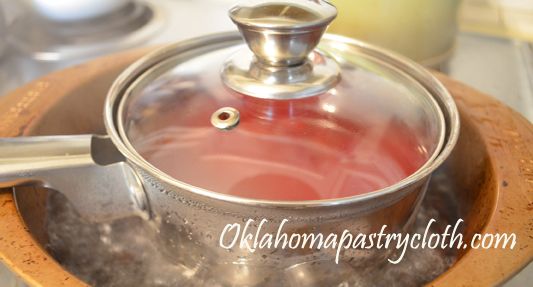 Or, you can use an old cake pan, fill it with water and set your pot into the water. By the way, I went to our local Big Lots and bought this sauce pan for $3. I just keep the wax in it and let it harden after melting to use the next time, adding more as I need. To store, I keep the lid on it so that no dirt gets inside. 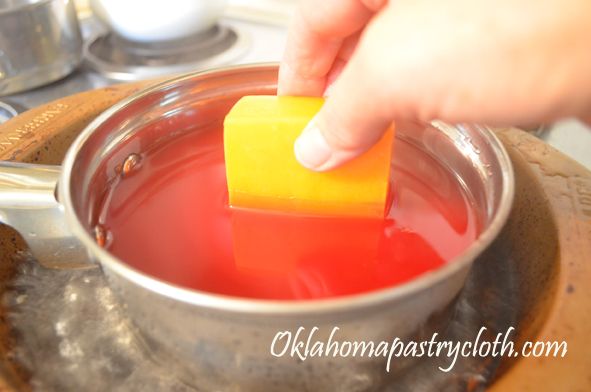 When the wax is hot to almost boiling or is boiling, dip one end of each of your cheese blocks into the wax to halfway up. 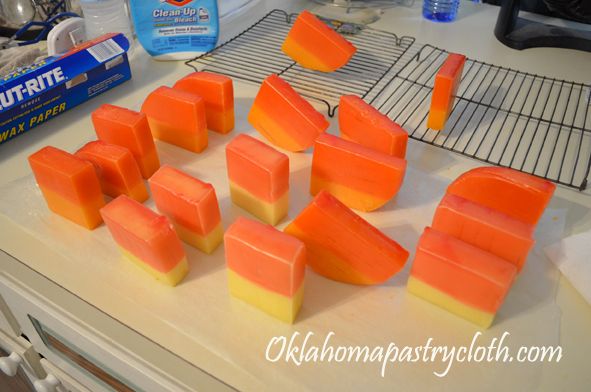 Turn the blocks to the undipped sides and let them rest to harden 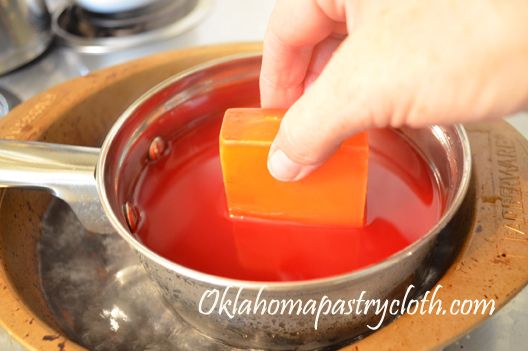 It only takes about a minute for the wax to harden where you can touch it. Pick the cheese up by the wax end and dip the unwaxed end. Place the block onto the end with the hardened wax so that the new wax can harden. Continue this process until you have waxed each end four to five times. 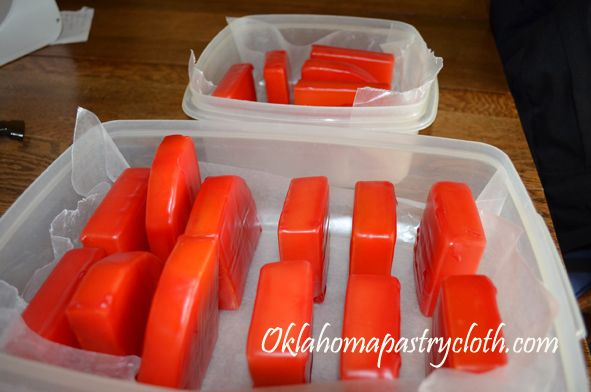 Place the waxed cheese in a container and into a room that is dark and cool or into a pantry where it can be easily accessed. Every few days, turn the cheese to a different side. Sometimes, the cheese will weep oil or water. It is still ok to use. I found that storing it on paper towels or cheese cloth helped absorb any weeping. Also, in some cases, the wax will thin and so you will need to wipe it clean and dip the block a couple of more times. If you see a dark patch under the wax, it is probably mold which is the result of a pin sized hole or other disturbance of the wax surface. You can use that cheese immediately, washing it and cutting off the molded part. 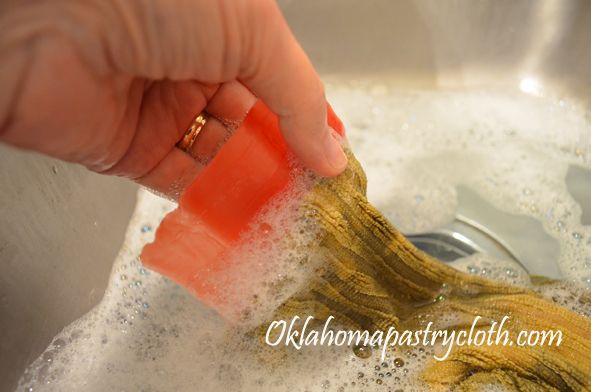 When you decide to use a block, use a knife to pry one end of wax off of the cheese. The rest just lifts off. Wash the wax in hot, soapy water and be sure that any pieces of cheese and oil are removed. Put the wax into your wax pan to reuse on your next batch. 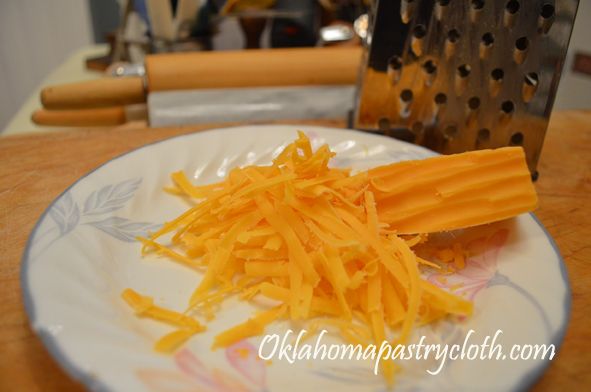 The cheese can be grated 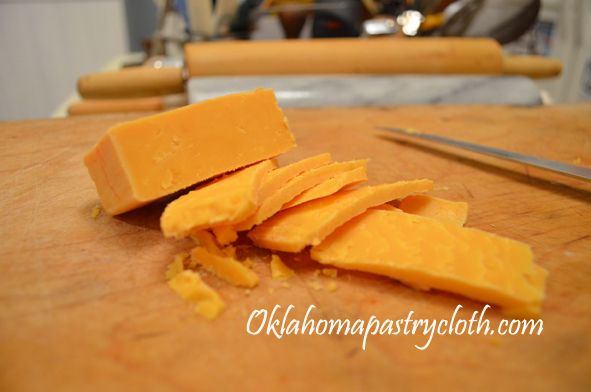 It can also be sliced or cut into cubes. Because it is sharper, it is also drier. So there you go!! Now you can wax poetic too….and if you want to send me your poems, I put them up at the blog! 🙂 Don’t forget to leave a comment to enter the giveaway!   |
|
| |
|
Oklahoma Pastry Cloth™ Company on Facebook
|
|
 |
|

|
Smoked Gouda Chicken Pasta
Sunday, September 15th, 2013
   I think that all of us have to admit that this has been a strange summer, weatherwise. Thankfully, our normally three digit temps did not appear, however, three monstrous tornadoes – one right after the other – destroyed much of our local landscape. Fires and floods in other parts of the nation have wreaked all kinds of havoc and our prayers go out for those in Colorado who are struggling through some of those floods, right now, after having to endure fires. Abnormally cool temperatures up north have kept places like Alaska in igloo conditions. But now, the days are growing shorter and there is a different feeling in the air. County fairs are popping up and the sound of college football, with its background of cheering fans, dominates the television on Saturdays. Fall used to always be hard for me. No joke. It seems that everything bad that happened, occurred in the FAll. For the longest time, when that crispness in the air appeared and the tell-tale muted sunlight of autumn days rose, I would get this feeling of dread in the pit of my stomach – a heaviness of spirit if you will. But that has since passed and now the Fall is my favorite time of year with Spring my second choice. I can’t wait for Thanksgiving and I so enjoy the baking, canning and preparation that I do like a squirrel storing up nuts for the winter! I’ve included a recipe for one of those meals below. I’ve decided to give you a peek into one of those “bad” Autumns so that you might get a little picture into my ready-for-psychiatric-research psyche. Perhaps you won’t find me so strange after all. And then again, this story may make me that much more strange!! Read on. It was the end of August of 1992. I was 38 years old, skinny, full of energy and the mother of two young children. My sister and her family had invited us to Dallas, from Mt. Pleasant, TX, to join them at Six Flags Over Texas. The kids were excited. I was ready for a fun day. And it was fun…that is…until we hit the kiddie ferris wheel (emphasis here on “kiddie”). My daughter, all of 11 years old, begged me to ride with her and so I hopped beside her in a swinging chair and watched as the safety bar was lowered over our midsections. Shortly thereafter, the gears ground, the music started and we were lifted probably a whopping one and a half stories into the air. As we came to the highest point, open swing rocking and pitching, I discovered, for the first time in my life, that I am afraid of heights. And I don’t just mean “close your eyes and don’t look” afraid of heights. I mean “scream in abject terror and beg for mercy” afraid of heights. I began to hyperventilate. I started to cry. My heart raced and I gulped for air between screams emitted through clenched teeth. My daughter grabbed my arm and tried to soothe me. She looked genuinely stunned and dismayed – not embarrassed that her mother needed a straight jacket and an ambulance waiting at the foot of the ride. My family members in the crowd below, however, looked like they wanted to change their names and claim no acquaintance with the crazy woman who was unraveling on the kiddie ride. When the ride finally stopped, I fell out of the chair, onto my knees, and struggled to stand. My makeup was a mess but that was no comparison to my mental well-being. My daughter led me to find our family which had scattered in embarrassment and someone brought me a Coca-Cola to fill me with caffeine and make me crazier. I finally gathered my wits and returned to a state of calm, trying to laugh off my apparent phobia. We moved on to food and more fun. We knew not to put me on anymore rides that went more than a foot off of the ground. I know. You are thinking, “So?” I understand. But that isn’t the end of it. We continued our Six Flags experience and as darkness descended, my niece indicated that, as a last ride, she wanted to do the Splash Water Falls, a ride that sends a boat down a steep slide to hit, bow first into a deep pool of water, sending a wall of water over a walk bridge that acts as the exit for the ride. Those standing on the bridge, at just the right location, get drenched by water cascading over them. I was actually able to handle that ride and even enjoyed it as we plummeted into the water. I’m thinking that it had to do with the idea that falling into the water is safer and less painful than spatting onto concrete from the height of a ferris wheel. My children and I exited our boat and climbed to the bridge to watch my sister and niece take their turn. I pressed way against the back, concrete wall to avoid the water that would inevitably come from their trip. My daughter ran forward to the railing to get a better look. In a series of actions that could only have taken seconds, I first realized that my daughter would be soaked (and would soak the car as well, since we were leaving immediately). I then ran forward to attempt to pull her back as I called out for her to move. She moved. But I was caught in the very center of the width of the bridge. That wall of water came over the top of the structure, full force, hitting me squarely in the chest, picking me up off my feet and tossing me like a rag doll against that back concrete wall and then onto my back on the concrete walkway. All of the air was knocked out of my lungs and I gasped, looking, I am sure, like a goldfish poured out of its bowl, flopping in a huge puddle of water. There was not one inch of me that was dry. Did I mention that I had on white cotton shorts and a white cotton t-shirt? I’ll leave you to imagine the result of soaking white cotton. The guy running the ride and a number of visitors ran to help me up. I could see, “Lawsuit” written all over the poor Six Flag employee’s face. Down below, my entire family was rolling on the ground laughing so hard that they couldn’t even get up the stairs to help me. They didn’t stop laughing until they realized that they hadn’t gotten a video of the whole incident to win $10,000 on America’s Funniest Home Videos. I headed back to Mt. Pleasant, beaten, bruised and assured that my children were going to be advertising for a new, less embarrassing mother. And again, you say, “So? What’s so bad that you would hate Fall?” I’m not finished. The following week, still literally blue and smarting from my tumble and embarrassed by my fits of hysteria, I went about my normal work which included taking care of our pet raccoon. Rascal the Raccoon had shown up at our home as an unweaned baby whose mommy had been hit by a car while he was clinging to her back. We took him in and nursed him, bottle feeding him to weaning. Rascal readily accepted house training like a cat and soon had run of our home. 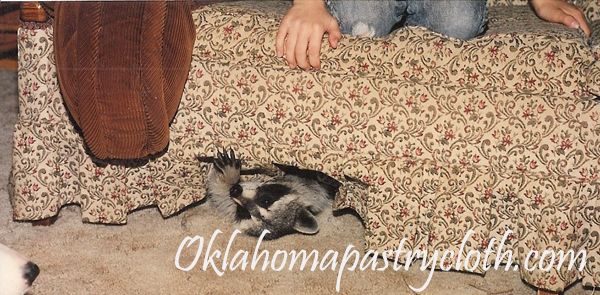 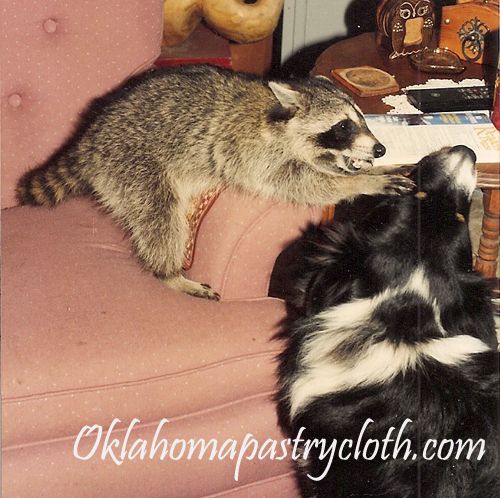 A couple of days after the trip to Texas, I let Rascal out for a stroll. He was still pretty tiny and so I watched him carefully because I did not want him climbing into one of the huge trees of Northeast Texas. Of course, the first thing that he did was head for the biggest of those trees. I called out to Rascal and walked quickly to retrieve him from the tree trunk, not seeing the large tree root in front of me. The tip of my toe clipped under that tree root and I pitched forward. I tried to catch myself on my left leg, but my leg twisted so that my foot was inward as I continued to fall forward. The sound of a large tree branch snapping echoed through the Fall air as I hit the ground and I noticed that the lower half of my left leg, about 8 inches below my knee was laying in the totally opposite direction of the rest of my leg. It wasn’t a tree branch that had snapped. It was the bones in my leg. I did what any normal person would do. I screamed and screamed for help. And I reached down and picked up the wayward portion of my leg and tried to put it in the right position. Bad idea. My poor, stoic 11 year old daughter was the only person home and she came running out to see what had happened. She quickly assessed the situation, called a neighbor and brought me two ibuprofen and a glass of water without me asking. I was too in shock to know what I needed!! My neighbors arrived and slid a cutting board under my leg, securing it by wrapping and wrapping with a horse lead rope and then slid a blanket under me. They took corners of the blanket and lifted me to a car seat where I passed out. Two surgeries and a $20,000 hospital bill later, a year and a half of physical therapy and the leftover scars and arthritis of 3 plates with 13 screws, I walked out of the physical therapist’s office one Spring, relieved that I would not be a cripple the rest of my life.  Rascal finally grew up and wandered off to find a woman Raccoon, but he left us with an unlimited list of funny stories and precious memories. He was a wild raccoon and needed to go back to his habitat. We eased him from his home life to the great outdoors and he finally did not need us anymore. So there is an example of ONE of my bad Autumns. As I have said, those memories are a distant past and now I can’t wait until I see our first scorpion – emphasis on the word SEE – because we know that Fall is just weeks away. I start getting the urge to cook heartier meals and fill the house with the smells of baking. Here is a recipe that I came up with to use our Shawnee Mills Country Gravy Mix for a hearty, lower calorie pasta meal (I’m on a diet you know) and Mr. Fix-It, my critic, gave it a two thumbs up. Ingredients: 3 tbsp. olive oil 2 tbs butter 1 lb chicken breasts cut into strips 1/2 lb ground Italian sausage or 1/2 lb ground pork mixed with salt, pepper and fennel seed 8 large shrimp, shelled 6 large mushrooms, sliced 1 – 2 tablespoons Cajun seasoning 1 pkg Shawnee Mills Country Gravy Mix or Peppered Gravy Mix prepared according to directions 1/2 to 1 cup chopped tomatoes, fresh or canned (depending on your taste) 1 tsp garlic powder 1 tsp oregano 1 tbsp. chopped red sweet pepper 1 cup smoked gouda cheese, grated 1/4 cup parmesan cheese, grated 4 cups cooked bowtie pasta  Directions:  Prepare Shawnee Mills Gravy mix according to directions. As 1 1/2 cups water is heating, add tsp garlic powder and oregano to the 1/2 cup water and powdered mix. 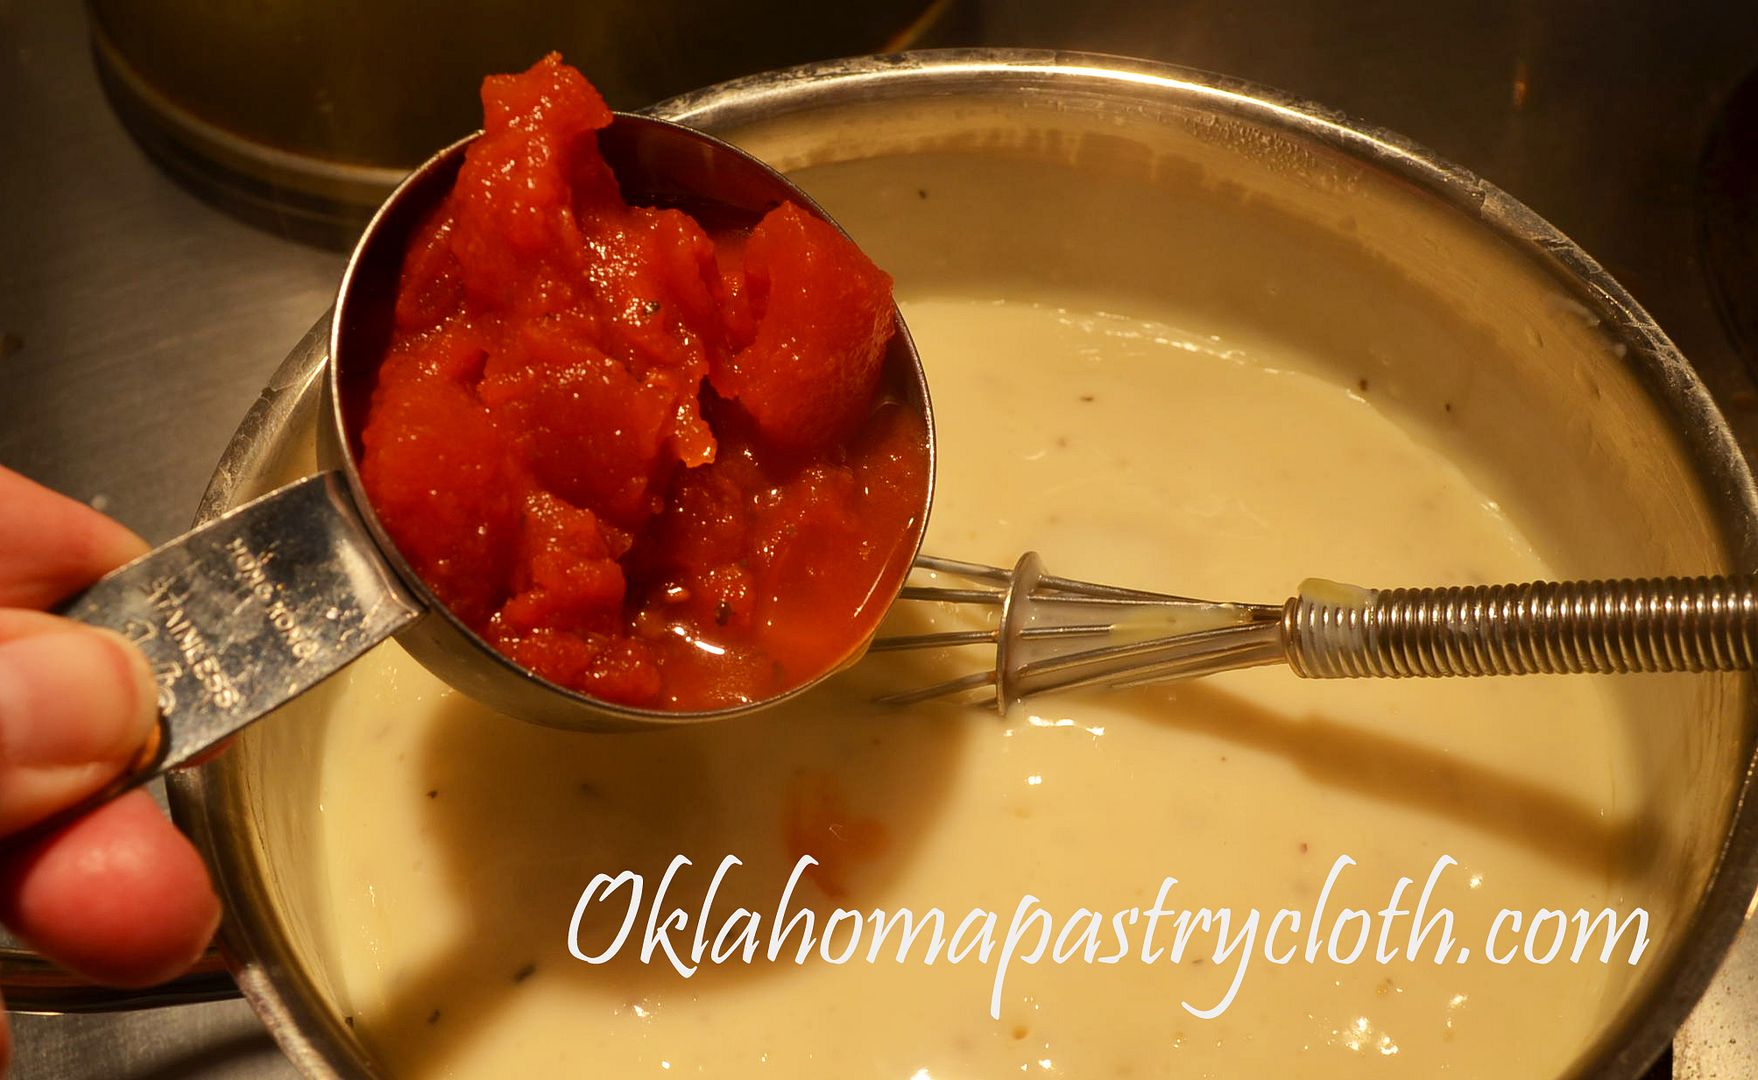 When gravy has thickened add tomatoes 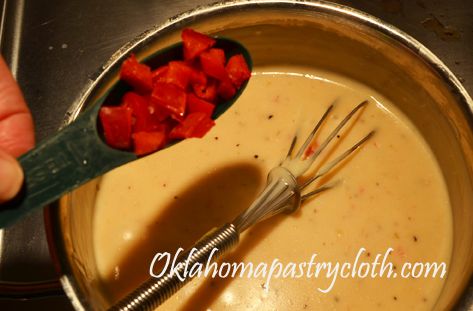 And add chopped peppers  Add gouda and parmesan cheeses. Stir until cheeses are incorporated, cover with lid and set aside onto warm eye. 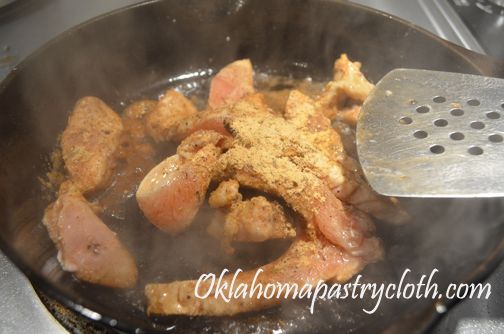 Toss chicken and shrimp with Cajun seasoning. Separate chicken from shrimp. Add 2 tbsps. olive oil and 2 tbsps. butter to skillet and heat skillet to smoking. I am using a cast iron skillet here because I think it is best for a blackened meat. Put chicken into skillet and sauté until browned with black areas. Add shrimp and toss until no longer opaque. 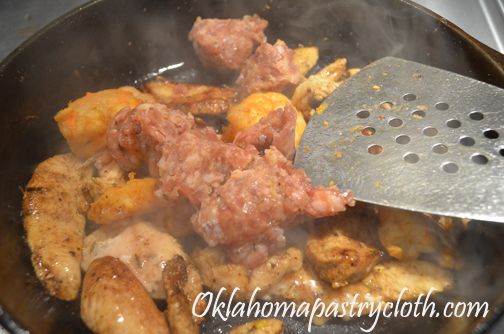 Add sausage and chop and stir until crumbles are cooked all the way through. 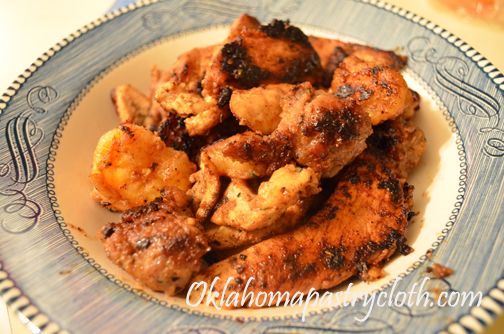 Place meats into a bowl and put into the oven that has been preheated to warm or put into a warming oven if you have one. 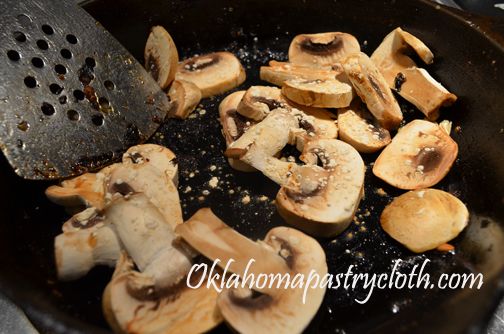 Return the skillet to the heat and add mushrooms to the skillet. Stir fry, constantly stirring. 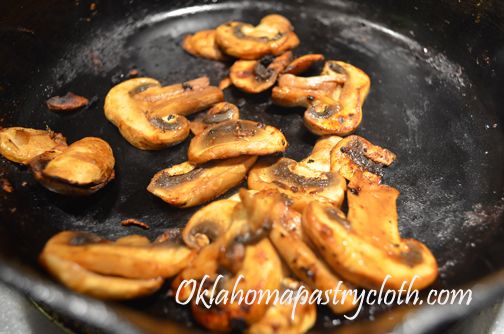 Cook mushrooms until browned and add to bowl of meats. Toss to mix. 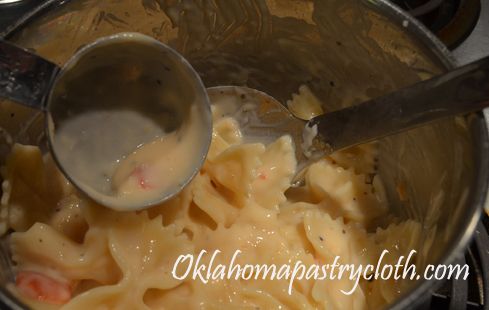 Prepare pasta in salted boiling water with a tablespoon of olive oil added. Drain well. Stir gravy sauce and slowly add to the pasta, stirring to coat until pasta is covered according to your tastes.   Spoon pasta and sauce onto 4 plates and divide meat and mushrooms to top each plate of pasta. Drizzle leftover sauce over the meats and then garnish with grated gouda and parmesan cheese with chopped tomatoes. Serve with garlic bread and a salad. So there’s a Fall meal for you! Hope you are ready to dive into this year’s season like I am!!!  |
||||
|
Chocolate Scones
Tuesday, August 27th, 2013
 First order of business….I forgot to announce that we had a winner on the 17th of the month. We drew a name out of the hat for the Red Gold Tomato apron and Jalapeno Ketchup and reader, Jonni from Kentucky is our winner. She has been notified and responded with surprise and her address. Congratulations, Jonni!! Now, I have an admission to make. I’m on a diet. Yep, I am. I’ve been on one since March but when one has thyroid disease, a diet feels pretty much pointless. Your metabolism ceases to exist and a stalk of celery adds 10 pounds to the waistline!! Actually, LOOKING at a stalk of celery adds 10 pounds to the waistline. It’s just a little depressing. Having been one who has always loved to cook and to eat what I cook, it’s been a difficult journey over this past year and a half, but there IS a tunnel and I’m seeing a light at the end of it!! I’ve lost 17 pounds! I still have a ways to go, but that’s a real achievement for me!! And in that tunnel, there has actually been food – really good food! I have discovered that no matter what fad diet is out there – eating blue or red foods, Atkins, South Beach, HCG, low carb, high carb, low protein, high protein, juicing, you name it – the reality is that the secret to losing weight is this formula: Calories In minus Calories Out. That’s it. So the way that I track that is by a free website called SparkPeople.com. It is wonderful. It even gives me a pie chart to try to match my perfect amounts of fat, carbs and proteins per day. And I get to eat whatever I want. It is the Dave Ramsey course in calorie budgeting! I have my 1200-1300 calories to spend and it is my choice how I spend them. If I make up a recipe, I can enter the exact recipe and how many servings I get out of it. The site then figures up all of the nutritional info plus calories per serving. Then, I can put a serving into my daily budget easy as pie. Well, sorry, didn’t mean to be thinking about pie. So today, was my baking day. I always keep something sweet in the freezer for me and Mr. Fix-It to enjoy in the evening with a cup of one of our tasty teas. I usually bake some type of scone or cookie to be heated in the toaster oven. I leave 200 calories open for that possibility. This afternoon, I made my usual round of cranberry scones and still had 1/2 cup of heavy cream left. I thought, “Hmmm. I wonder what would happen if I added cocoa and chocolate chips to the basic scones recipe?” I guess you know that I had to try. I did. Yummy!! Chocolate scones. I have a feeling that High Tea in England does not include chocolate scones, but here in America, we believe in chocolate in everything!! So here is the recipe that I concocted. They are a true English scone – heavy and flaky – but have a little bit of the flavor of an American brownie. And they are 186 calories each! I stayed under my 200 calories and so I am one happy camper. So here you go. If you want detailed instructions on making scones, you can hop over to that post at English Scones. 
Ingredients: Glaze 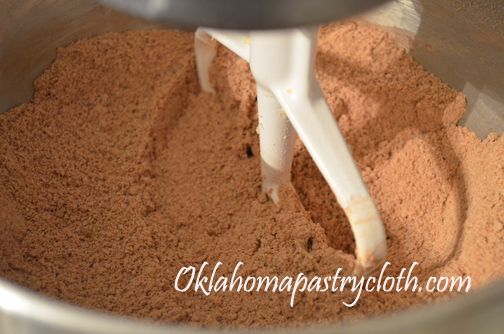 Preheat oven to 400º. In a mixing bowl, add flour, cocoa and butter that has been cut into cubes. Either by hand with a pastry cutter, or with a mixer, cut butter into the flour mixture, until the mixture is like tiny crumbs. Add sugars, salt and baking powder. Mix. Add the chocolate chips and mix. 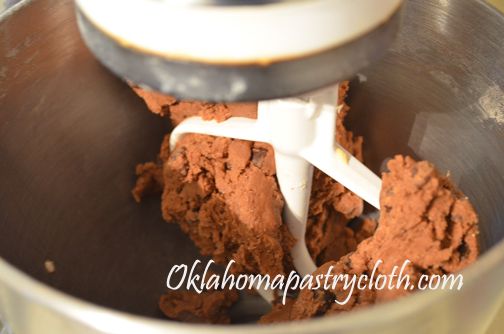 Add the cream, vanilla and egg white and mix until a very stiff dough pulls away from the sides of the bowl. Divide dough in half and put onto a floured surface – you need an Oklahoma Pastry Cloth™ here!! Pat out first half to about a 4″ circle. Cut into 8 triangles. Repeat with the second half. Place scones onto a baking sheet that has been lined with parchment paper. Mix leftover egg yolk with 2 tbsps. half and half and brush the tops of the scones with the mixture. Bake at 400º for 13 minutes or until done. While scones are baking, mix melted butter, powdered sugar and milk to make a glaze. Dip tops of scones into the glaze and place onto a cookie rack.   Serve the scones warm. I bet raspberry jam would be great with these!! This picture is of the two different scones that I made this afternoon. Oh! And the china is my grandmother’s Thomas Ivory Bavarian china, made by the Rosenthal company, that my grandfather bought in Germany during WWII – paid for with cigarettes!!  |
|
| |
|
Oklahoma Pastry Cloth™ Company on Facebook
|
|
 |
|

|
A Winner, A New Give Away and A New Recipe for Your Canned Meats!
Thursday, August 8th, 2013
 On August 1st, we drew a name out of the hat and Frankie, from Silver Spring, Maryland, won the gift certificate to the Grangeville Rose Tea Room and Emporium. The gift certificate has been mailed to her sister, who lives right here in Oklahoma City, as an early birthday present. Lucky her!! And so, another Okie will get to experience the lovely atmosphere of our newest tea room. Congratulations Frankie and sister, Liz. And thank you to all who entered the drawing. 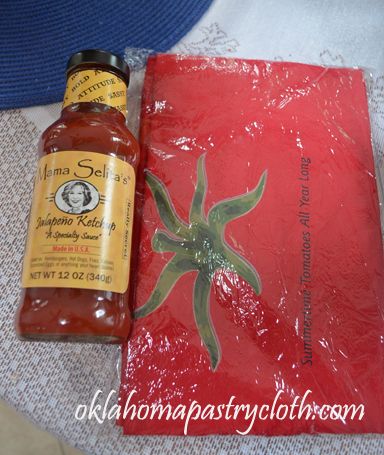  Now, we have a new giveaway. Red Gold Tomatoes, the best canned tomatoes in the world (if you can’t do your own!!) has sent me a couple of items that I thought I would give away to a lucky reader. On August 21st, we will be giving away this Red Gold Apron and a bottle of their Mama Selita’s Jalopeno Ketchup. Just comment at the blog and you will be entered. Plus, Red Gold Tomatoes is having their own celebration. I will post here exactly what my letter from them says: Now, we have a new giveaway. Red Gold Tomatoes, the best canned tomatoes in the world (if you can’t do your own!!) has sent me a couple of items that I thought I would give away to a lucky reader. On August 21st, we will be giving away this Red Gold Apron and a bottle of their Mama Selita’s Jalopeno Ketchup. Just comment at the blog and you will be entered. Plus, Red Gold Tomatoes is having their own celebration. I will post here exactly what my letter from them says:“Come join our Red Gold Summer Grillin’ Party that will run from July 24th through August 30th on Facebook — #RGParty. During this period, we will share our new RG Tomato Grillers Recipes. They are tomato-licious!…As part of this promotion, we will be giving away 1,000 Red Gold “Summertime Tomatoes All Year Long” Aprons every week via a random drawing – that’s 5,000 total winners! There will also be one grand prize winner who will win a large Big Green Egg Grill – that’s a $1,000 value. Anyone who registers for our promotion is automatically entered into both the weekly drawing and grand prize drawing. Here’sthe twist – anyone can earn additional entries into ourgrand prize drawing! For each person they refer, who opts to participate in our promotion they will earn additional entries int the grand prize drawing. Our goal is to have 150K Red Gold Facebook Fans by the end of the summer. Each week we will be releasing new recipe videos, as well as sharing summer grilling tips.” You can also find them on Pinterest at www.pinterest.com/RedGoldTomatoes And by the way, Red Gold is an Indiana based, 3rd generation Family-Owned company that has been making premium quality tomato products since 1942!! We need to support small businesses!! 🙂 Now, on to cooking….in the past, I have shown how to can meats like chicken breasts, ground beef, sausage and etc. I even can my own chili, a recipe that I am not at liberty to share because it is not my own. However, my point is that meat is an easy staple to put up for long-term storage much longer than freezer times. Many of these meats can be bought as well, canned, off of the grocery shelf, but sometimes we are at a loss what to do with them. Here, I am going to show you a quick way to make enchiladas with your canned chicken breasts, canned chili or canned roast beef. You can even use your canned cheeses and dehydrated onions, rehydrated with water. You will need for 4 people: 8 – 10 White corn tortillas (yellow corn are fine but I like the lighter texture of the white corn tortillas) Olive Oil 1 pint canned, boneless chicken breasts 1 pint canned chili or canned roast beef 1 package taco seasoning mix (I prefer Taco Bell) 1 8 oz sour cream (light is fine) Buttermilk 1 cup shredded Monterey jack cheese 1 cup shredded Cheddar Cheese (you can use your canned cheddar) 2 slices American Cheese (You can use your canned Velveeta) 1 small onion chopped 2 tbsp. chopped green pepper 1/2 tsp garlic powder salt 1 jar salsa verde 1 can red enchilada sauce (not picante sauce)  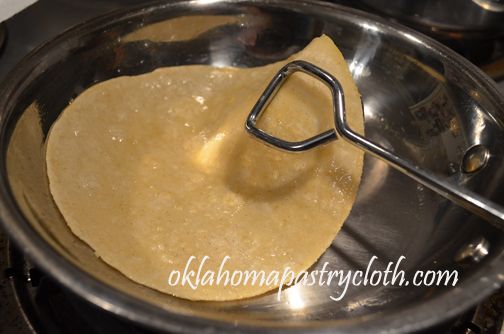 Place canned chicken breast with broth into a small sauce pan and add 1/2 pkg of taco seasoning. Stir until chicken is shredded and mixed with seasoning. Add a little water or broth if the meat is too dry. Simmer until liquid is reduced to a thick sauce. Set aside. Put 2-3 tablespoons of olive oil into a skillet and heat. Place one tortilla at a time into the hot oil and sear lightly. Turn and lift out to a paper towel to drain. Do each tortilla, placing a paper towel between each one. 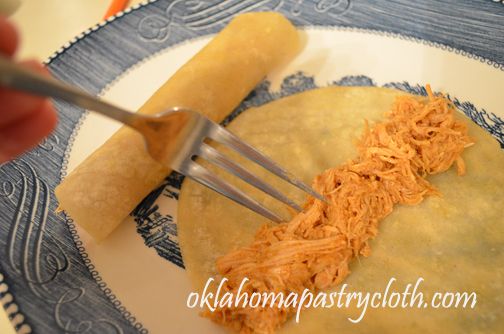 Place a line of hot, seasoned chicken mix down the center of each tortilla. Roll tightly and place on a microwaveable platter, seam side down. Repeat until desired number of chicken enchiladas is achieved.  In a bowl, add sour cream, chopped onions, chopped green peppers, garlic powder, 1/2 cup Monterey jack cheese and salt to taste. Stir and add just enough buttermilk to make a nice, thick sauce. Spread the sour cream sauce over the chicken enchiladas, evenly.  Spoon salsa verde down the center of the enchiladas. 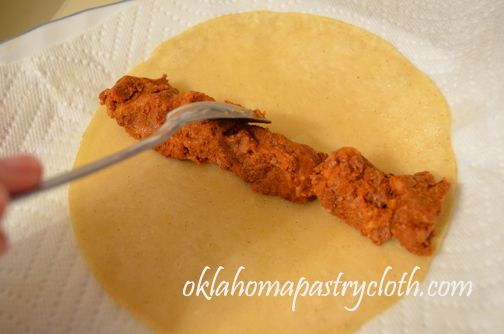 Now, with remaining tortillas, (here I am just making two for the two of us but you can make more) we will make beef enchiladas. If using canned beef, do the same as with the chicken breasts and place into a pan with the broth and 1/2 pkg of taco seasoning, simmering until hot and liquid is reduced. If using your canned chili, heat it first, cooking it down to very thick and then spoon onto the tortillas. Roll the tortillas tightly and place onto the platter with seam side down.  Slice the American cheese into strips and lay the strips down the tops of the enchiladas. Sprinkle with a mixture of the cheddar and Monterey jack cheeses and then spoon red enchilada sauce over the top of the cheese.  Microwave the enchiladas a length of time according to your microwave’s power level (you can carefully cover these with foil, making the foil stand up away from the enchiladas and heat in the oven) I usually microwave about 2 minutes or until the cheese is melted and sour cream sauce is hot. Remove from the microwave and sprinkle a mixture of cheddar and Monterey jack cheeses over the chicken enchiladas.  Serve with Mexican rice and refried beans and you’ll think you are at a restaurant!  |
|
| |
|
Oklahoma Pastry Cloth™ Company on Facebook
|
|
 |
|

|
Canning Ground Meat
Thursday, June 20th, 2013
  Being without electricity during the tornadoes made me appreciate canned goods all the more. Once we got the generator going, things got easier, but so much of life was topsy-turvy with the destruction, mess and time demands that canned items were a blessed relief for cooking meals. My canned hamburger came in especially handy. Canned hamburger is amazing for whipping up tacos or nachos, Sloppy Joes, spaghetti, soups, casseroles and anything else that requires ground beef. It is already cooked, ready for spices and seasoning and cuts any recipe time in half. I also cook sausage loose (not in patties) to use on pizza and can the very same way. Either one is great. We are very fortunate here to have a store called CHEFS that provides bulk purchase of just about anything you could want. Ground beef comes in 10 lb chubs for much, much cheaper than at a normal grocery store. And the meat is very high quality, less fat and ground fine. I buy several of these chubs and process the meat, winding up with around 10 pints of cooked, ground meat ready for a quick meal. 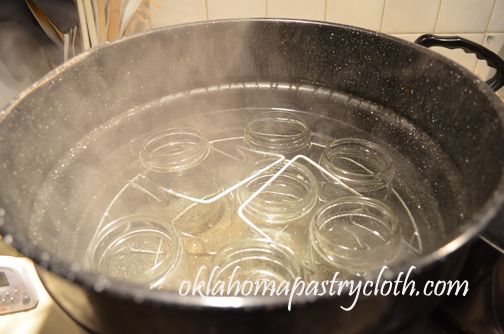 To make sure that my jars are sterile, I use a waterbath canner to boil them in water that completely covers. 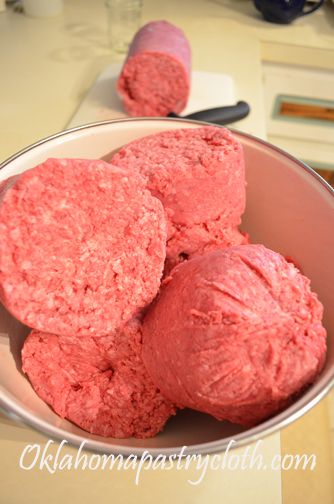 Meanwhile, I cut the chubs into approximately one pound chunks and put them in a large bowl. 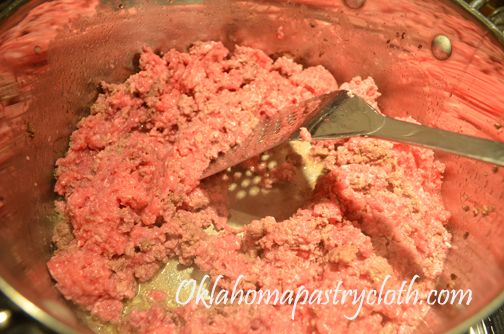 In a large pot, I brown the hamburger a little at a time, adding about a pound at a time, until most of the ground beef is browned. It does not have to be cooked all the way through. That will continue in the processing. 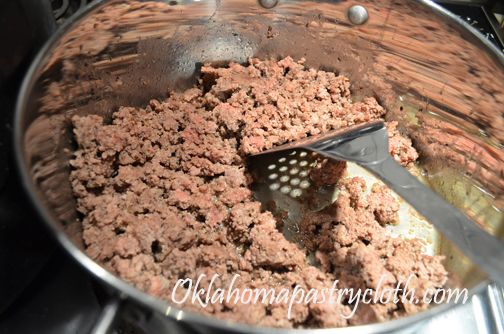 When all of the hamburger is lightly browned, a small amount at a time goes into a colander that is placed inside a large bowl. The grease is drained this way so that the meat is nice and dry and non-greasy. I place the drained hamburger in the jars and then put a little more meat into the colander to drain and so on. 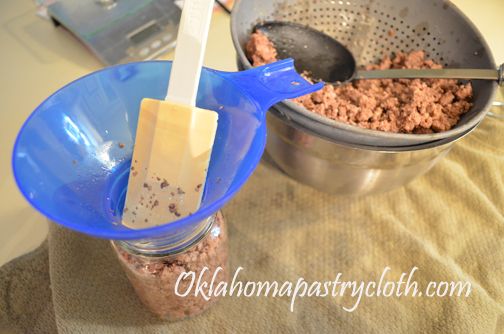 Using a canning funnel, the meat is placed into jars. I use pint jars because I can figure right at a pound of meat (weight before it was cooked) per jar and that makes it easy for use in recipes. The hamburger is packed down pretty tightly by using a spatula or wooden spoon to tamp it between additions. The jars are filled to 3/4″ – 1/2″ headspace. 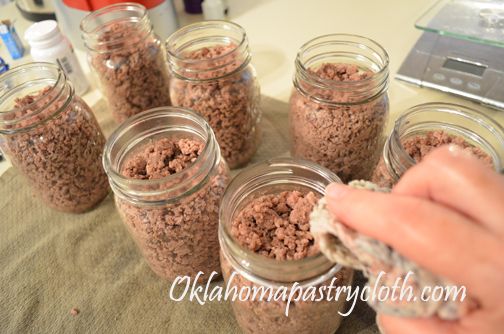 The rims of the jars are wiped with a warm, wet cloth to remove any oils. 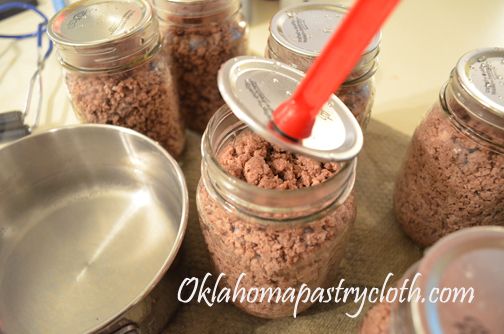 Lids that have been warming in nearly boiling water are applied. 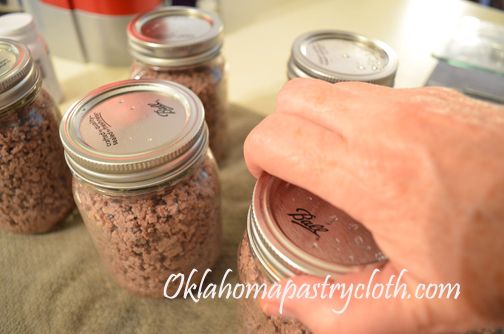 The rings are tightened and then loosened back a little less than 1/4 turn 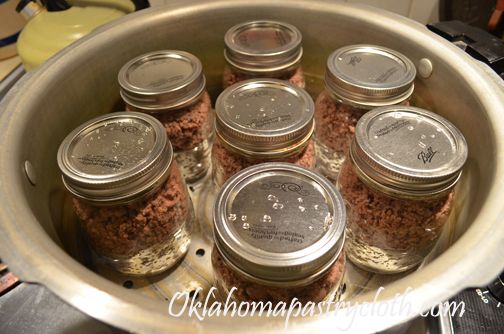 The jars are processed in a pressure canner for 90 minutes for pints and quarts. 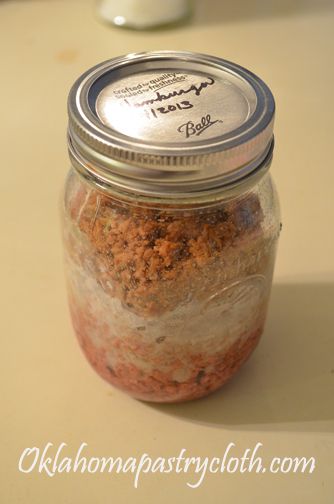  When the jars cool, a little fat will show up that is extracted in the processing. To use, just open a jar and pour it into a pan, brown a little bit and add seasonings or sauces for your favorite recipe. Or for pizza, just brown a little, add salt and pepper and sprinkle on pizza. You can do the same thing with your canned loose sausage.  |
|
| |
|
Oklahoma Pastry Cloth™ Company on Facebook
|
|
 |
|
|
|
Flat Earth Travelers and Cooking With Children
Friday, May 3rd, 2013
  Ha! I bet you thought that I am going to educate you on people who refuse to accept the fact that this earth on which we live is a three dimensional sphere! Nope. I’m going to talk about travelers who are flat! Really, really flat. Well, yes…I know. I have been remiss in posting over the past few weeks. But we have been up to our elbows in soap…200 pounds of the stuff. We are preparing for the Central Oklahoma Lavender and Herb Festival at the farm of Country Cottage Primatives on June 1st. If you would like to have a lovely day of classes, vendors and lavender picking, set aside this day and make your way to this beautiful place. Look for our canopy and be sure to introduce yourselves!! Oh! And we did have our April drawing and Janet Black of Weatherford, Oklahoma was the winner of the canning tool set. Thank you for all of the entries. Stay tuned for the next give away. I have been working on this post for two days. That’s ridiculous. But I had it nearly finished yesterday, hit ‘save draft’ and instead of saving my draft, it got wiped out!! All of it!! There was some glitch that I have not figured out. It happened again this morning. I hit save again and it said, “You do not have permission to edit this document” and, “kerplooey!” everything was gone. I came very close to losing my normally pretty even temper with a shoe through the computer screen. But I didn’t and so third time is charm. But back to Flat People…Facebook is awesome. There were so many people about whom I have wondered over the years, having lost touch with them for as many as 45 years. Facebook has put me in touch with those wonderful people, letting me see what they look like, what they are doing, what accomplishments they’ve made, their families and it has given me a chance to rekindle old relationships. One of those people, a former high school friend and classmate, Carol, contacted me and told me about a geography project in which her 8 year old granddaughter, Ali, was participating. The students were sending a paper doll, drawn by each student, out to as many people as they could find to be photographed at locations that would introduce the students to new and wonderful places. The doll’s name is Flat Stacy. Mr. Fix-It and I volunteered to take Flat Stacy on our 2000 mile trip recently. It meant that we would stop along the way and take pictures of Flat Stacy in front of places of interest that we thought would be useful to the class. Now, there is nothing like watching the looks on people’s faces as a gray haired woman happily slaps a laminated, cut-out paper person that has been created by an 8 year old, up against some landmark to then step back and shoot pictures with a pretty nice camera. I figure that they wrote me off as some demented older person. But there WAS one place where a couple of young, college-age girls bounced up to ask, “That’s one of those flat people projects, isn’t it?! We did that when we were in school!” They hadn’t been out of school long enough to forget those kinds of things!! I do wonder, though, if they thought that I was somehow still in the third grade!! Mr. Fix-It joined into the project with gusto. Normally, ready to drive without stopping until bladders are screaming for mercy, he would see a sign and say, “Heh! That looks like a good place for a Flat Stacy picture!” and we would detour from our designated route to take in a site, complete with pictures to prove it. I just love that man. Anyhow, I thought that I would share with you just a few of the many places that we visited on Flat Stacy’s behalf. And Carol also sent me a recipe, to try, that her children, grandchildren and their friends brag about and can’t wait to eat when they are at her home. My granddaughter and I had a cooking day and tried these delicious treats so the recipe is posted below.  We stopped in Tupelo, Mississippi to visit the birthplace of Elvis Presley. Very impressive. Flat Stacy had her picture made with the “King” in front of the Tupelo City Hall.  Flat Stacy looked for the checkered flag at Talladega International Speedway in Alabama. I looked for Ricky Bobby.  In Newnan, Georgia, we found Flat Stacy’s store – or, at least it SAID it was her store! She was kinda dwarfed by the structure.  Outside of Wilmore, Kentucky, Flat Stacy had her picture made at Shaker Town, in front of a rock fence that was built before the Civil War.  Our little, long-haired dachshund, Ellie, was Flat Stacy’s traveling companion. Unfortunately, Ellie wasn’t feeling very good on this trip and when we got back and her to the vet, we were sad to find out that she is suffering from congestive heart failure. She is too young for that – just 8 years old. We are treating her with natural remedies and prescription medication to help her quality of life. We want to keep her around for a long time because she is such a joy in our life! 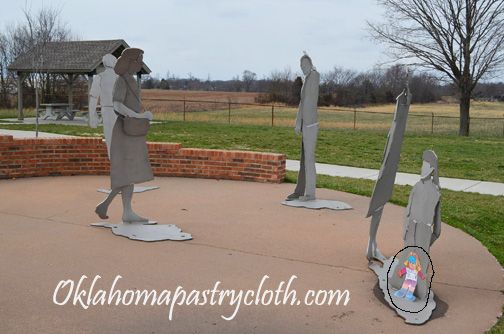 Near Mitchellville, Tennessee, Mr. Fix-It spotted these flat people who were just like Flat Stacy! In doing the research to find out about this sculpture, I found that the state of Tennessee has commissioned artists to do sculptures for each of the welcome stations. It just so happens that this one of the flat people was done by my former drawing professor at MTSU, Phillip Vanderweg! Small world.  Of course, we had to get a picture of Flat Stacy in Oklahoma and what better place than in front of the only working oil well in the United States that is located on the grounds of a capitol building. Our beautiful capitol building in Oklahoma City is in the background. Those are just a few of the pictures that we took. What a fun way to make a trip! And according to Carol, Flat Stacy went as far as Afghanistan for Ali! Here is Carol’s great cookie recipe for you to try. They are light, crisp and buttery.  1 cup butter 1 cup oil (I used coconut oil) 1 cup powdered sugar 1 cup granulated sugar 2 eggs, well beaten 4-5 cups flour 1 tsp. salt 1 tsp. soda 1 tsp. cream of tartar 1 tsp. vanilla 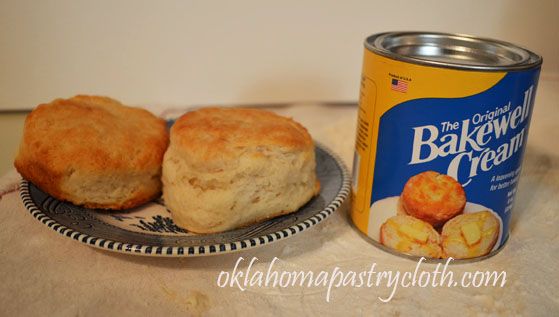 Now would be a good time to introduce our newest product: Bakewell Cream. I was actually introduced to Bakewell Cream way back in the 70’s in Maine but had not used it since because it is not available around here. Now I can have it!! Yay. It is the most wonderful baking Cream of Tartar that makes the most incredible biscuits. I have tossed baking powder and use the Bakewell Cream with soda and oh my….You can find it at our shopping page. 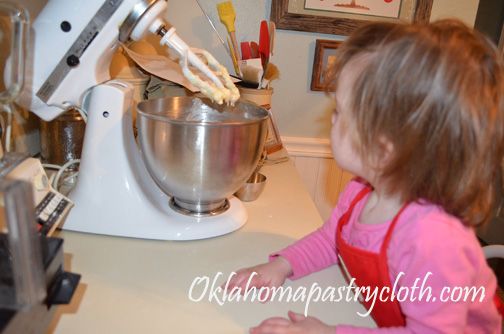 My granddaughter, Miss Peachy Pie, got her first cooking lesson, complete with her own “Li’l Cook” apron.” Typically, the batter wound up in her hair. Directions: Cream butter and oil with sugar and eggs. Sift flour, salt, soda and cream of tartar. Stir into creamed mixture, add vanilla and mix well.  My granddaughter “helped” put the dough balls on the baking sheet. If you are wondering why I cut faces in pictures – after the photo of my mother got stolen and used for unsavory purposes, I have ceased to show the faces that can be photoshopped and misused! Place small balls of dough on cookie sheet. Flatten each with a small flat bottom glass dipped in sugar. Bake at 350 degrees for 10 minutes. (Do not grease pan!)  Yep, they are TAAASTY! Miss Peachy Pie loved them.  |
|
| |
|
Oklahoma Pastry Cloth™ Company on Facebook
|
|
 |
|
|
|
Getting Down To Business: A New Give Away!
Monday, April 1st, 2013
  Everything is back to normal. We’re back to work and all WAS going well until the big press died. Now, it is lying in pieces, looking like a destroyed robot from Star Wars. Mr. Fix-It is doing the surgery but a thermonuclear discombobulator is needed and the only one that could be found must be ordered from…where else?…China. Actually, it is called a heat resistor thingy. Evidently, it’s an important thingy, too. Ah, technology! We have had a number of emails just recently, dealing with the subject of shipping. Personally, shipping is the bane of my existence. I wish that we could ship everything to everyone for free. But alas, I don’t do the lottery and haven’t won any millions so we can’t afford to give away the farm. Shipping expense is a reality with which Creating Concepts, Enterprises must deal. And on top of everything, unfortunately for all of us, shipping costs have gone up. We do not use UPS or FedEx because their charges for the size shipments we send out are ridiculous. In fact, their charge can be as much as $15 over what the US Postal Service charges us. And so, we use the US Postal Service Priority method almost exclusively. For international orders, First Class is used. First Class packaging is not available for the states. Everything is done by weight and for online orders, PayPal does its best to estimate as close as possible to accurate shipping charges. Sometimes, it misses the boat and nearly always it goes against us rather than the customer. In fact, we were rather sick awhile back when an order to Australia was estimated at $11 by PayPal and the actual shipping cost us $22.50. Not good. The fact is, shipping is high. Phone orders are more of an exact science for us because as soon as an order is processed and ready to ship, the customer credit card is charged with the exact amount on the shipping label. If you plan to order, doing so with a credit card by phone at 405-275-5639 will be the most accurate route. I, personally, feel badly when someone is unhappy with a shipping cost that they perceive is too high. A larger Oklahoma Pastry Cloth™ or multiple pastry cloths can be heavy and so cost more to ship. The mixes add up in weight as well. It doesn’t matter what box or bubble mailer is used, the weight is still the same, the location is assessed and the price goes up accordingly. Our Oklahoma Pastry Cloth™ is made of a heavy weight cotton, unlike the cheaper, lighter brands, so that it will last for years and years. It is not meant to be a throw away item but is meant to be a family treasure. So hopefully, this will better explain our shipping policy. I understand the groan of financial agony when a customer sees that shipping charge. It seems too high. But in order to use the US Postal Service, we have to pay the price – their price. We appreciate your understanding. 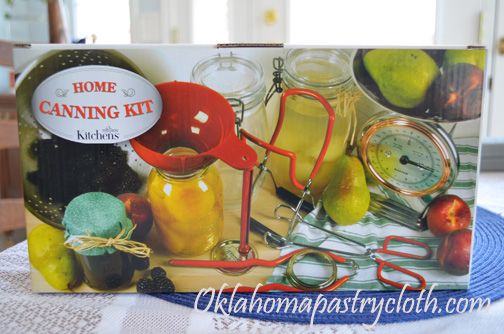  It’s time for another giveaway! And this is no April Fools joke. Since canning season is just around the corner, we are giving away a nice set of canning tools ready to be used! Starting today, leave a comment on any of the blog posts and you will be entered. If you have never posted at the blog before, don’t worry if your comment does not show up immediately. New posts must be approved by the moderator and then your post can be seen. The drawing will be two weeks from now on April the 15th – TAX DAY! Yayyyy. Good luck to everybody!!  |
|
| |
|
Oklahoma Pastry Cloth™ Company on Facebook
|
|
 |
|
|
|

 Homestead Revival
 Paratus Familia
 Rural Revolution