Posts Tagged ‘preparedness’


Dehydrating Series Pt III Peppers

Wednesday, January 19th, 2011

Part I
Part II


Dehydrating Part III

OR

The Incredibly Shrinking

Pepper


ImageHost.org


Another vegetable that is fast and easy to dry is the bell pepper. All peppers can be dried, including jalopenos, but that is one pepper you will want to process in the garage or outside. Your eyes and nose won’t be able to stand the fumes while drying!! Here’s a fast rundown on drying peppers.


ImageHost.org


Wash peppers. I will be using green, red and yellow bell peppers


ImageHost.org


Slice peppers


ImageHost.org


Chop peppers and spread onto racks of your dehydrator


ImageHost.org


I have trays of green peppers on the bottom, then yellow and then red because I like to have a few of the red and yellow fall through to the greens for a pretty mix and then have a mixture of yellow and red as well.


ImageHost.org


Dry overnight or for 12-15 hours and the peppers pieces will be shrunken and hard


ImageHost.org


Dried peppers make a pretty gift for the cooks in the family. They can be used in any recipe that calls for peppers! You can either reconstitute by letting them soak in warm water or just put them into a recipe to reconstitute as it cooks.

Happy Cooking!

MB


Please leave your comments at the comment link that follows! You will be automatically entered in our January Giveaway! And join us for updates on Facebook by clicking on the FaceBook icon below.


Vacuum Sealing Jars

Saturday, January 15th, 2011


Hoover Ain’t Got Nothin’

On This

Little Bit Of Technology!


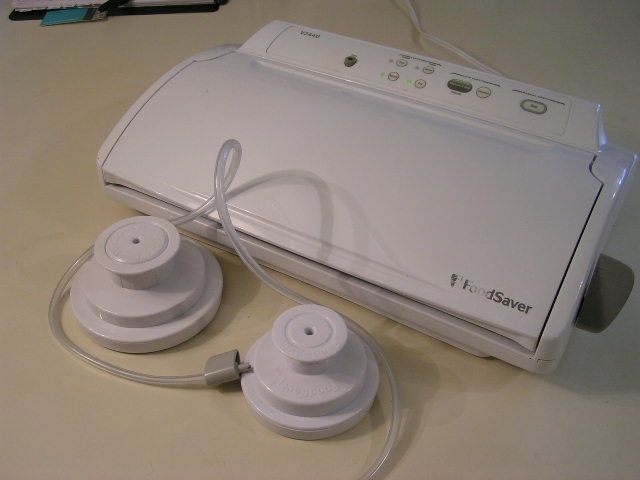
I have had a number of readers ask me how a vacuum sealer works with jars, since posting the two articles on dehydrating veggies. I thought that I would break into the middle of that series and answer those questions in pictures. Just as background info, I have a FoodSaver V2440 which is quite ancient in the world of technology. I am thinking that I got it somewhere around 2000 or 2001. I am sure that you can find that particular model on Ebay but I highly doubt anyone is selling it new. Target , Walmart and Amazon all carry FoodSaver products or you can order from the company directly at FoodSaver.com. Just make sure that whatever model you choose has the “accessory port” which is the little raised button that you will see in my pictures. Some of the models do not have this feature. I looked on the website and found one particular model that seemed reasonably priced and with the port feature. Just click above if you’d like to view it. The canning accessories must be purchased separately unless the website happens to be having a combined special. You can find the jar sealing items here. There is one for wide mouthed jars and for jars with regular openings. The following are pictures of how I use my vacuum sealer for both bags and jars.


 photo PICT1022_zps8f11677f.jpg


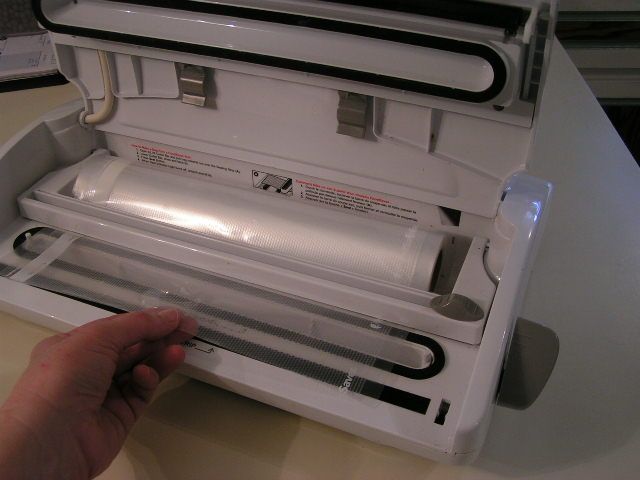
My vacuum sealer is equipped to do both bag vacuuming and container vacuuming. To bag items, first pull the plastic sheeting from the roll to cover the sealing plate.


 photo PICT1025_zps7ffac889.jpg


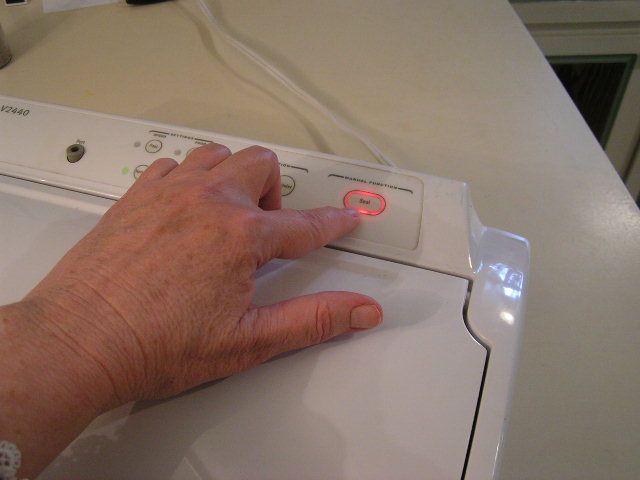
Secure the lid and press the ‘seal’ button and allow to seal what will become the bottom end until the light goes off or until the time you have determined is enough. If you predetermine a time, you have to manually stop the sealing feature by repressing the ‘seal’ button. Pull the plastic out to make a bag long enough to hold your food. The sealed portion acts as the bottom. Cut with the cutting feature.


 photo PICT1035_zpsc0349a2e.jpg


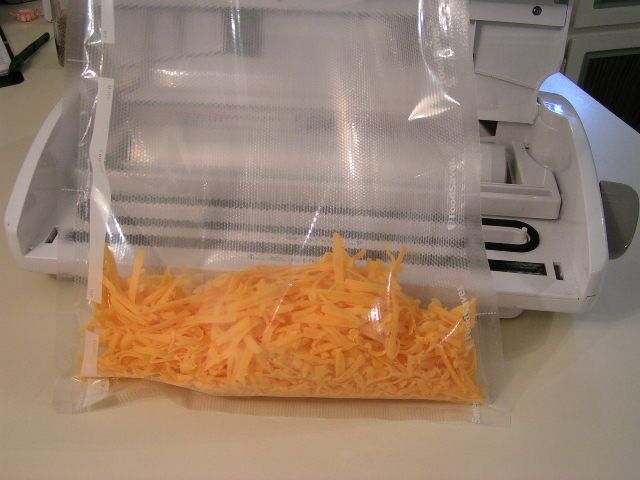
I bought a boatload of cheese on sale (1 block for $1.00!) and so since we like grated cheese, and I have found that you can freeze grated cheese really well, here I have grated a block of cheddar. You can also use a food processor. Cheese may also be canned!! But that’s for another post. Pour in the cheese or whatever you are sealing


 photo PICT1040_zps0a538f03.jpg


Place the open end of the bag down into the chamber that attaches to the suction holes and close the lid and fasten Press the “vacuum and seal” button and watch it work!


 photo PICT1042_zps5d85111e.jpg


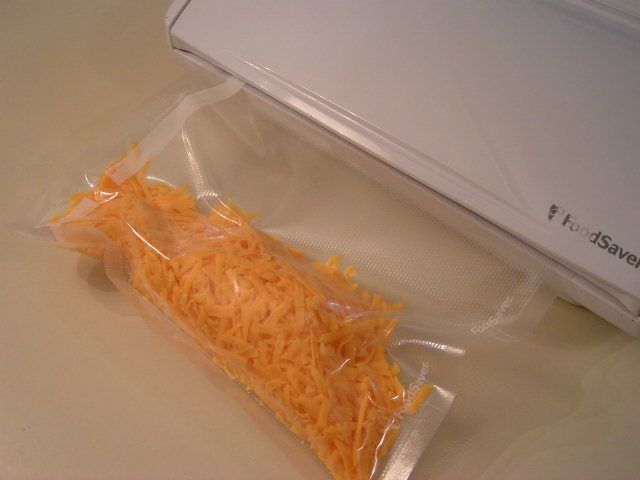
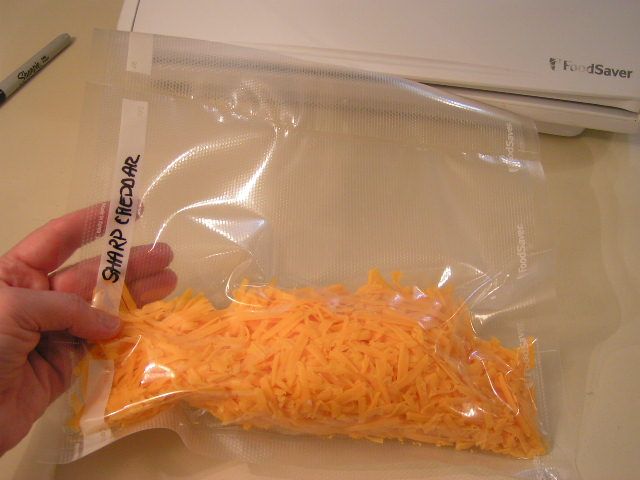
You can stop it at any time, which is what I am doing here in order to keep the cheese from being too tightly pressed.


 photo PICT1044_zps4d606b05.jpg


To vacuum jars, you must have the jar sealers and hoses that can be purchased separately. They run anywhere from $8 – $10


 photo PICT1045_zps20db3898.jpg


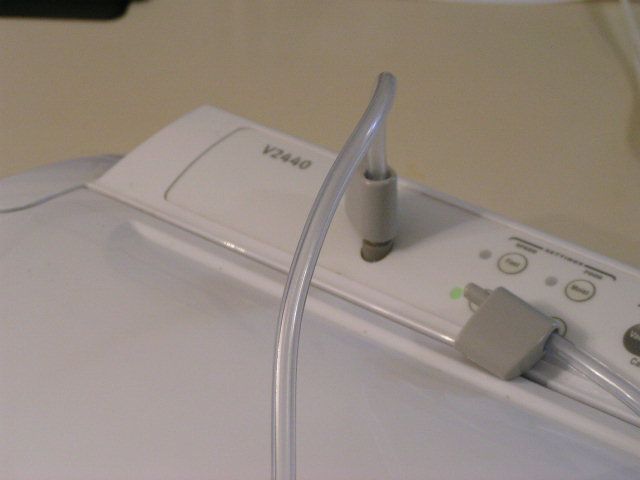
First, attach the hose to the accessory port


 photo PICT1047_zpsd64099f3.jpg


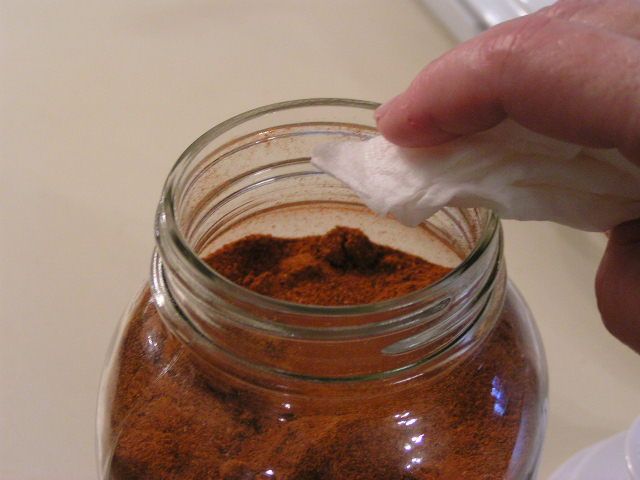
Wipe the edges of the jar with a damp cloth or paper towel to remove any residue or oil


 photo PICT1049_zpsd7b9f7e6.jpg


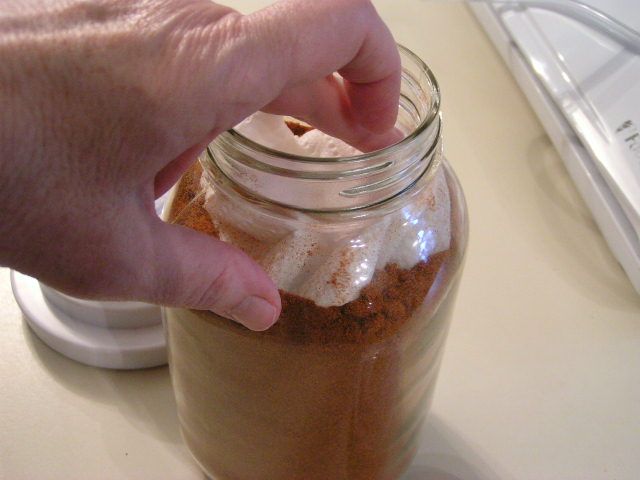
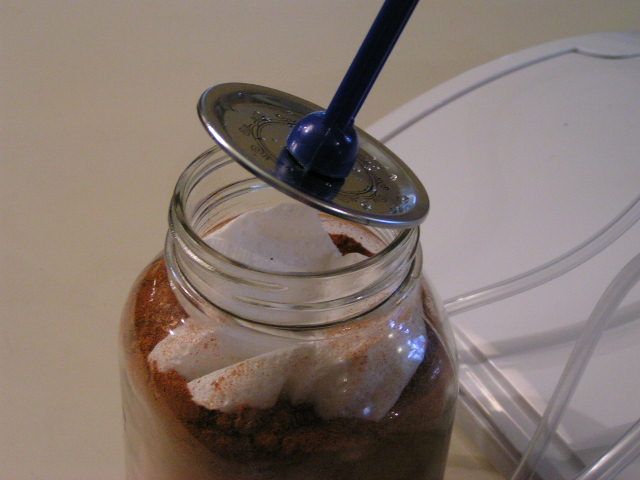
Place a dry, folded paper towel over powdery substances in the jar. Not needed for fruits and vegetables, etc.


 photo PICT1021_zpsb5d63e55.jpg


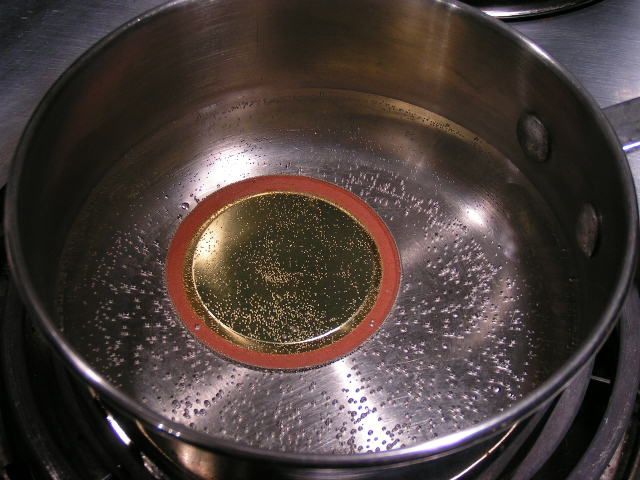
A new lid should be softened in a pan of nearly boiling water


 photo PICT1063_zpse47e1466.jpg


Place lid on top of jar


 photo PICT1053_zps7a8c2da0.jpg


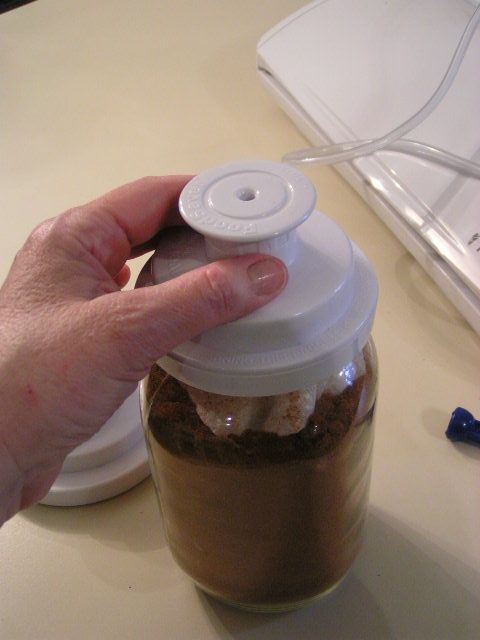
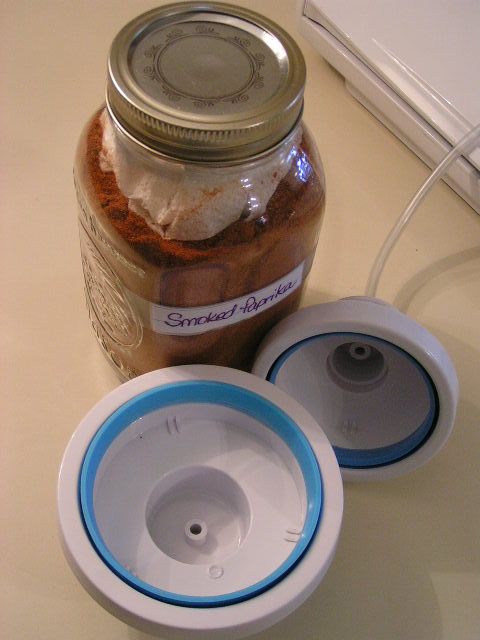
Place appropriate width jar sealer over the lid. This is the sealer for a regular mouthed jar. I find that sometimes it helps to wet your finger and run it around the inside edge of the sealer before putting it on the jar to create an even tighter vacuum.


 photo PICT1055_zps306df411.jpg


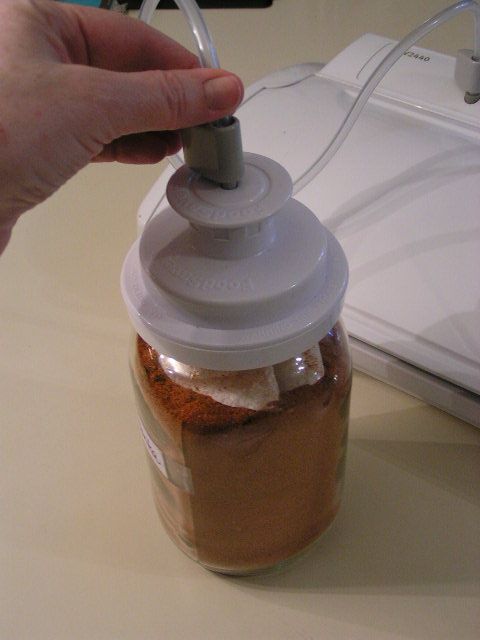
Attach hose to jar sealer


 photo PICT1060_zps3181eea4.jpg


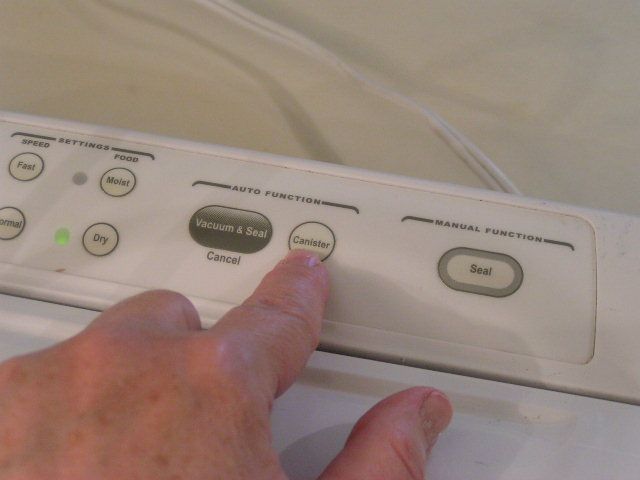
Press the canister button. If you get a newer model sealer, then the button may be different


 photo PICT1067_zps6bc0e18f.jpg


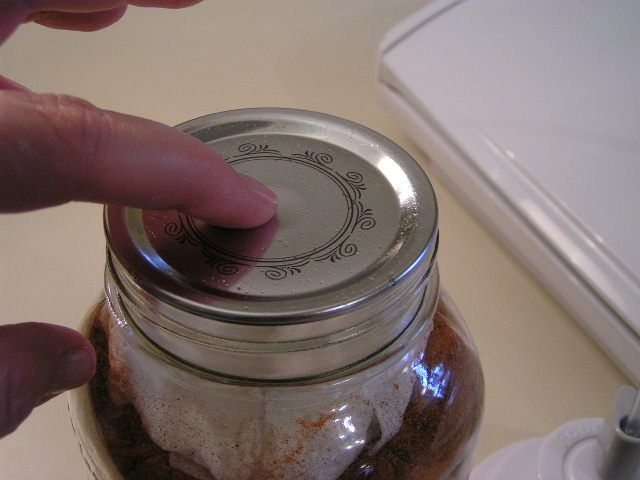
After removing the jar sealer, the “button” on the center of the jar lid should be concave and will not pop when you push the center of the jar lid.


 photo PICT1069_zpsf2cb2bca.jpg


So there you have it. My darling daughter refers to this wonderful piece of equipment as “the sucker thing” and asked for one for Christmas. Did I mention that she is 29?!


Happy Cooking!


MB
Please join us on FaceBook!!


Join in the conversation by leaving a comment below and enter our January Giveaway!


Dehydrating Series Pt II – Potatoes

Thursday, January 13th, 2011


Part I

Dehydrating Series Pt II

Or

A Big Spud in a Little Jar


 photo PICT0823_zpsaa829959.jpg


I’m going to get right to the point today as a continuation of Part I with photos of how to dry potatoes. Potatoes are one of my favorite garden items and I devote an entire bed to both red and Yukon Gold spuds. These “new” potatoes take a little longer to dry than the traditional Russetts which I am demonstrating here. Also, at the end is a recipe in which to use the sliced and dried potatoes. My next post will be about drying peppers and then you’ll get a recipe for broccoli cheese soup made from all of your dried veggies that will have your family licking the pot. So keep following!


 photo PICT0798_zps93e2069c.jpg


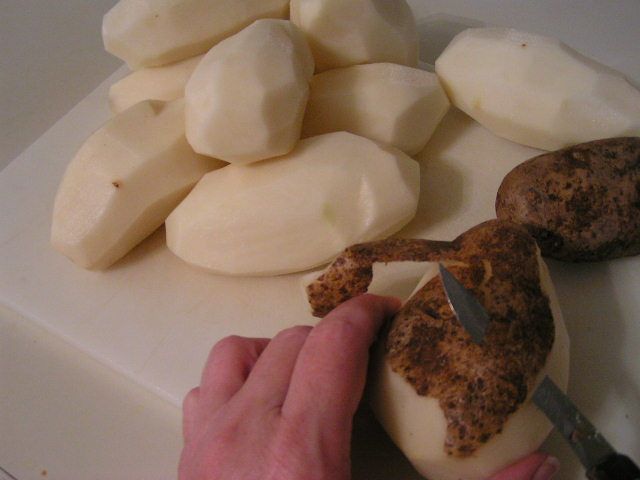
Peel potatoes


 photo PICT0801_zpsd93848fc.jpg


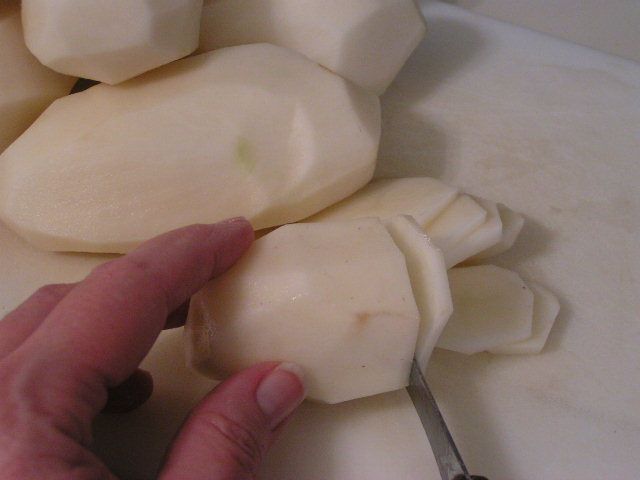
Thinly slice potatoes


 photo PICT0804_zpse3cec2c3.jpg


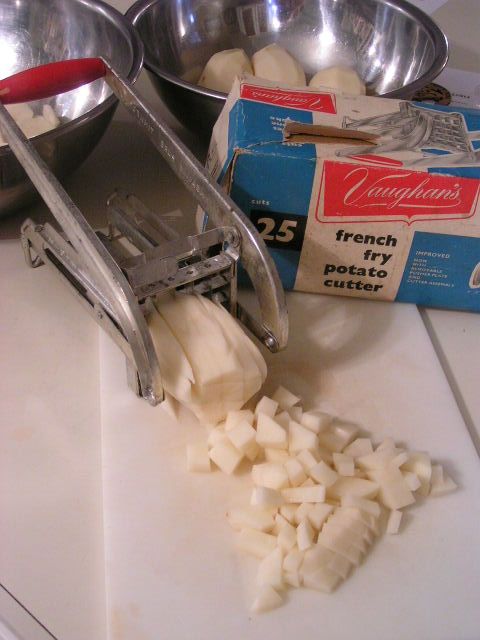
Or you can dice the potatoes. Here, I am using my grandmother’s old french fry cutter – it even has a wooden red handle…and dice by cutting across the potato strips


 photo PICT0808_zpsb0680277.jpg


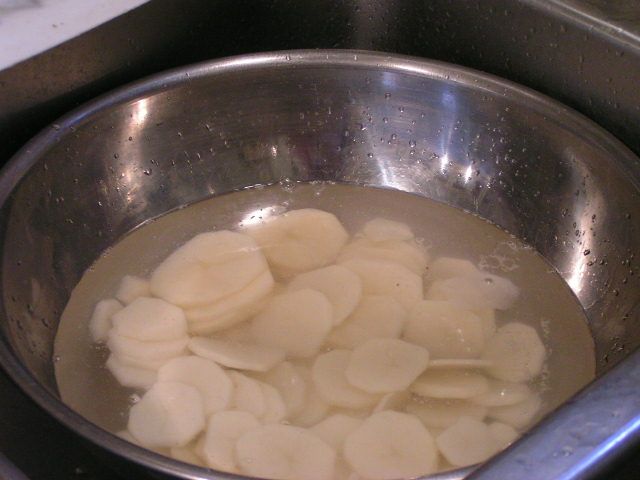
In a large bowl, rinse potato slices under water, strain and rinse again until water runs clear and all of the starch is washed off.


 photo PICT0819_zps02f3a2a0.jpg


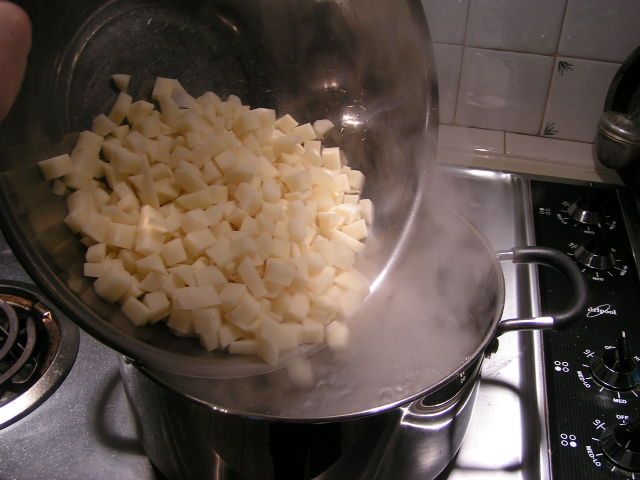
Bring water to a boil in a large stock pot. Pour potato slices or cubes into the boiling water. Allow to parboil for 2 minutes. Drain and put parboiled potatoes into ice water in a large bowl until totally cooled.


 photo PICT0816_zps077bda80.jpg


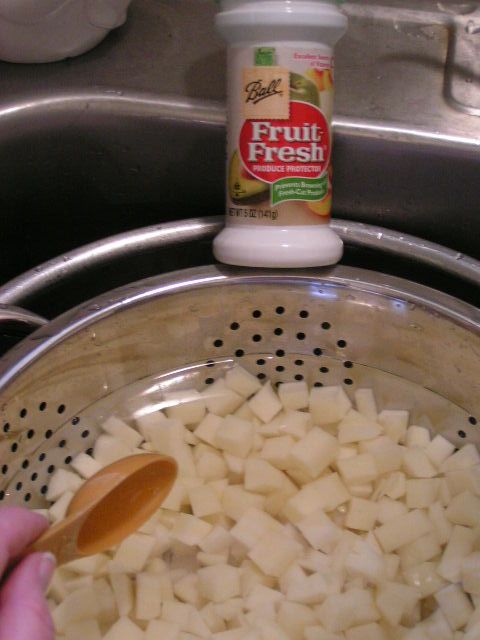
You can add a tablespoon of Fruit Fresh or other citric acid product to the water for added protection against discoloration, according to directions.


 photo PICT0817_zps98eb9285.jpg


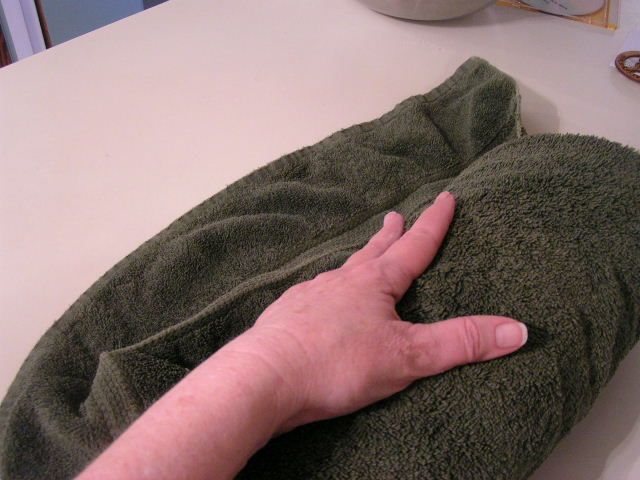
Spread the potato slices or diced pieces onto a large towel to dry. Roll the towel up to squeeze as much water out as possible


 photo PICT0827_zps60a73265.jpg


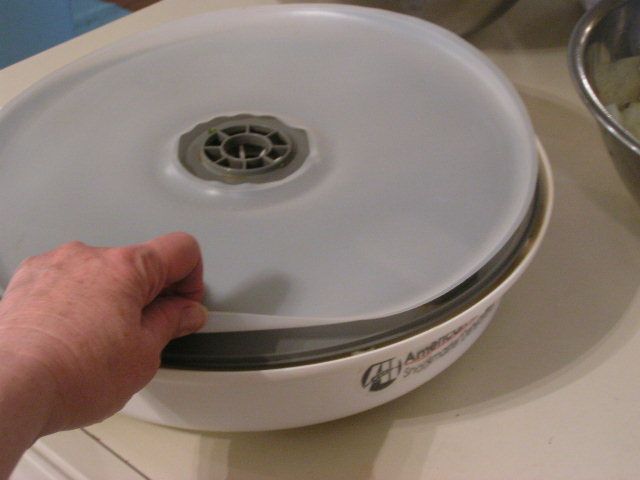
My dehydrator came with a plastic tray to place inside of the larger trays to make fruit rollups. However, I have found that it is also a wonderful edition when drying veggies or fruits that can fall through the cracks when dried all the way. So, I put the tray over the main motor housing of my dehydrator and stack the larger trays on top of that. If anything falls through the cracks it is caught in the fruit rollup tray and easily transferred to a bowl when the drying is finished.


 photo PICT0828_zps36c821b8.jpg


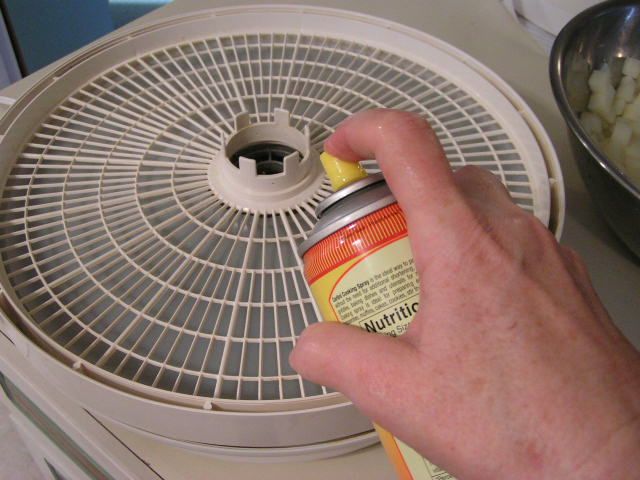
You can lightly spray your racks with oil if you are worried about easy removal of your dried fruits or veggies.


 photo PICT0830_zps70422a28.jpg


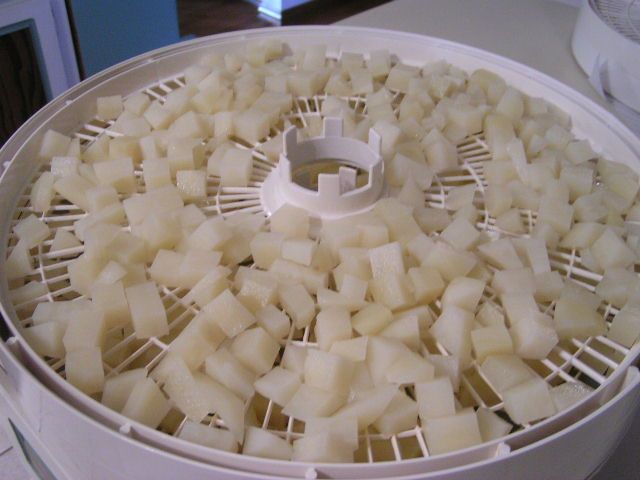
Evenly spread diced potatoes on the racks and stack racks


 photo PICT0833_zps1143eaf8.jpg


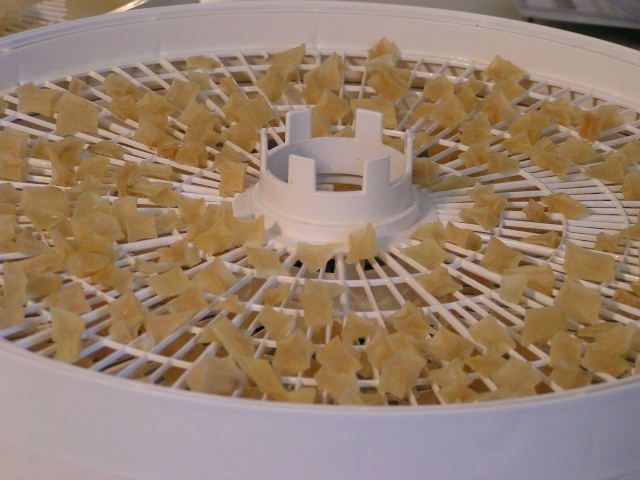
Dry overnight or for 12 – 15 hours. Potatoes should be hard


 photo PICT0832_zps688de371.jpg


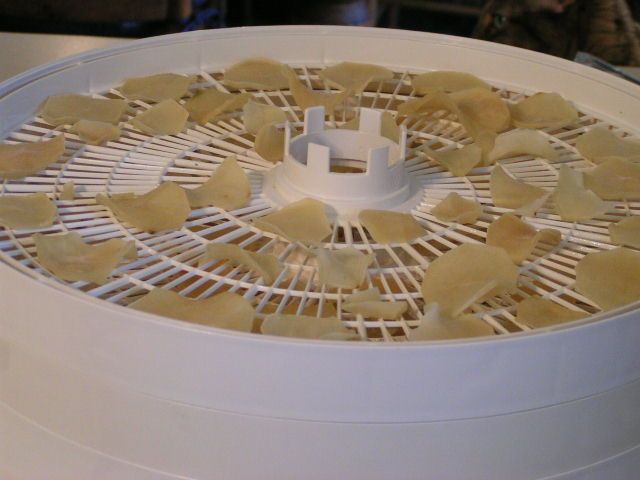
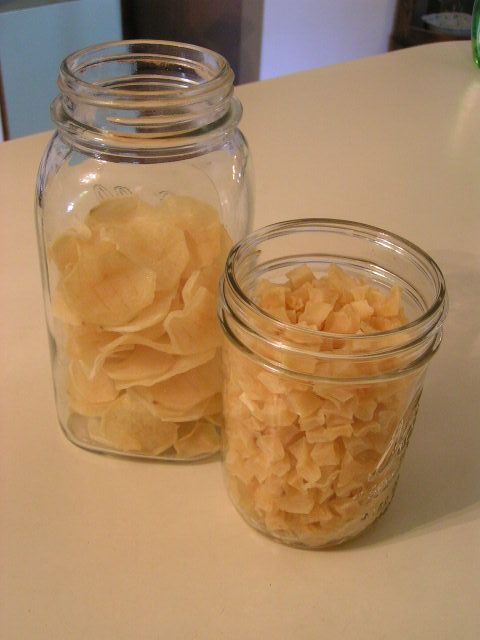
Dried potato slices should look like potato chips


 photo PICT0835_zpsca21ecb8.jpg


Store the dried potatoes into jars and seal with a vacuum sealer or just place a lid and ring in place and fasten tightly. Heavy weight plastic freezer bags work well too


Au Gratin Potatoes


(Or as my friend Janis calls them, “Old Rotten Potatoes”)


1 pkg Shawnee Mills Country Gravy Mix
2 1/4 cups water
OR make 2 cups of your own white sauce from your favorite recipe
1 cup dried sliced potatoes
1/2 medium onion
1/2 cup shredded cheddar cheese
2 tbsp Hormel Real Bacon Bits or 3 slices bacon chopped into pieces
French’s French Fried Onions


 photo PICT0847_zps4996893e.jpg


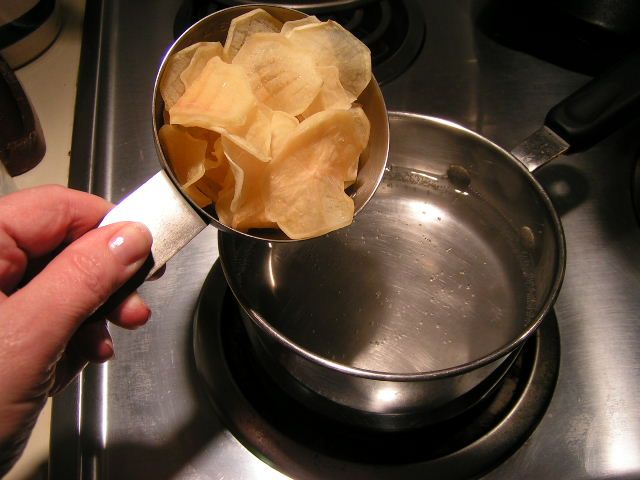
Pour potatoes into boiling water and cook for 15 minutes


 photo PICT0843_zps13a4a0eb.jpg


 photo PICT0850_zps15c9761f.jpg


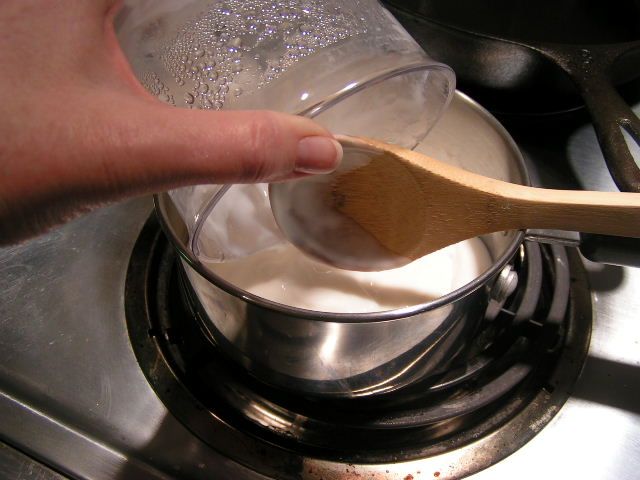
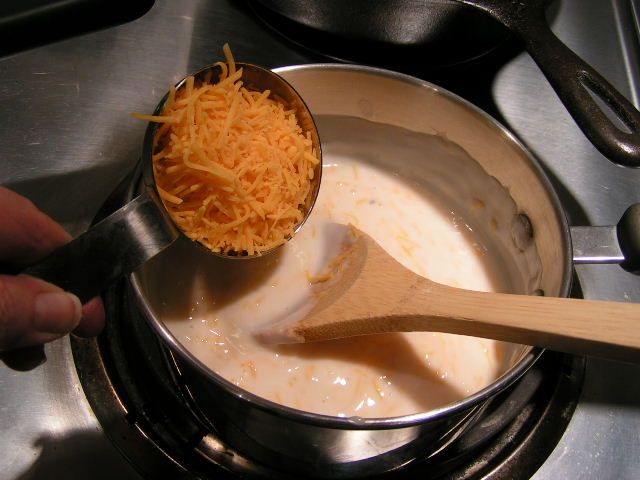
Make gravy according to directions, adding 1/4 cup more water – or make your own white sauce. I like to use the gravy mix because (1) it is fast and (2) it is low fat and low calorie. Add shredded cheese to the sauce and stir until totally incorporated into the sauce.


 photo PICT0856_zpsba0fc650.jpg


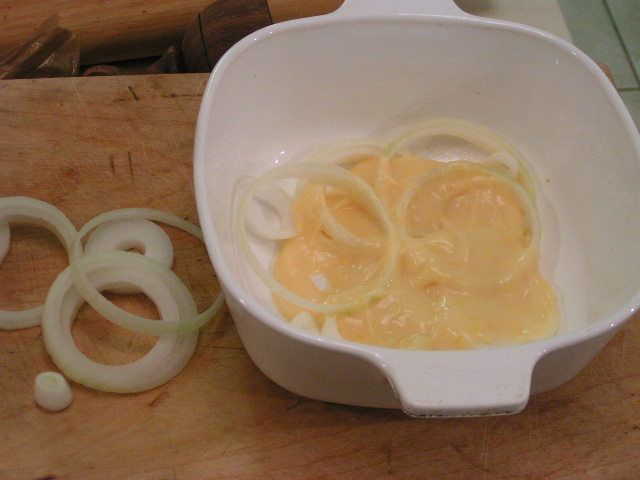
Slice 1/2 onion into rings and place half of them into the bottom of a small baking dish. This is a 1 quart dish. Pour 1/4 of the cheese sauce over the top of the onions.


 photo PICT0860_zps73d5f166.jpg


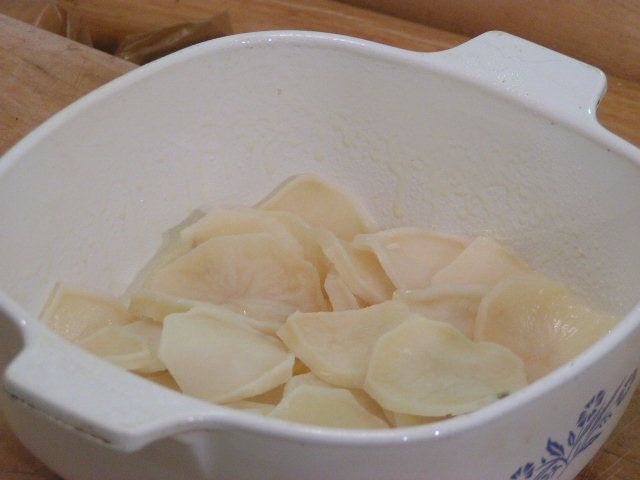
Drain potatoes and layer them in baking dish over onions


 photo PICT0861_zpsfe892d1c.jpg


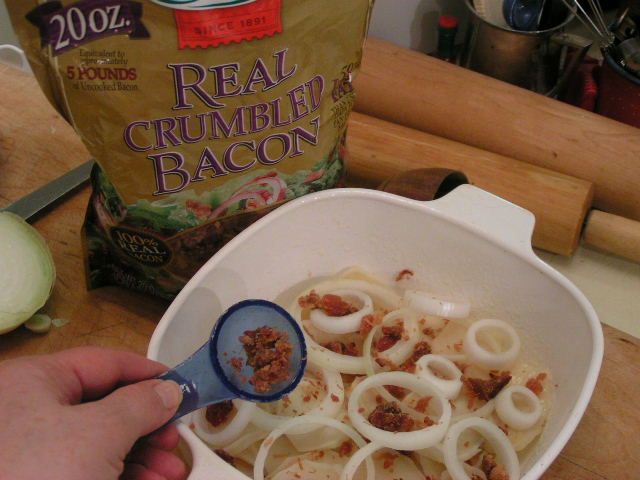
Layer rest of the onions over the potatoes and sprinkle the Hormel Bacon pieces or fresh bacon pieces over the onions and potatoes.


 photo PICT0862_zps10368a75.jpg


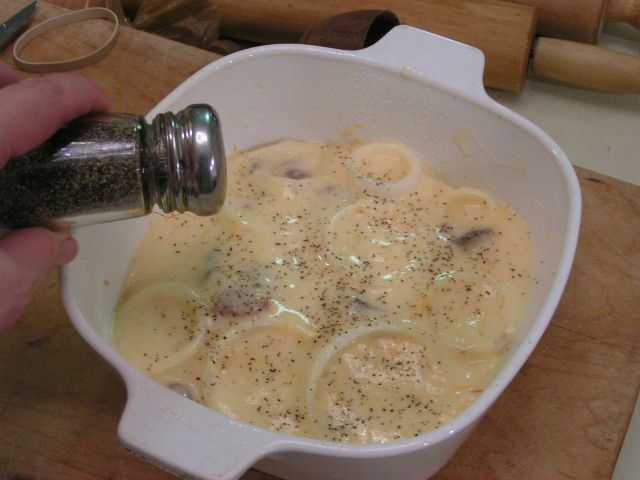
Pour remaining cheese sauce over the potatoes and sprinkle with pepper to taste.


 photo PICT0863_zps82b90c4c.jpg


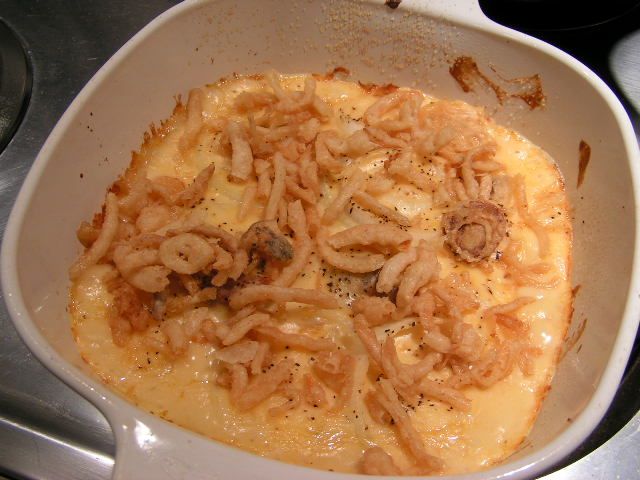
Bake for 30 minutes and remove from oven. Sprinkle with French’s onions and return to oven to cook 10 minutes more


 photo PICT0864_zps12a2c9f5.jpg


Can we say “Yuuuuummmm”?


Happy Cooking!


MB
Please join us on FaceBook!!


Join in the conversation by leaving a comment below and enter our January Giveaway!


Dehydrating Series Pt I – Celery

Monday, January 10th, 2011


Part II

Dehydrating Series Part I

Or

How To Pack 8 Bags of Celery Into

A One Quart Jar


Here in Oklahoma, most of us are tough old birds. We’ve learned the only thing predictable is that there is nothing much predictable in this state. One minute you can bake a chicken in your car and the next minute you’re trying to figure out how to get that car out of a snow drift. Of course, the car can get cooked in one of our prairie fires as well. Ice storms can paralyze daily life for a week and tornadoes can change lives forever. And then of course, there are the hail storms.


So, we Okies have pretty much figured out that you don’t need a government commission on emergency preparedness to tell us to be prepared. We’ve been prepared since the days of the Land Run when barrels of beans, flour and sugar and a crock of sourdough starter meant protection from starvation when the WalMart shelves were empty. Unfortunately, there ARE some city dwellers here who have either forgotten these facts or who moved here from some foreign country, like Los Angeles, who get caught with their rations down. But for the most part, we’re a pretty prepared and flexible lot. I got tickled the other day when a 30 minute program was aired to remind us that we have the likes of tornadoes and such here in Oklahoma. Ya think? A body would have to be living in a cave 24/7 to miss that little bit of reality. Anyway, the Oklahoma preparedness program has been called “Red Dirt Ready” and the name symbolizes the fact the Okies immediately jump in to help after a disaster, getting all covered in Oklahoma’s famous red dirt. That’s true. We do. It’s what makes this state great.


 photo IceStorm1-27-09003_zps64602f77.jpg


 photo PICT0032_zps15eac0a6.jpg


Imagine this on the power lines. That tree totally disentegrated. So do our electric lines!!


Electricity can be a problem around here. It is not unusual for us to be without for a couple of days and in many areas that can run into a number of weeks. That wreaks havoc on one’s frozen vittles if one hasn’t a generator and so it is nice to have plenty of stock that requires no refrigeration. That would seem impossible for such things as fruits and veggies, but not so! The age old art of dehydrating comes in really handy to offer up a pantry full of wonderful and healthy treats that will last a looooong time.


Having a garden each year, I dehydrate stuff yearly, but lately, I’ve been a dehydrating fool. I have been challenging myself to see what I can dry next and how best to use it. I’ve decided to do a series on using a dehydrator with recipes. Today I’m demonstrating celery and broccoli drying. I was inspired to do the celery because our local store, Firelake Grocery, had celery on sale, 3 large bags for $1. The broccoli was on sale as well – two good sized heads for $1. I use a lot of both.


Now, I need to sidetrack here for a sec because I realize that these are not organic items coming from a local grocer. However, with food prices soaring, many people can’t afford the more expensive organic foods and I want to let them know that it’s ok. This is where my faith comes into play. I see 3 large bags of celery for $1 as a blessing and I see God as my provider of blessings. Therefore, I just trust that all I can do is the best that I can and trust God to take care of me. In other words, I eat as healthily as I can and leave the rest up to the Lord. Shoot, I used to break thermometers when I was young and chase the little balls of mercury around on the table for hours with my friends! I promise, I don’t glow in the dark – although I do have very white hair. Do you suppose – – – ?


Back to the celery and broccoli. The long and the short of it is that I bought 16 bags of celery and a lot of broccoli. Neither of these items is anything you can keep for any amount of time unless you dry them or freeze them. I like to freeze celery by chopping it, leaves and all, and spreading it onto a cookie sheet, freezing it hard and then taking it off of the sheet to place it into freezer bags. That way the pieces stay separate and don’t clump up. Frozen celery is a quick addition for sautéing and putting into chicken salad. However, as I said, frozen is useless when there is no electricity. Plus, I don’t have that much freezer space! I froze one bag of this celery and all of the rest I dried.
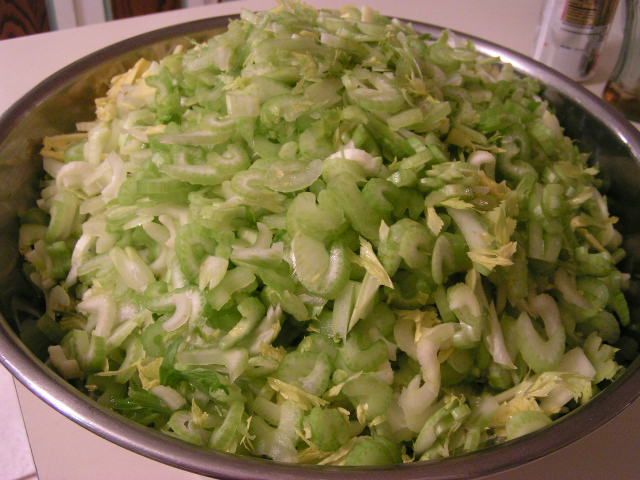

 photo PICT0689_zps26a77d51.jpg


I used electricity on those suckers with a food processor! Beat having to cut them all up by hand. But I could have done it – Really.
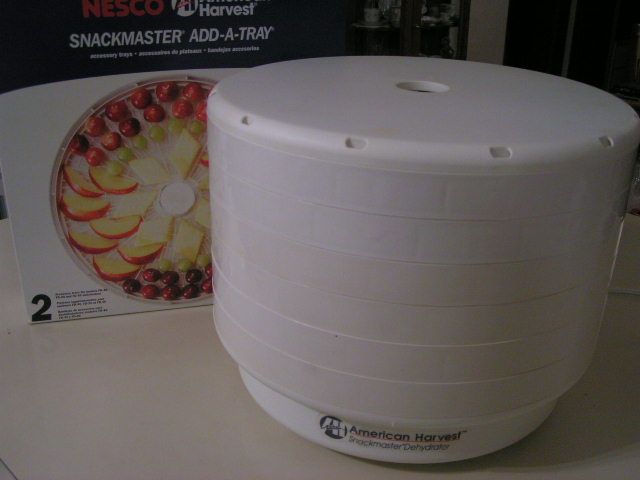
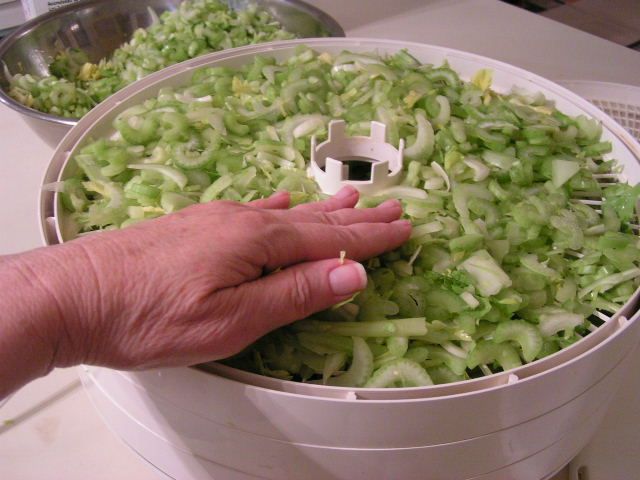

 photo PICT0695_zps4c5bc851.jpg


 photo PICT0694_zps5f6dd73b.jpg


I use an American Harvest dehydrator that I have had for years. Got it at Walmart. They still carry them as far as I know, in season, but they are offered elsewhere as well. I also ordered extra racks from the company. Sprinkle the celery evenly on the dehydrator racks. It doesn’t matter if the celery is several layers thick. Continue adding celery to racks and layer one rack on top of the other. Dry overnight for 12 – 13 hours.
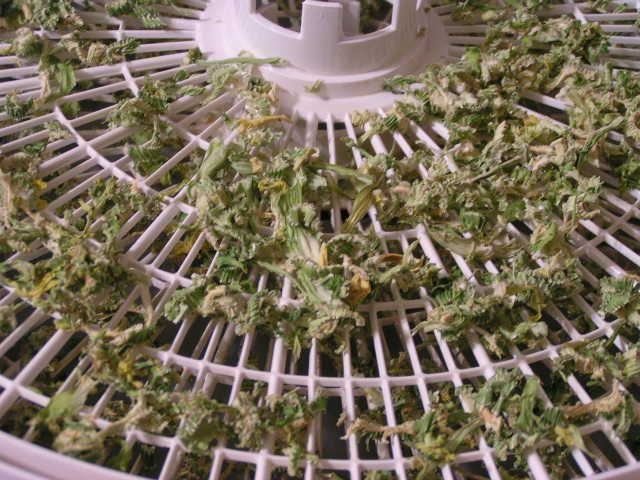


 photo PICT0708_zps8195570a.jpg


The celery should be totally dry and crisp in thin areas.
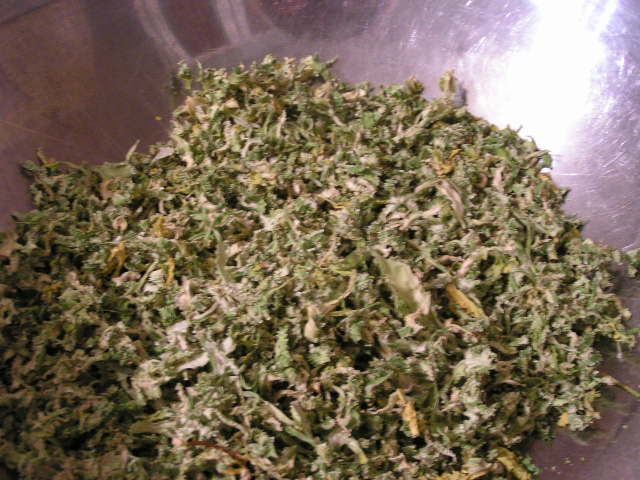


 photo PICT0709_zpsded1406f.jpg


To make it easier to put the celery into jars with less mess, I have a very large bowl into which I shake the pieces. Then, using a canning funnel, I scoop the dried celery into jars. I like to use jars because I can vacuum seal them on my FoodSaver sealer. That takes out all air for good preservation. The nice thing is that you can unseal and reseal these jars with the vacuum sealer.
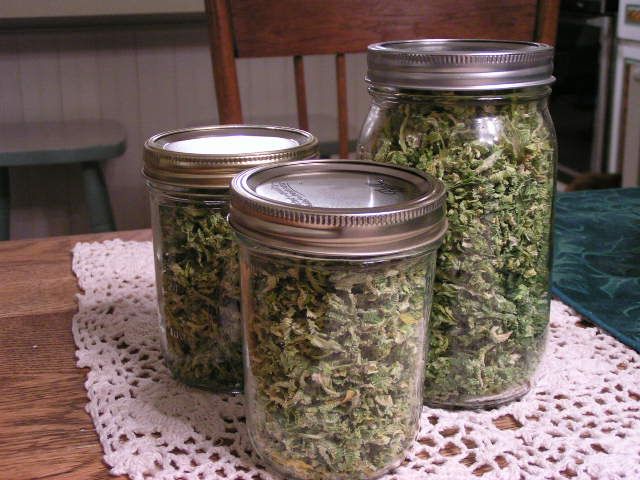


 photo PICT0714_zps4a691c61.jpg


15 bags of celery!! 1 tbsp = 1 stalk of celery
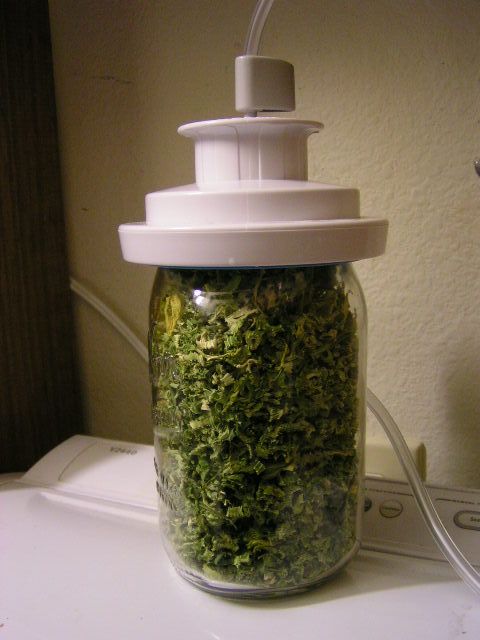


 photo PICT0713_zps26052810.jpg


 photo PICT0771adj_zps04704d9e.jpg


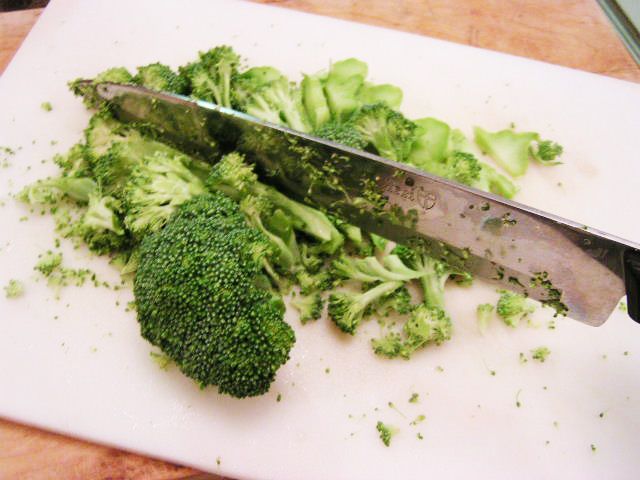
The same can be done with broccoli. You have a choice – if the brocolli is fresh from the garden and tender, I just cut it right up. If it is older or from the grocery store, I blanch in boiling water for 2 minutes, dump into ice water and then dry before cutting it up.
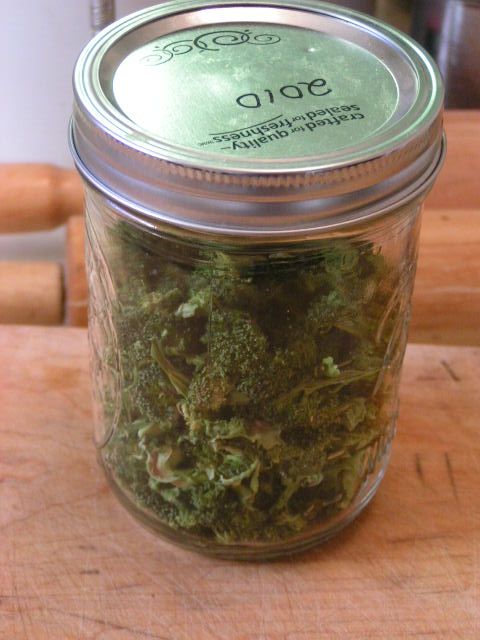


 photo PICT0778_zps0699519b.jpg


Dried Broccoli


 photo PICT1180_zps4453900d.jpg


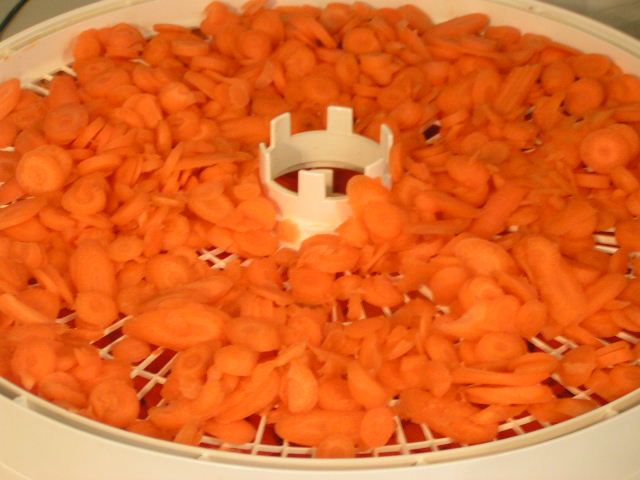
You can dry sliced carrots too


 photo PICT1182_zpsfbe9e539.jpg


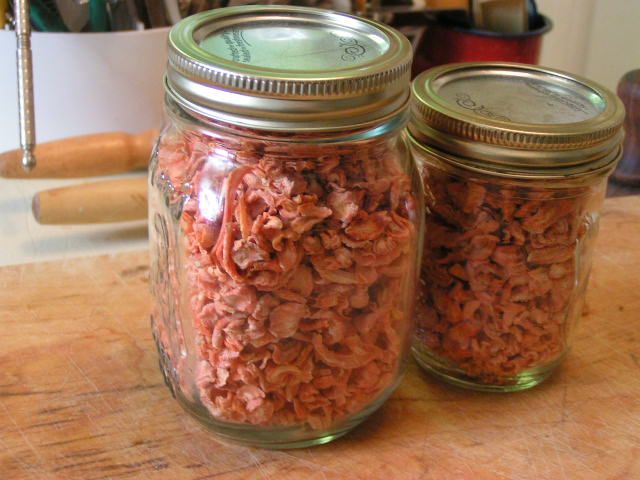
They look pretty in the jar. The one thing about carrots is that they need to be soaked with FruitFresh because they will lose their color over time, if kept for long.
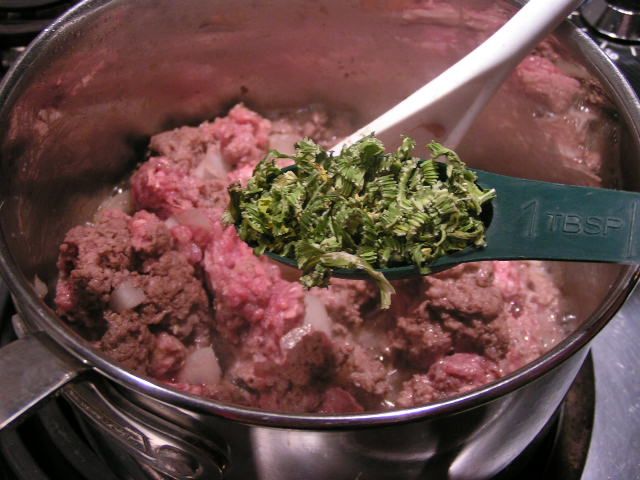


 photo PICT0661_zps1ada8f9c.jpg


The dried veggies are wonderful for cooking. Add dried celery to browning hamburger for homemade spaghetti sauce or to the tomatoes for meatless sauce.
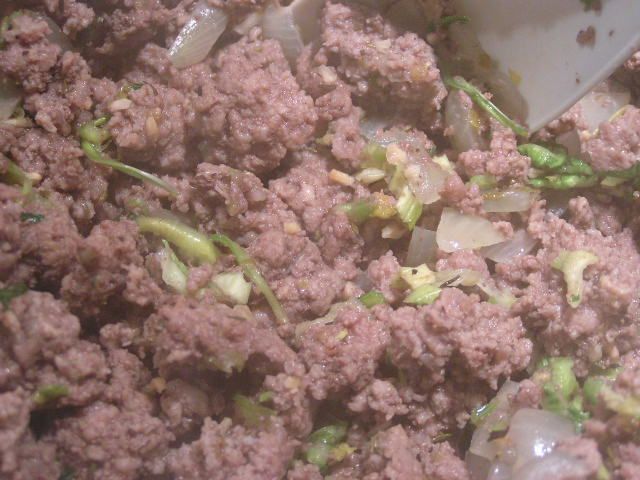


 photo PICT0666_zpsea3d6a74.jpg


It reconstitutes beautifully! Or, for chicken salad or other times you want crispy celery, place dried celery into a bowl and cover with cold water to an inch over the top of the dried celery. Place in the frig overnight. Drain the next day and you have celery like fresh!!


So there you have it. That will keep you busy for a couple of days and by Thursday, you’ll be ready for a recipe. I’ve made a New Year’s Resolution – I’m going to do my dead level best to post twice a week, hopefully Mondays and Thursdays. Just remember what happens to New Year’s Resolutions – they’re kinda all dried up too.


Happy Cooking!


MB
Please join us on FaceBook!!


Join in the conversation by leaving a comment below and enter our January Giveaway!