Archive for the ‘Breads’ Category


Random Musings – Buttermilk Biscuits From Scratch

Wednesday, December 8th, 2010


Random Musings


 photo PICT0657_zpsd3422752.jpg

Biscuit cutters come in all shapes and sizes – from the real utensil to a tin can or plastic cup with holes punched in the top


Isn’t it funny the things we say before we really realize how dumb we sound? Like the clerk who recently told my daughter that she didn’t think the grocery store carried poppy seeds anymore because of the opium in them – Huh??


Or how about someone near and dear to me who announced that the IPhone had an exciting new app that turns your IPhone into a walky-talky, allowing you to talk to other people over your IPhone!! Ya think? (Oh and that’s ‘application’ for those of you out-of-the-technologically-advanced-loop kinda fuddy-duddies)


One of the best was stated by a sport’s caster announcing a Denver Bronco’s game, years ago, who marvelled, “He threw it with his left arm!! He threw it with his left arm!! He’s amphibious, you know!!!”


I’ve had my major share of unengaged brain moments myself. There was the time I didn’t realize that I explained to a friend of ours, who had accompanied us to a reunion, not to be alarmed about one of our cousins who suffered from “necrophelia” (attraction to corpses). I couldn’t understand the shock and recoil of our guest until one of our children whispered to him, “She means narcolepsy“(sleeping disorder). Oh yes. I really said that.


And then, there was the awful time that I got frustrated with one of the old timers who loved to kid me in the grocery store meat department where I worked years ago. Balancing a row of packaged chicken breasts, three deep, along my left arm as I was placing them in the bin, I picked up one package, waved it in front of his face and threatened, “Do you want some breasts in your mouth??!!” There was nothing to do but hide in the big cooler between the hanging sides of beef and pork until the coast was clear.


My favorite story of all time, though, involves a very dear friend of mine (whose name I will change to protect the not-so-innocent), Claude. In that very same grocery that I mentioned as my place of employment, there was a very handsome, macho, young man – the brother of my boss and co-owner of the store – who worked the cash register every so often. His name was Gerald. My boss, had a delightful little tow-headed four year old son, who spent many days with us in the meat department. And his name was Jarod. One day, my friend Claude and his wife had come to the grocery store to shop. Seeing Jarod playing in front of the store, Claude’s wife mentioned, “Oh! There’s Jarod. When you get closer to him, be sure to play “Got’cher Nose” with him because he loves it.” If you have no idea what that game involves, it requires the adult to grab the youngster’s nose, and then, sticking the thumb between the index finger and the middle finger to present it as the stolen nose, the adult declares, “Got’cher nose!” to which the youngster screams in terror, “Give it back!! Give it back!!” It is solely for the sadistic pleasure of adults to terrify, frustrate and generally disturb the psyche of young children.


Now Claude, dutiful husband that he was, pushed the cart around the store and loaded it with groceries alongside his wife. In order to pay for their loot, Claude stationed the buggy at the checkout stand manned by Gerald, my boss’s brother. Claude looked a little timid at first, but just as Gerald rang up the last item and stated how much was owed, Claude reached across the conveyor belt to Gerald’s nose, grabbed it and declared, “Got’cher nose!!” Now, Claude defends his actions by explaining that when his wife mentioned “Jarod”, he heard “Gerald”, and disaster ensued. Gerald, every bit the man’s man, stepped back in shock and stared at Claude in total confusion. Then Claude saw little Jarod and realized his mistake. Leaving groceries, cart, a stunned checkout clerk and a wife, who was in hysterics, Claude exited the grocery as fast as he could and waited in the car until his wife made it out with the groceries. It was quite awhile before Claude set foot in the place again, and those of us who worked in the grocery had a story and a laugh for weeks and weeks.


Well, speaking of Claude – Claude, like Ernest in the old milk commercials, used to pop up at our home every morning because he knew that there would be fresh biscuits and sausage for the taking. He loved biscuits and he always made me feel so appreciated as he devoured a plateful. And so, it is in honor of Claude that I thought I’d post my biscuit recipe. Hey, Claude!! Got’cher nose!


Buttermilk Biscuits From Scratch

2 cups flour (all purpose or whole wheat pastry flour)
1 tbsp + 1 tsp baking powder
1/4 tsp baking soda
1 tsp salt
6 tbsp shortening
buttermilk
oil
butter


 photo PICT0571_zps20cb0770.jpg


Mix all dry ingredients and then cut in shortening with a dough blender also known as a “pastry cutter”.


 photo PICT0574_zpsf1054651.jpg


The mixture should resemble small crumbs


 photo PICT0575_zps17e938bf.jpg


Now here is where I have a tough time explaining because I am a “dump” cook. In other words, I just start dumping in buttermilk until it looks right! If it makes you feel better, start with 1/4 cup and mix that in and then another 1/4 cup and so on until the dough is soft to stir, but not too sticky. I am going to venture a guess at 1/2 cup total buttermilk, but it all depends on the consistency of the buttermilk.


 photo PICT0579_zps81e93e60.jpg


 photo PICT0580_zpsdf4dbfa9.jpg


The dough is ready to put out onto a floured surface like an Oklahoma Pastry Cloth™ I flour my hands and press the dough into a ball and knead it slightly by dropping it onto the pastry cloth, rounding it up again, dropping it and rounding it about 6 times.


 photo PICT0583_zpsc92c0480.jpg


Gently roll the dough to a circle about 3/4 to 1″ inch thick


 photo PICT0584_zps87b9250b.jpg


Cut the biscuits with your favorite sized biscuit cutter


 photo PICT0652_zpsec86cdd6.jpg

 photo PICT0590_zpse22ec749.jpg


Put enough oil to cover the bottom of the pan or baking sheet in which you plan to bake your biscuits. A cast iron skillet works great for baking biscuits.


 photo PICT0655_zps6df53e85.jpg


 photo PICT0593_zpsd92fa8c7.jpg


Place the biscuits top side down into the oil and then flip over to right side up so that the top is oiled. In the photo of the biscuits in the skillet, notice that they are closer together than the ones in the cookie sheet. Putting them closer together makes the biscuits soft on the edges. Separating them makes them crusty all the way around. Bake in a hot oven at 450º for 13 minutes or until golden brown on top.


 photo PICT0660_zps26fab91a.jpg


As soon as the biscuits are out of the oven, I melt a little butter on the tops. I immediately cover the biscuits with foil or a heavy dish towel to steam them for about 5 minutes from their own heat.


 photo PICT0664_zpsfcf327e2.jpg


Now they are ready to put on the table!


 photo PICT0665_zpsb14b6f98.jpg


Any leftovers can go into a freezer bag and stored in the freezer. Just pop one out and nuke it in the microwave, or place it in some foil and bake it in the oven at 400º for about 10 minutes and it tastes just like it is fresh!


Happy Cooking!

MB
Please join in the conversation by leaving a comment below. And join us on FaceBook


Belgian Waffles

Monday, October 11th, 2010


♪♪I’m Stuck On You♪♪


Of course, with any new-fangled idea, there were bugs, the major one being that when the cook used one of these pans, what looked like bugs appeared in the scrambled eggs or the white gravy, due to flakes of the nonstick surface loosening. Small sheets of Teflon® floated in the cooking food and small, shiny hints of the base metal were exposed. If you were the least bit paranoid, you worried that your family was ingesting some poisonous substance that the government had invented to get rid of half of the population to save the planet. If you weren’t paranoid, you surmised that maybe Teflon® wasn’t such a great invention after all.

Then came the nonstick surface that was co-mingled with the base metal of the cooking utensil. That was better. I think that T-Fal® was one of the first. It worked pretty well, but we quickly figured out that nonstick didn’t really mean, NONSTICK. It just meant “not-as-likely-to-stick-especially-if-you-use-oil-to-coat-the-pan-like-you-did-for-your-old-pans-that-were-not-nonstick.” I had a whole set of T-Fal® and still have a few cookie sheets, but while they were the “thing” in the ‘70’s, as I became more and more entrenched in the kitchen, I gravitated back to my perfectly seasoned, cast iron skillets and wonderful three-ply bottomed, heavy-weight, stainless steel pots and pans. Wouldn’t trade them for the world.


It is with this background of wisdom that I should ask myself, “What were you thinking?” because, recently, I couldn’t resist the purchase of a nonstick surfaced Belgian waffle maker that was on sale. Actually, another waffle iron was on sale, but the store was out and because I had such a pained expression on my face and the manager probably thought that my gray hair indicated that I might be hard to get along with, I was handed a more expensive, with more gadgets, Belgian waffle iron at the sale price. It had a timer that beeped!


I took my prize home, predictably thrilled at beating the system of sales, and quickly unboxed it to prepare for the next day’s breakfast surprise for Hubby – waffles topped with strawberries and whipped cream. I read the directions for the batter – easy enough – decided on how I was going to change it (added vanilla) because it isn’t in my nature to just follow directions, and made sure that I had all ingredients required. I got up the next morning, whipped up the batter in a matter of minutes, heated the waffle iron until the light went out and carefully measured ¼ cup of batter into each section. Closing the lid, I flipped the whole assembly on the stand, over to the opposite side as per the directions. Steam gushed from the seam of the surfaces and a wonderful sizzling sound let me know that breakfast was on its way. The timer automatically began its countdown.


 photo PICT0021_zpsaeee36e9.jpg


At the ear-piercing shriek of the waffle siren, I jumped out of my skin and rushed to flip the waffle iron back to the other side of the stand. I gently lifted the lid – well – attempted to lift the lid, but nothing separated. I got a plastic fork and slipped it between the layers of metal to carefully pry them apart but nothing budged. But it’s a nonstick surface! The box said so…. no oil needed. It’s 2010! It’s new and improved! I flipped it back to the other side and tried gently pulling the sections apart. No dice. I turned it over to its original position and thought, “Maybe I’m not pulling hard enough.” I gave it a hard tug and jerked the top lid off of the bottom surface. One half of the waffle traveled with the lid and the other half stayed on the bottom.


Now you know that you are NOT to use ANY metal utensils on nonstick cookware. Plastic only. And so, I took the plastic fork and carefully slid it under the top half of the waffle. Fully expecting for the waffle to lift off the surface, I was sorely disappointed. The tines of the fork slipped through the cooked dough, and succeeded only in removing a couple of chunks. I tried a different location with the same results. At this point, I was frustrated and I started digging at the center of the mess. Some of the pastry lifted out of the multiple indentions, but the majority remained adhered to this “nonstick” epitome of false advertising. The tines on the fork broke.


Of course, it never occurred to me, at the time of purchase, to see if the two cooking surfaces could be removed for easy cleaning. And of course they could not be removed. They opened into a gigantic “L” with teeth, every tooth encrusted with waffle plaque. The lettering on the base cautioned, “DO NOT IMMERSE”. Why would I need to immerse it?? It is nonstick, for crying out loud! My only recourse was to concentrate on one surface at a time, digging out as much of the now rock-hard waffle as possible. I poured hot water just to the batter level to soak and finally washed with a brush, repeating the process for the other side. This took most of the morning. Did I mention that my husband ate cereal that day?


 photo PICT0030_zpsc9111c0e.jpg


Yes, all of the labor saving brilliance that is dangled before us cooks have obviously been created by inventors who never really watched the process of food preparation and cleanup, let alone attempted it themselves. However, I will say that one such item HAS put its comrades to shame, as it has proved to perform in exactly the way it was intended. It has made available for my dear husband, the Belgian waffles that he loves, baked on the aforementioned, offending waffle maker. This product states on its label, “no stick, fat free, cholesterol free, calorie free, sodium free, naturally clear”…Yep. It’s spray olive oil in a can and it works like a charm. Who would have ever thought of putting oil on the surface of a cooking utensil to keep food from sticking? What will they think of next??


My Belgian Waffles


1 3/4 cups all-purpose flour or pastry flour
1 tbsp baking powder
1/2 tsp salt
2 tsp sweetener (honey, sugar, splenda, etc.)
1 3/4 milk (2%, whole, skim)
2 eggs, separated
2 tbsp vegetable oil
Possible additions:
1 tsp cinnamon
1/2 cup chopped pecans


 photo PICT0371_zpsc5aa2d2d.jpg

Mix all dry ingredients in a batter bowl or large mixing bowl


 photo PICT0372_zps9f0e185f.jpg

Separate eggs and set aside to whip. In a separate bowl, whisk together eggs, milk and oil


 photo PICT0373_zps403e483f.jpg

Add mixture to dry ingredients and whisk until batter is formed. It will be thin


 photo PICT0384_zps0fa60ae8.jpg

Whip egg whites until white and fluffy and fold into batter.


 photo PICT0387_zps15ccb40b.jpg

Pour batter into oiledwaffle maker and cook according to directions.

 photo PICT0392_zps35ea6b0b.jpg

Pile chopped and sweetened fruit on top of buttered waffle and add syrup and whipped cream if you really want to go the max. We fix these for supper too!

Happy Cooking!! MB

Please leave your comments at the link below! And join us for updates on Facebook by clicking on the icon.


Sweet Cornbread

Sunday, October 3rd, 2010

A Corny Treat


 photo PICT0186_zps780fb007.jpg


In answer to a request by reader, Marcie, here is my recipe for cornbread that I have used for years and years. I love it because it has just a tad bit of “sweet” to it, it is firm and is just tasty. The trick to it, though, is the pan I use. You can find these pans at hardware stores, Bass Pro Shop and I have even seen them at Walmart. A new skillet must be “seasoned” before use – wiped with a thick coat of cooking oil and baked upside down on a cookie sheet in a 350º preheated oven for 1 hour. This should be repeated often after cooking, until the surface becomes nonstick. If you want to go the “authentic” route, you can look in antique stores. I have two of these cornbread pans. One was my grandmother’s and the other was found at a junk shop.


These cast iron skillets have dividers to make 8 pieces of cornbread. The secret to baking amazing cornbread in them is to put shortening in the bottom of each section and to place the pan in a 450º oven to melt the shortening. Have the cornbread batter ready when the skillet is removed from the oven and then pour the battle into the piping hot pan to fill each section 1/2 to 2/3 full. The batter will sizzle and bubble. Of course, you can do this same process with a regular cast iron skillet, and then slice your bread yourself. Melted shortening in the cast iron skillet also helps to keep it seasoned for the next batch. To wash the pan, just wipe out with a paper towel or damp cloth and let air dry.

Cornbread Recipe
1 cup all purpose flour or pastry flour
1 cup plain white or yellow corn meal (not the mix)
4 tsp. baking powder
1 tsp salt
1/4 cup sugar or honey
2 eggs
1/4 cup shortening or butter
1 cup milk
Directions
In a bowl, add flour, corn meal, baking powder, salt and sugar (if using honey add in with milk and eggs) and cut in shortening or butter with a pastry blender or two knives. Make a well in the center. In a separate bowl, whisk together milk and eggs and honey if using instead of sugar. Add the mixture to the dry ingredients and mix with a large spoon until a batter is formed. Lumps are no problem. Immediately pour batter into hot iron skillet and bake in a 450º oven for 15-20 minutes or until golden brown. Do not add the liquid ingredients to your mix until you are able to immediately put the batter in the pan. The baking powder starts acting immediately on the addition of the liquids. Lift out sectioned pieces with a knife or, if using a plain cast iron skillet, invert onto a rack and then onto a plate and allow to cool before slicing. Serve warm or cold.


 photo PICT0179_zps346f5d09.jpg

Batter is the thickness of pancake batter


 photo PICT0180_zps0eca4fa2.jpg

A divided cast iron skillet makes the best cornbread!


 photo PICT1250_zps588a8ff5.jpg


Get out the butter and jam and dig in! Goes great with the soup in the last post!


Happy Cooking! MB


Please join in the conversation by leaving a comment below. And join us on FaceBook


Whole Wheat Sandwich Bread

Tuesday, December 15th, 2009


“Who Will Help Me


Make The Bread?”


 photo TheOkieHomeMaker_zpsd701b0ad.jpg


Christmas is coming and I thought that I would post my favorite bread recipe just in time for the big day. It is an easy recipe and makes the most delicious bread that can be used for everything from warm, buttered slices alongside a plate piled high with casseroles, potatoes, ham and turkey, or for ham or turkey sandwiches, or for French toast early in the morning before presents are tackled. I use this recipe to make hamburger and hot dog buns too. We love this homemade bread so much. And it is good for you too! (how’s that for a ’60’s ad?)


My bread is made with home-ground Prairie Gold, hard, white, Spring wheat, although you can use any flour you like from the store. Sometimes I do use freshly ground, hard, red wheat, but the mild and nutty flavor of the Prairie Gold is just delicious. I grind my wheat on a Lil Ark hand grinder, using stone burrs, that my Mr. Wonderful converted to an electric grinder. Would you like to know just how brilliant he is? Well, I’m going to tell you anyway. He replaced the handle with a flywheel that is connected to a larger flywheel by way of an automotive “V” belt. The larger flywheel is connected to the motor of an old trash compactor. The trash compactor gave up the ghost long ago and was compacted itself – minus its motor. Anyway, my Mr. Wonderful housed the motor in a wooden box with a switch on the outside and mounted the entire assembly on a long board. I think that he should have painted the whole thing a deep forest green and added a quiet, gurgling brook type of fountain to give the semblance of an old grist mill, but he insisted that water and electricity don’t mix very well, so my grinder just looks like a plain, wooden box. The nice thing is that if the electricity goes out, my Mr. Wonderful can just unhook the flywheel, add the handle and I am back to hand-grinding by kerosene lamp light.


I know, I know. There are electric mills out there that grind really fast with metal burrs. The best supplier I can recommend can be found at Sonrise Whole Grains where you can also purchase bags and buckets of all kinds of grain. The Bartons are friends and I can vouch for their servant attitude and willingness to help you in any way possible. I do plan on purchasing one of those mills soon to grind the soft, white wheat that I use for biscuits, pie crust and pastry. It tends to gum up my stone burrs. But there is just something about my stone ground flour that makes the bread taste that much more special.


Freshly ground, whole wheat flour must be kept in the refrigerator or freezer once ground. It breaks down quickly at room temperature. I keep my flour in the freezer and then, when I am ready to make bread, take out whatever I need about an hour ahead of time to bring it back to room temperature. I also sift my flour. Many people do not, but I find that if I sift it two or three times, my breads are lighter. Of course, flours bought at the store are pre-sifted. I use my grandmother’s sifter that has the turning handle on the side. In January, I will start carrying this same kind of sifter. The sifters with the squeeze-trigger handles do not work well for the grainier, freshly-ground flours. When sifting, a little of the larger wheat germ is sifted out, but I keep that in a ziploc bag in the frig and sprinkle it on cereal, add it to baked goods or mix with peanut butter for crackers or a sandwich.


I’m sure that is all more information than you wanted, so now for the recipe:


Whole Wheat Sandwich Bread

1/4 cup honey or sugar (1/8 if you want less sweet taste)
1/2 tbsp salt
1/2 cup warm water
1 egg white
3 1/2 tsp yeast
3/4 cup warm milk or 3/4 cup warm water and 1/3 cup powdered milk
1/4 cup canola oil or melted butter
3 – 3 3/4 cups flour
2 tsp dough enhancer

 photo PICT0391_zpseczqjwgl.jpg


 photo PICT0394_zpsptqzmfnx.jpg


In a glass container, add a pinch of sugar to 1/2 cup warm water and sprinkle yeast over the water. I shake the container a little to force water over the top of the yeast. Allow to “proof” until yeast is bubbly on the surface of the water. I use SAF yeast that can also be purchased from Sonrise Whole Grains It is a fast rising yeast, but you can use any yeast, including the rapid rise variety.


 photo PICT0397_zpsecisqaeu.jpg

In a mixing bowl, add honey or sugar, salt, egg white and oil and powdered milk if not using warm milk.


 photo PICT0407_zpsx5mxm1mm.jpg


Add the proofed yeast/water and 1/4 cup flour or whole wheat flour. Mix on low.


 photo PICT0409_zpsbvdln4pr.jpg


At this point, if using milk, add the 3/4 cup warm milk. (I use the powdered milk and warm water mixture) Add one cup of flour or whole wheat flour and two teaspoons dough enhancer.


 photo PICT0412_zpsyagrb8dh.jpg


Because of my Mr. Wonderful’s tastes, I add one cup of regular, white flour in with the whole wheat at this point and then continue with whole wheat but you can use regular flour all the way through. Mixing the two makes it just a bit lighter than using all whole wheat. However, you may want to use all whole wheat. It is all a matter of preference.
LATER NOTE: I have since found that sifting the fire out of my whole wheat to add lots of air and volume makes all the difference in the world, thus not requiring any white flour. I also use a 1 to 3 ratio of barley flour to whole wheat which just gives it an added punch. I mix the two flours together and then measure out 3 to 3 3/4 cups for the recipe.


 photo PICT0418_zpsooth9v4l.jpg


Adding 1/2 cup of flour at a time to equal 1-2 cups, continue mixing until the dough is firm but still sticky. This dough does not pull away from the side of the bowl and if it does, it means you have added too much flour. On medium speed and using dough hooks, knead/mix the dough for 8-10 minutes until smooth.


 photo PICT0420_zps6c1ikc6h.jpg


Scrape the dough onto your Oklahoma Pastry Cloth™ and turn to coat all sides with flour.


 photo PICT0424_zpsx6gwwh8q.jpg


Gently knead dough to form a smooth ball using the remaining flour.


 photo PICT0429_zpsbjte8fmy.jpg


Pour 1 tbsp olive oil into the bottom of a bowl that is twice the size of the bread ball, and place dough topside down into the oil. Turn the dough back upright so that top is oiled. Cover with a warm, wet towel. Allow dough to rise in a warm, dry place until double – anywhere from an hour to two hours. I like to warm my oven to 150 degrees and then turn it off. I then place the bread dough to rise in my warm oven.


 photo PICT0431_zpsiu6zidod.jpg


 photo PICT0434_zpstipz5xam.jpg


When the dough has doubled, roll it out onto the pastry cloth and pat it out into a thick circle.


 photo PICT0438_zpsiaxgkfn9.jpg


 photo PICT0440_zpsb4g0kydk.jpg


Oil hands with olive oil and proceed to roll dough toward you like a jellyroll. Using your hand, seal edges as you roll, pressing down and under the rolled part. Continue oiling hands to do this until it is rolled. Tuck under the edges to form a loaf. Or, if you want to make hamburger buns instead of rolling into a loaf, cut out buns with a large biscuit cutter.


 photo PICT0443_zpsbfwnibxz.jpg


 photo PICT0446_zpslgnzgqzt.jpg


 photo PICT0448_zpsgu2dwfae.jpg


Oil and flour a loaf pan and place loaf into pan. For buns, place them on an oiled and floured cookie sheet. Cover with warm, wet towel and allow to rise until double – anywhere from 30 minutes to an hour. Hint: If the towel sticks to the dough as you are trying to lift it off after rising, just spray water on the towel and it will lift right up. This bread has doubled and is ready to go into the oven.


 photo PICT0451_zpss8fke0uj.jpg


 photo PICT0452_zpsyrbg4nmq.jpg


Preheat oven to 350 degrees. Bake bread for 20 minutes or until golden brown. Turn loaf out onto a rack to cool. I cover my bread with a tea towel to allow it to cool slowly.


 photo PICT0457_zpsfuo0oyxf.jpg


Now you are ready to slice your bread! Serve it warm with butter and jam. Or, if you have used the recipe to make buns, grill up a juicy burger to sandwich between a bun.


I hope you enjoy this recipe as much as we do. It is actually a very fast recipe for bread and is light as a feather. Have a wonderful Christmas and here’s hoping that you make special time for those you love!!


Happy Cooking!


MB
Please join us on FaceBook!!


The Oklahoma Pastry Cloth™ Company on FaceBook

Join in the conversation by leaving a comment below!

Sourdough Bread on the Oklahoma Prairie (and recipe)

Tuesday, November 3rd, 2009

Sourdough bread is the oldest kind of leavened bread known to man. It is earliest recorded in Egypt around 1500 BC, but how it was discovered is total conjecture. There are all kinds of good stories regarding the discovery of the potent dough, but it is anybody’s guess how the first person suddenly decided to use wild yeast to make their usual flatbread rise to a fluffy loaf. Of course, with all of the brewed products available back then, like wines and beers, it is conceivable that some might have spilled into flatbread dough or that dough was left out and attracted the plentiful wild yeasts to produce a bubbly sponge, but I’ll leave you to your imagination to come up with “the story” of how sourdough starter was discovered.

My own imagery conjures up a man who stumbles home after a night out with the boys, precariously grasping a clay jar of strong Egyptian beer (brandname Pharoah’s Choice), and occasionally managing to find his lips to take another swig. As he wobbles into his humble abode, he finds his dutiful wife on her knees, mixing a batch of dough to bake for the next day’s flatbread allotment. Mr. Ancient Egyptian lunges toward his wife to give her a drunken hug, as she stands to greet him, and as if in slow motion, the clay jar of suds pitches out of his loose grip, flies through the air and lands squarely on the floor, shattering to pieces and sending waves of dark ale into Mrs. Ancient Egyptian’s bowl of flour and oil. Mrs. Ancient Egyptian lets loose with a string of hieroglyphics and cries over her ruined bread. The mess goes into the trashbin, also made of pottery, and the angry wife stomps off to bed. Next morning, she awakens to find an oozing, bubbly live thing, growing in her trashbin and out of curiosity, the Mrs. pours the doughy sponge into her floured breadbowl because she didn’t have an Oklahoma Pastry Cloth™, picks out any bones that had also been thrown into the trash from dinner the night before, adds some flour and then bakes the dough in her 400 degree brick and mortar oven. Out comes a tall, fluffy confection that she tentatively samples. A smile gradually replaces her angry frown and she comments, (in ancient Egyptian of course) “This bread is tangy and light – a veritable pastry worthy of royalty! I would think that it would be quite good with jam and tea.” As a result, she forgives her husband and encourages him to come home and drop his ale into her bread on a regular basis. I’m sure that it happened that way.

Sourdough starters are made with a variety of ingredients. Depending on the taste desired, milks, potato water, sugars, and various types of flours are incorporated to create a “sponge”. This sponge is continually “fed” to keep the yeast alive and thriving and as it is nursed, it develops its own particular flavor. Personal taste determines which characteristics are desirable or not.

Just a bit of historical trivia: According to www.kitchenproject.com, during the gold rush days in San Fransisco, California, a bakery run by the Boudin family from France used sourdough culture to create a unique and famous bread that miners enjoyed every morning. Since 1849 they have been using the same sourdough culture, which they call a “Mother dough” and the same recipe. So important is their “Mother Dough” it was heroically saved by Louise Boudin during the Great San Francisco Earthquake of 1906. Here in Oklahoma, sourdough starter has been used on the prairie through days of wagon trains, landruns and cattle drives to produce biscuits, pancakes, muffins and bread. It doesn’t take long to find a class here, where one may learn to create these morsels in a dutch oven nestled in the coals of a campfire.

Every sourdough sitter considers their starter to be the best. As in the case above, many starters have been handed down through generations of bread bakers. However, it is possible for you to start your own legacy and tweek it to your own taste. You can make the base recipe that follows, and then divide it to keep some going as a pristine culture and experiment with various additives like milk or potato water instead of just plain water on the rest. Also, as your culture becomes exactly what you like, it is a good idea to pour some onto wax paper and allow it to dry into a flat sheet that can be broken into small pieces and stored in a tightly sealed jar. If something horrible happens to your live culture, you can start over by adding two tablespoons of dried culture with 2 tablespoons of water to reconstitute and bring to room temperature and then start your usual process over again with this base.

If you are not going to use your starter for a time, you can put it in a jar with a tight fitting lid and store it in the refrigerator. I have also had luck with freezing cubes of my starter to then thaw to room temperature and start the process over. And one last tip that I use: I use bottled spring water to hydrate my starter, as city water has chlorine that kills the yeast and well water can have bacterias that ruin the taste.

I have tried a variety of starters and have come up with my favorite that is very, very simple. If you wish to be truly “pioneer”, then you would omit the yeast and let this starter stand for three days, stirring once each day, to capture any wild yeast in the air. When you start seeing bubbles, you start the “feeding” process. I personally like the flavor achieved from adding a little powdered yeast to get started. Again, if you wish to be “pioneer” in making the true, slow, sourdough bread then you would follow my bread recipe, ommitting the yeast and allow your dough to rise for as long as 24 hours, but I am including in the recipe, two teaspoons of yeast in case you do not wish to wait that long to have bread and still have the sourdough flavor.

Starter Recipe

3 tbsps whole wheat four
2 1/2 tbsps warm water
1 tsp powdered yeast

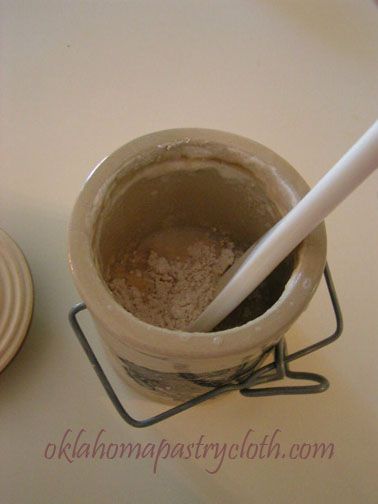
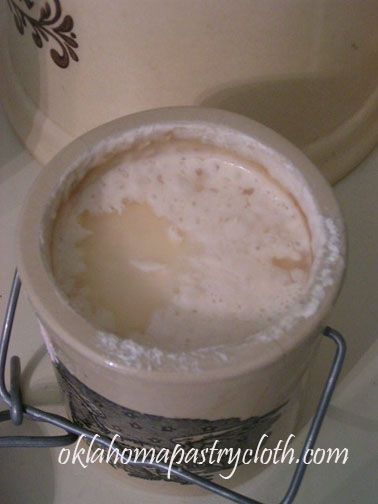
In a crock container or other opaque glass jar, mix ingredients with a wooden or plastic spoon. Do not use any metal utensils or containers. Allow to stand overnight, covered with cheese cloth. Next day, stir in 2 more tbsps of flour and 1 1/2 tbsps water. Stir and let stand overnight. Continue this process each day of using 2 tbsps flour (you can use white flour at this point) to 1 1/2 tbsp water until you have approximately 1 1/4 cups of starter. At that point, you have enough to make a loaf of bread. You must have enough starter to be able to remove 1 cup and still have some left to continue feeding for the next time. As the starter grows, it should be bubbly and pungent. Overnight, if a liquid rises to the top, just stir it in and continue feeding. Each time you make bread, it is a good idea to transfer all of the starter into a clean jar or bowl and wash the container that houses the starter to keep mold from ruining it. Dry the container and return any culture that is left after removing a cup and start the feeding process again.


Photobucket


Photobucket


To make bread:

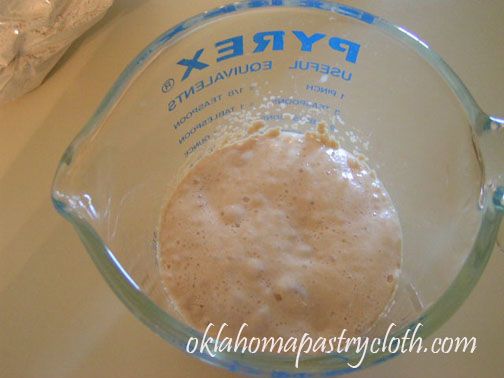
1 cup sourdough starter at room temperature
3/4 cups warm water
2 tsps yeast
2 tbsps honey or sugar
1/4 tsp baking soda
2 tsp dough enhancer (lecithin)
3 cups high gluten flour either whole wheat or white or combination of both


Photobucket


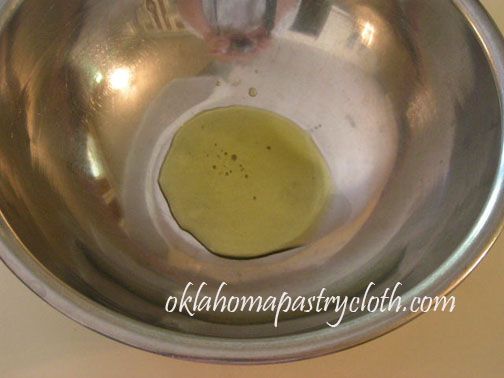
Sprinkle yeast over the surface of the 3/4 cups warm water and allow to “proof” or dissolve in the water and bubbling to the top.


Photobucket


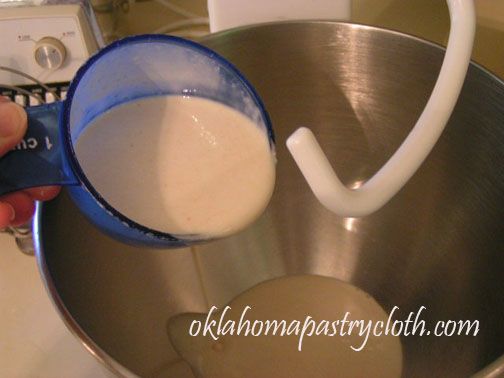
In a mixer with a dough hook, place starter, honey or sugar and yeast water along with one cup of flour, salt, enhancer and soda. Mix to blend.


Photobucket


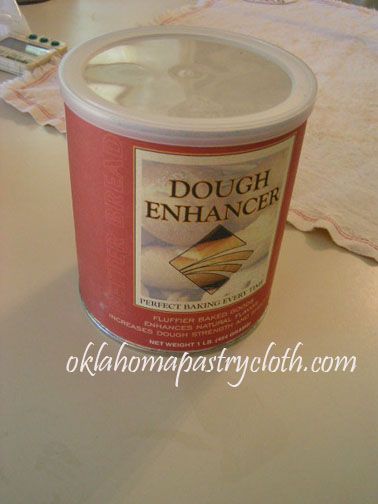
Dough enhancer can be purchased at Sonrise Grains


Photobucket


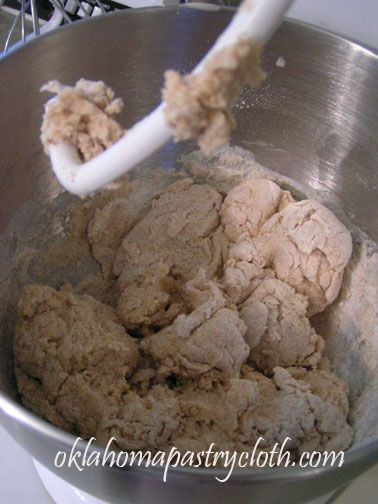
Gradually add second cup of flour. Continue mixing. Add third cup in stages because you may not need all of it. The thickness of your starter will determine how much flour you use. Your dough should pull away from the sides of the bowl. If it does not, add more flour. If it appears too dry, you may add a little more water. This picture shows the dough too dry.
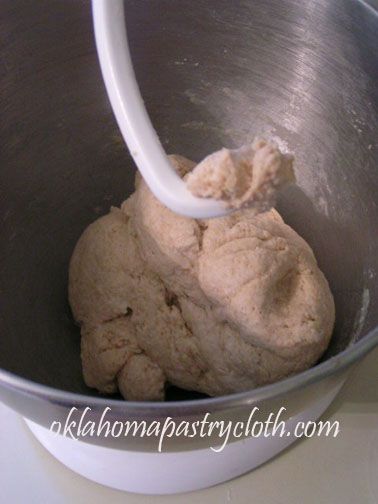

Photobucket


This is better


Photobucket


Using the dough hook on low speed, knead the dough for 8-10 minutes. It should be smooth and easily formed into a ball.


Photobucket


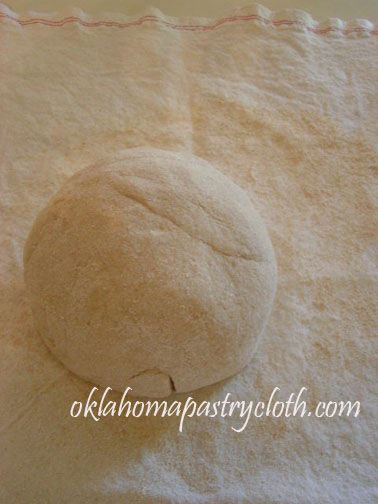
Put the dough out onto the Oklahoma Pastry Cloth™ and form into a ball. Wrap in plastic wrap and allow to rest for 10 minutes.


Photobucket


Photobucket


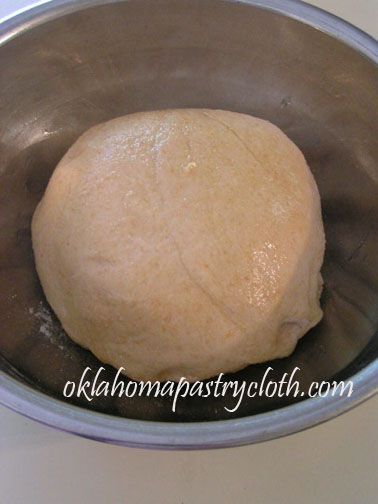
In a bowl, pour a tablespoon of olive oil into the bottom and place the dough, topside down, into the oil. Turn right side up to coat the dough ball in oil.


Photobucket


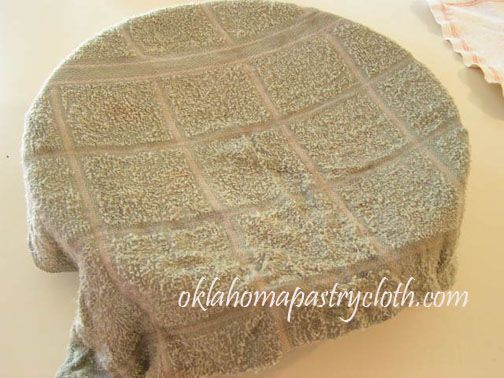
Cover with a warm, damp towel and allow to rise until doubled. If not adding yeast, allow to rise in a bowl that is covered with a wet towel and then covered in plastic wrap. Rise for anywhere from 8 -12 hours until doubled. The longer the rise, the stronger the flavor.


Photobucket


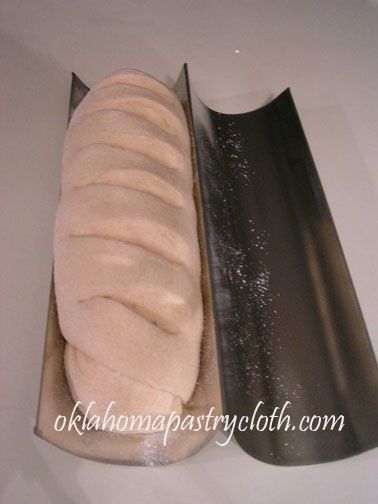
When risen, punch the dough down and put out onto pastry cloth and pat out to 1 inch thick. (If not using yeast, knead in a little flour.) With oil on your hands, wipe the dough with oil and then begin rolling toward you like a jelly roll, firmly pressing the edges into the dough. Continually oiling your hands, continue rolling until loaf is created. Tuck ends under. On a cookie sheet or Italian loaf pan, oil the pan and sprinkle with corn meal. Place loaf onto cookie sheet or into pan and cut diagonally with scissors to make slashes. Cover with warm, wet towel and let rise until double. (If not using yeast in the recipe, cover with towel and spray water mist onto the towel occassionally to keep it moist as it rises for 1 to 4 more hours.)
Preheat oven to 400 degrees. Spray the bread with a mist of cold water before placing into oven and then bake for 20 minutes until browned. Turn bread over in the Italian loaf pan and bake 4 minutes longer to brown bottom.


Photobucket


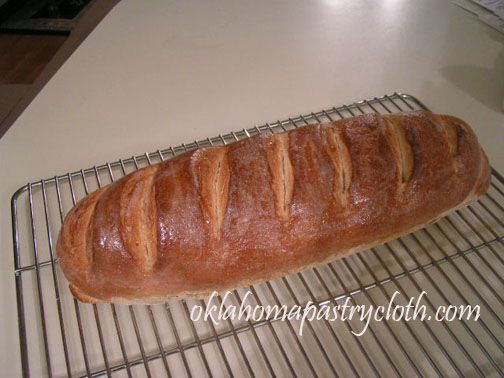
Remove from oven and cool on rack. While hot, you can brush melted butter over the bread. Cover bread with towel as it cools for 30 minutes to make the crust soft yet crunchy.


Photobucket


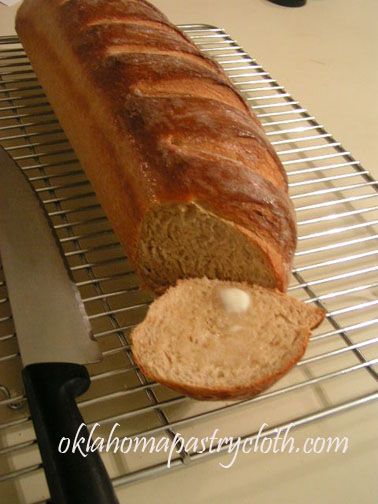
Slice and serve. And it IS good with jam and tea!!


Happy baking.

MB