 I’ve been debating how to approach occurrences of the last few weeks for you all. Life has been a bit strange in that time frame and I feel like I should explain in the hopes of possibly helping someone else who might be in the same boat as I. That boat seems to be a bit rickety and is letting in water, but it is the boat in which I find myself, none-the-less. I have been diagnosed with an unusual form of autoimmune disease that exhibits itself as both Graves and Hashimoto’s diseases. In other words, my white cells really hate the rest of me! Most people have one or the other of these diseases, but I am one of those people who is termed, “unlucky,” as I have both. You might surmise that there is more than one reason why I don’t play poker or go to the casinos!! Over the past couple of years, I have done a LOT of internet searching for information on my various symptoms, as doctors seemed to want to diagnose me as “a little crazy.” It has been a long journey from 2005 to the present accurate diagnosis and I have a few things to say to anyone out there who is having a health struggle of their own. (1) Trust your instincts: If you think something is wrong, then act on it. Seek help and don’t stop until you have a doctor who takes you seriously, who acts responsibly and who treats you with respect. (2) Do not be satisfied with anything less than the best in care, follow-up and scheduling. You are paying for services. Therefore, YOU are the customer and the doctor and his cohorts are serving YOU. Don’t be intimidated and don’t accept abusive behavior from anyone! (3) Be willing to change doctors and hospitals until you have accurate answers and top-notch care. (4) Educate yourself. The National Library of Medicine is an excellent source for research, etc. as is The Mayo Clinic site. For my particular issues, I was delighted to get information at the University of Michigan’s site. Many of the university medical schools have sites where one may research any disease. Read books. And don’t let ANYONE discourage you from educating yourself. (5) Be willing to look at alternative forms of treatment. There are natural approaches that far outweigh traditional medicine in many cases. For example: A year ago, I was told that I would have to have regular epidurals in my back for pain and eventually a rod placed in my spine for curvature of the spine. THAT sounded fun. (sarcasm there, folks) I am now under the care of a chiropractor who has succeeded in ridding me of any back pain and who has actually been able to straighten my spine significantly, without medication or surgery. (6) Pray for discernment and direction: My son made a comment to me one day when I was very discouraged with the progression of my disease. He reminded me, “Mom. There is a healer so much greater than any of these doctors!” He is so right. Healing can come in spite of doctors. Healing can come as God uses doctors. And healing may never come. But one thing is certain, healing of the spirit is more important than anything else. With that peace is acceptance and an ability to overcome in the midst of disease. I am going to make this a three day soap opera for you! Tomorrow, I’ll add the next installment. Will Dr. Moan find spots? Will Nurse Jane be able to draw blood on the first attempt? Stay tuned, as the world turns!!  |
|
|
Oklahoma Pastry Cloth™ Company on Facebook
|
|
 |
|
|
Posts Tagged ‘humor’
In Hopes This Helps Someone!!
Tuesday, June 19th, 2012
Fighting My Dragon
Thursday, May 26th, 2011
 I know. Everyone says, “I hate going to the dentist.” But not everyone says it in the screaming, overemphasized, “I HATE GOING TO THE DENTIST!!!!” way that I say it. Most people, though they are uncomfortable with instruments, drills and hands in their mouths, suck it up, grit those teeth on their good side and stoically march to the dental chair with the air of one heading to an execution. I, however, hold each side of the doorway moulding with fingers of steel, while wedging my feet at each corner of the bottom of the door frame and dare anyone to push or pull me through. There is no screaming. There is no crying. There is just a resolute, “uh-uh – not gonna do it.”  I believe the beginning of this abnormal relationship with dentistry began when I was six years old. It was at that time I determined, with what little deductive reasoning a first grader may possess, that [parents = gift after dentist = pain → parents = good such that dentists = mean]. My first journey into this equation involved the fact that my baby teeth were falling out in God’s time and not Man’s time. Because Man’s time is the guage most depended upon by the medical community, it was decided that a few of my teeth had to go, in order to make room for those adult teeth which God’s time had not even produced yet. That encounter gleaned me a small, shiny, red bike with training wheels. A few years later, my final “dental trip-equals-gift” experience also included removing baby teeth but I had progressed to the fourth grade and wasn’t so easy to bribe. I had graduated to a full meal at my favorite McDonald’s Hamburger restaurant and the movie, FLIPPER, on the big screen. It was later that I realized that my parents and my dentist were in cahoots and I no longer cut my parents any slack.  In the summer after eighth grade – at that awkward age of 14 – my parents took me to a dentist who then sent me to an orthodontist. I had no clue what that was, but because the dentist didn’t do anything to me except clean my teeth, I figured this new kind of doctor couldn’t be all bad. The orthodontist ‘ummed’ and ‘ohhhed’ as he pulled my cheeks back, pushed my gums and tapped different teeth. My parents tried to squash the tendency to lean over to look at what he was observing. Finally, the awful verdict was issued and my parents checked me into a hospital to have MORE teeth extracted and wires put under my gums around hidden canines with a prognosis of 5 years in braces. My parents let me start high school, the angst of every budding teen, with stitches in my gums, unable to smile and with lips the size of a cartoon character. Several weeks later came the inevitable ‘railroad tracks’ which then became my nickname. And to make matters worse, there was no prize, no gift, no bribe to lift my self-esteem. Evidently, I had “grown up”. To add to my misery, I had to stretch tiny little rubber bands from a metal hook attached to the wire under my gum on each side of my upper mouth to a metal hook on a band around a bottom molar on each side of my lower jaw. These rubber bands were no bigger around than the end of a large pencil and so the pressure on them was enormous. Teachers and friends alike had to pay attention where they were standing in proximity to my face because when I spoke, it was not unusual for my mouth to shoot a rubber band with the accuracy of a slingshot. “Humiliation” became a new variable in dentistry for me. I wore those braces through my first year in college and today, as a result of all that effort and humiliation and thousands of dollars, I can smile with a mouthful of fewer teeth, visible canines and pearly-not-so-whites that look like a row of dominoes after a minor earthquake.  Then came the extraction of four wisdom teeth which also had to be done in the hospital because it was in the stone-age, also known as the ‘70’s. The young man who was next in line for surgery, lying on his gurney outside the surgery room door, could hear the surgeon grunting and yelling because my mouth was so small and my teeth were so big. That evening, this same young man came to my room to see how I was doing (and to brag that he was getting a steak from Steak and Ale), only to find me with a swollen face, bruised cheeks, mouth split at each corner and begging for morphine. Two dry sockets later, I vowed that dentistry was akin to torture. My disgust for all things dentist was established for life. Fast forward to last week. I had broken a tooth – I’m talkin’ 2/3 of that sucker was gone. I wasn’t crazy about our family dentist office and I figured it was time for a change. So, I found a new dentist, in the Yellow Pages, whose sole attraction was the words, “Comfortable and Stress-Free.” Comfortable and Stress-Free is good! And they really are gentle at OKC Smiles in Oklahoma City. I loved the office workers. Those people were so nice and they made great effort to make me feel comfortable and welcome. I got my teeth cleaned without the usual bleeding gums, swollen cheeks and uncomfortable throb throughout the next day. I was not the least bit perturbed about this dentist working on my teeth because the atmosphere was so relaxing. That is, until I was informed that the broken tooth would involve a root canal. A root canal? I had heard of those things and nothing about them had been good. In fact, I had heard horror stories about them and so, when my new dentist friend informed me that he does “sedation dentistry” my answer to his question of , “Do you want to be sedated?” was, “How stupid do I look? Ok, don’t answer that question. Yes.” I was given a little blue pill and sent home with directions to take it one hour prior to my next appointment. Oh yes, and Mr. Fix-It was to be my designated driver. On the day of my major surgery – ok, so when it comes to dental work, I like to exaggerate – Mr. Fix-It and I headed out the door to drive the nearly hour it takes to get to my new dentist. I had taken the pill and was happily waiting for it to kick in. Halfway to the office, Mr. Fix-It realized that he didn’t know where he was going and turned to ask me directions. My chin was slumped against my chest. I was snoring. He managed to wake me to get spotty information and attempted to find the dental clinic. He was smart – or just lucky, but he found it and helped me out of the car. I did not hold to the door frame or refuse to enter, but obediently shuffled into the plush waiting room to sit down with Mr. Fix-It at my side. From that point on, all I have is Mr. Fix-It’s version of the story. According to him, my head lolled downward and to the side when, all of a sudden, I hiccupped. I didn’t just do a little hiccup. I let loose with a high-pitched, body-wrenching, air-gulping hiccup and my head flew backwards. My chin then dropped back down onto my chest and I hiccupped again, going through the same motions of head pitching backward and then slumping forward. This continued as my dear husband, who is supposed to be my advocate and protector, could not contain himself and exploded into gales of laughter. Another patient, a man, entered the waiting area and sat down across from us just as I let loose with another jarring hiccup. He looked embarrassed for me and Mr. Fix-It said, “She’s sedated. She gets these hiccups sometimes.” I let loose with a big one. Mr. Fix-It giggled loudly. Thankfully, the nurse ushered me to the dental chair and got the hiccups stopped. My kindly dentist did his work, determining that I did not need a root canal after all. Tooth temporarily capped, I was carefully monitored for blood pressure and heart rate and the hiccups commenced again. Mr. Fix-It assured me that they reverberated throughout the entire building. I am wondering what the office personnel are saying about that day. Do they have conversations that begin with, “Did you hear that lady….?” or “Was that hilarious or what?!” I have to go back to have the permanent cap affixed. I am not sure I can show my face.  All I know is that dentists and I have a very strained relationship. However, I think that if this new one will still have me, I will stay in his care because I have to admit that my experience there has been the most pleasant of any. I will say, though, I don’t think I’ll be taking any of those little blue pills again. As I told Mr. Fix-It, while still in an inebriated state, I think, next time, I’ll take some of that “Noxious Oxide” instead. Somehow, I have a feeling that my inserting “noxious” for “nitrous” is a harbinger of things to come. |
|
Oklahoma Pastry Cloth™ Company on Facebook
|
 |
Two Dangerous Women
Tuesday, January 25th, 2011
|
Proud 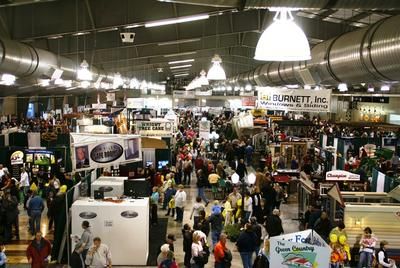 I am sure that you have heard of the Home and Garden Show that stations itself at every fairground in the US to encourage gardeners to grow pumpkins the size of a Smart Cars and to coerce nongardeners to envelope their homes in copper guttering which, at the price of copper today, will be removed within a week by some industrious n’er-do-well needing cash for a big screen tv. Well, my darling daughter had two exhibitors’ passes for this past weekend and she asked if I would like to go with her to this show of shows. Now, it’s a great thing to get to go to this yearly event, but for a daughter to actually be caught with her mother in public and on PURPOSE is a cause for celebration indeed! Of course, my answer to her invite was a definitive, “Do pigs fly?” which is a much more genteel response than the one asking what bears do in the woods even though it makes absolutely no sense at all. She knew what I meant.  And so we did what any two red-blooded, southern women do and bundled up against what we considered a life-threatening 32 degrees. We drove across town to the beautiful OKC Fairgrounds, parked the car and walked to the building that we decided was obviously the first of 5 total exhibition buildings. I thought it odd that the steps were full of men in camouflage, smoking cigarettes and huddling to discuss who-knows-what, but I attributed it to true southern gentlemen who had brought their wives to the show even though it would have taken one of the John Deere Zero Radius mowers, displayed at the show, to physically drag them into the actual building to look at the latest fiberglass hot tubs.  Now, I have to tell you here that there is a certain sense of power that goes with having “exhibitor” badges. One need only flash these jewels at the TSA wannabes manning the doors and you are waved through with an “Oh! Go on in!” as the poor slubs with tickets must stand there and watch you waltz through while they have their wrists stamped to prove that they are NOT exhibitors. Only, at that particular moment, our passes didn’t mean much. As we waved our badges, I instantly noted that it was almost all men in the building – men in camouflage – and there were tables and tables of every kind of weapon of mass destruction that any self-respecting varmint hunter would be proud to call his own. It was at that moment that I and the attendant announced at the same time, “Gun Show!” My daughter and I backed out and headed to the next group of buildings where we would find weapons equally as deadly to our pocketbooks and our health – waterless cookware, full goldfish ponds with 8 ft manmade waterfalls and German Cream Cheese Strudel. And you know what? When we finally found that first Home and Garden Show building, I thought it odd that standing on the steps to the entrance were huddled groups of men in camouflage, smoking cigarettes and discussing who-knows-what. Yep. This is good ol’ Oklahoma!! 
|
|
Oklahoma Pastry Cloth™ Company on Facebook
|
|
|
Belgian Waffles
Monday, October 11th, 2010
|
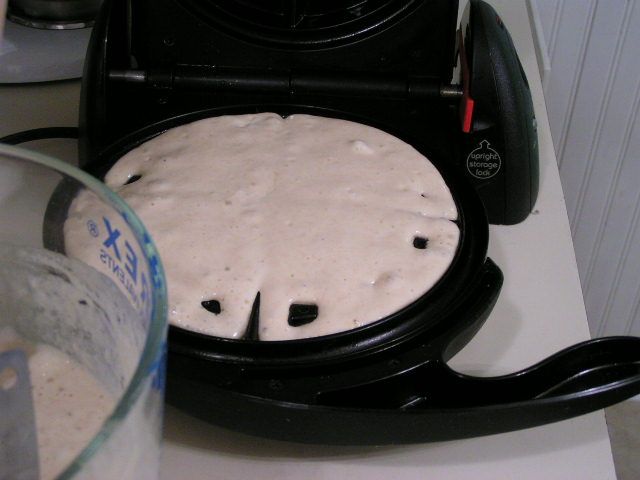
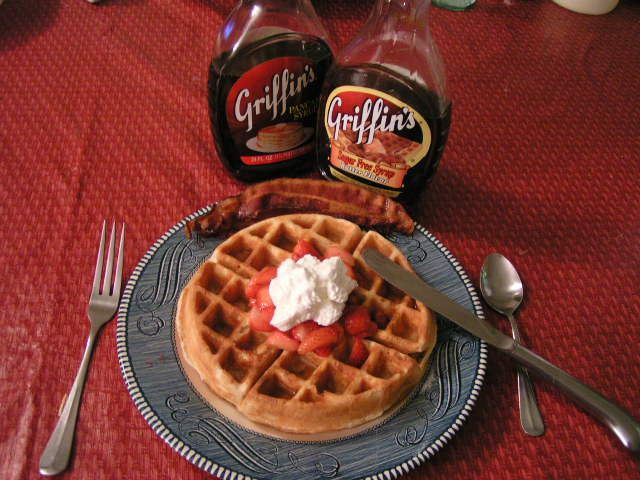
Of course, with any new-fangled idea, there were bugs, the major one being that when the cook used one of these pans, what looked like bugs appeared in the scrambled eggs or the white gravy, due to flakes of the nonstick surface loosening. Small sheets of Teflon® floated in the cooking food and small, shiny hints of the base metal were exposed. If you were the least bit paranoid, you worried that your family was ingesting some poisonous substance that the government had invented to get rid of half of the population to save the planet. If you weren’t paranoid, you surmised that maybe Teflon® wasn’t such a great invention after all. Then came the nonstick surface that was co-mingled with the base metal of the cooking utensil. That was better. I think that T-Fal® was one of the first. It worked pretty well, but we quickly figured out that nonstick didn’t really mean, NONSTICK. It just meant “not-as-likely-to-stick-especially-if-you-use-oil-to-coat-the-pan-like-you-did-for-your-old-pans-that-were-not-nonstick.” I had a whole set of T-Fal® and still have a few cookie sheets, but while they were the “thing” in the ‘70’s, as I became more and more entrenched in the kitchen, I gravitated back to my perfectly seasoned, cast iron skillets and wonderful three-ply bottomed, heavy-weight, stainless steel pots and pans. Wouldn’t trade them for the world. It is with this background of wisdom that I should ask myself, “What were you thinking?” because, recently, I couldn’t resist the purchase of a nonstick surfaced Belgian waffle maker that was on sale. Actually, another waffle iron was on sale, but the store was out and because I had such a pained expression on my face and the manager probably thought that my gray hair indicated that I might be hard to get along with, I was handed a more expensive, with more gadgets, Belgian waffle iron at the sale price. It had a timer that beeped! I took my prize home, predictably thrilled at beating the system of sales, and quickly unboxed it to prepare for the next day’s breakfast surprise for Hubby – waffles topped with strawberries and whipped cream. I read the directions for the batter – easy enough – decided on how I was going to change it (added vanilla) because it isn’t in my nature to just follow directions, and made sure that I had all ingredients required. I got up the next morning, whipped up the batter in a matter of minutes, heated the waffle iron until the light went out and carefully measured ¼ cup of batter into each section. Closing the lid, I flipped the whole assembly on the stand, over to the opposite side as per the directions. Steam gushed from the seam of the surfaces and a wonderful sizzling sound let me know that breakfast was on its way. The timer automatically began its countdown. 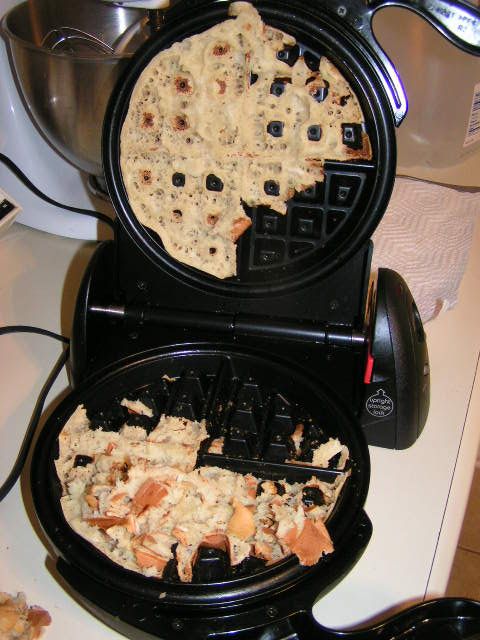 At the ear-piercing shriek of the waffle siren, I jumped out of my skin and rushed to flip the waffle iron back to the other side of the stand. I gently lifted the lid – well – attempted to lift the lid, but nothing separated. I got a plastic fork and slipped it between the layers of metal to carefully pry them apart but nothing budged. But it’s a nonstick surface! The box said so…. no oil needed. It’s 2010! It’s new and improved! I flipped it back to the other side and tried gently pulling the sections apart. No dice. I turned it over to its original position and thought, “Maybe I’m not pulling hard enough.” I gave it a hard tug and jerked the top lid off of the bottom surface. One half of the waffle traveled with the lid and the other half stayed on the bottom. Now you know that you are NOT to use ANY metal utensils on nonstick cookware. Plastic only. And so, I took the plastic fork and carefully slid it under the top half of the waffle. Fully expecting for the waffle to lift off the surface, I was sorely disappointed. The tines of the fork slipped through the cooked dough, and succeeded only in removing a couple of chunks. I tried a different location with the same results. At this point, I was frustrated and I started digging at the center of the mess. Some of the pastry lifted out of the multiple indentions, but the majority remained adhered to this “nonstick” epitome of false advertising. The tines on the fork broke. Of course, it never occurred to me, at the time of purchase, to see if the two cooking surfaces could be removed for easy cleaning. And of course they could not be removed. They opened into a gigantic “L” with teeth, every tooth encrusted with waffle plaque. The lettering on the base cautioned, “DO NOT IMMERSE”. Why would I need to immerse it?? It is nonstick, for crying out loud! My only recourse was to concentrate on one surface at a time, digging out as much of the now rock-hard waffle as possible. I poured hot water just to the batter level to soak and finally washed with a brush, repeating the process for the other side. This took most of the morning. Did I mention that my husband ate cereal that day? 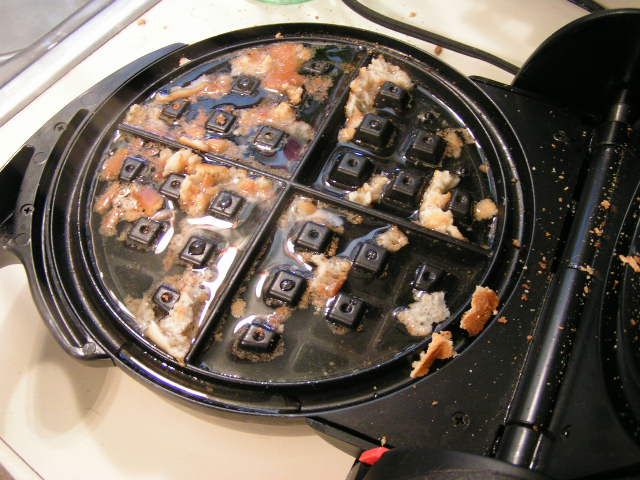 Yes, all of the labor saving brilliance that is dangled before us cooks have obviously been created by inventors who never really watched the process of food preparation and cleanup, let alone attempted it themselves. However, I will say that one such item HAS put its comrades to shame, as it has proved to perform in exactly the way it was intended. It has made available for my dear husband, the Belgian waffles that he loves, baked on the aforementioned, offending waffle maker. This product states on its label, “no stick, fat free, cholesterol free, calorie free, sodium free, naturally clear”…Yep. It’s spray olive oil in a can and it works like a charm. Who would have ever thought of putting oil on the surface of a cooking utensil to keep food from sticking? What will they think of next?? |
|
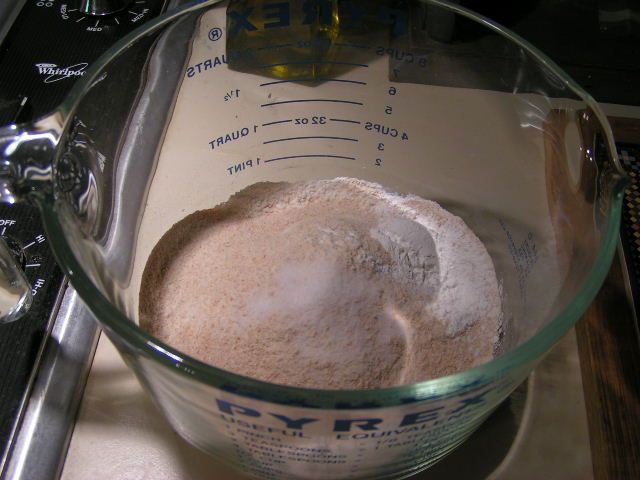
1 3/4 cups all-purpose flour or pastry flour 1 tbsp baking powder 1/2 tsp salt 2 tsp sweetener (honey, sugar, splenda, etc.) |
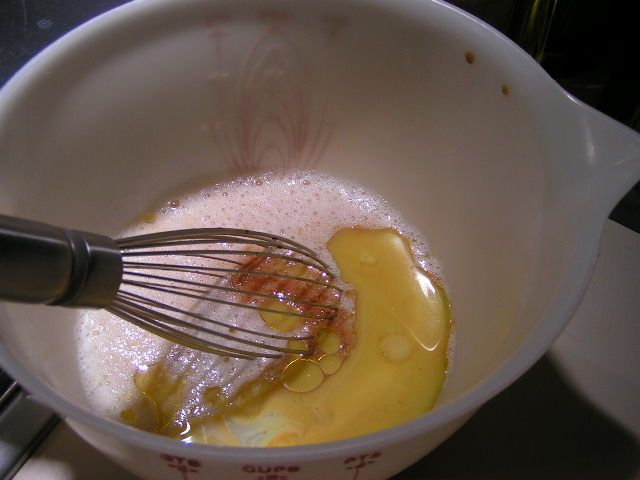
1 3/4 milk (2%, whole, skim) 2 eggs, separated 2 tbsp vegetable oil Possible additions: 1 tsp cinnamon 1/2 cup chopped pecans |
|
Oklahoma Pastry Cloth™ Company on Facebook
|
Sourdough Bread on the Oklahoma Prairie (and recipe)
Tuesday, November 3rd, 2009Sourdough bread is the oldest kind of leavened bread known to man. It is earliest recorded in Egypt around 1500 BC, but how it was discovered is total conjecture. There are all kinds of good stories regarding the discovery of the potent dough, but it is anybody’s guess how the first person suddenly decided to use wild yeast to make their usual flatbread rise to a fluffy loaf. Of course, with all of the brewed products available back then, like wines and beers, it is conceivable that some might have spilled into flatbread dough or that dough was left out and attracted the plentiful wild yeasts to produce a bubbly sponge, but I’ll leave you to your imagination to come up with “the story” of how sourdough starter was discovered.
My own imagery conjures up a man who stumbles home after a night out with the boys, precariously grasping a clay jar of strong Egyptian beer (brandname Pharoah’s Choice), and occasionally managing to find his lips to take another swig. As he wobbles into his humble abode, he finds his dutiful wife on her knees, mixing a batch of dough to bake for the next day’s flatbread allotment. Mr. Ancient Egyptian lunges toward his wife to give her a drunken hug, as she stands to greet him, and as if in slow motion, the clay jar of suds pitches out of his loose grip, flies through the air and lands squarely on the floor, shattering to pieces and sending waves of dark ale into Mrs. Ancient Egyptian’s bowl of flour and oil. Mrs. Ancient Egyptian lets loose with a string of hieroglyphics and cries over her ruined bread. The mess goes into the trashbin, also made of pottery, and the angry wife stomps off to bed. Next morning, she awakens to find an oozing, bubbly live thing, growing in her trashbin and out of curiosity, the Mrs. pours the doughy sponge into her floured breadbowl because she didn’t have an Oklahoma Pastry Cloth™, picks out any bones that had also been thrown into the trash from dinner the night before, adds some flour and then bakes the dough in her 400 degree brick and mortar oven. Out comes a tall, fluffy confection that she tentatively samples. A smile gradually replaces her angry frown and she comments, (in ancient Egyptian of course) “This bread is tangy and light – a veritable pastry worthy of royalty! I would think that it would be quite good with jam and tea.” As a result, she forgives her husband and encourages him to come home and drop his ale into her bread on a regular basis. I’m sure that it happened that way.
Sourdough starters are made with a variety of ingredients. Depending on the taste desired, milks, potato water, sugars, and various types of flours are incorporated to create a “sponge”. This sponge is continually “fed” to keep the yeast alive and thriving and as it is nursed, it develops its own particular flavor. Personal taste determines which characteristics are desirable or not.
Just a bit of historical trivia: According to www.kitchenproject.com, during the gold rush days in San Fransisco, California, a bakery run by the Boudin family from France used sourdough culture to create a unique and famous bread that miners enjoyed every morning. Since 1849 they have been using the same sourdough culture, which they call a “Mother dough” and the same recipe. So important is their “Mother Dough” it was heroically saved by Louise Boudin during the Great San Francisco Earthquake of 1906. Here in Oklahoma, sourdough starter has been used on the prairie through days of wagon trains, landruns and cattle drives to produce biscuits, pancakes, muffins and bread. It doesn’t take long to find a class here, where one may learn to create these morsels in a dutch oven nestled in the coals of a campfire.
Every sourdough sitter considers their starter to be the best. As in the case above, many starters have been handed down through generations of bread bakers. However, it is possible for you to start your own legacy and tweek it to your own taste. You can make the base recipe that follows, and then divide it to keep some going as a pristine culture and experiment with various additives like milk or potato water instead of just plain water on the rest. Also, as your culture becomes exactly what you like, it is a good idea to pour some onto wax paper and allow it to dry into a flat sheet that can be broken into small pieces and stored in a tightly sealed jar. If something horrible happens to your live culture, you can start over by adding two tablespoons of dried culture with 2 tablespoons of water to reconstitute and bring to room temperature and then start your usual process over again with this base.
If you are not going to use your starter for a time, you can put it in a jar with a tight fitting lid and store it in the refrigerator. I have also had luck with freezing cubes of my starter to then thaw to room temperature and start the process over. And one last tip that I use: I use bottled spring water to hydrate my starter, as city water has chlorine that kills the yeast and well water can have bacterias that ruin the taste.
I have tried a variety of starters and have come up with my favorite that is very, very simple. If you wish to be truly “pioneer”, then you would omit the yeast and let this starter stand for three days, stirring once each day, to capture any wild yeast in the air. When you start seeing bubbles, you start the “feeding” process. I personally like the flavor achieved from adding a little powdered yeast to get started. Again, if you wish to be “pioneer” in making the true, slow, sourdough bread then you would follow my bread recipe, ommitting the yeast and allow your dough to rise for as long as 24 hours, but I am including in the recipe, two teaspoons of yeast in case you do not wish to wait that long to have bread and still have the sourdough flavor.
Starter Recipe
3 tbsps whole wheat four
2 1/2 tbsps warm water
1 tsp powdered yeast
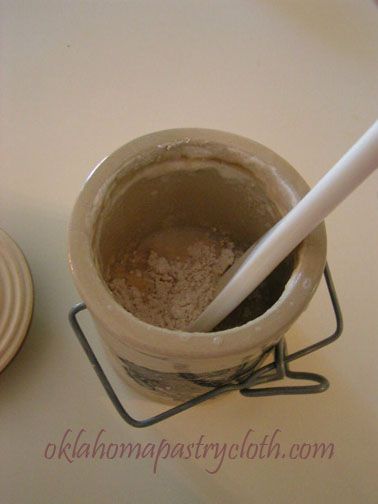
In a crock container or other opaque glass jar, mix ingredients with a wooden or plastic spoon. Do not use any metal utensils or containers. Allow to stand overnight, covered with cheese cloth. Next day, stir in 2 more tbsps of flour and 1 1/2 tbsps water. Stir and let stand overnight. Continue this process each day of using 2 tbsps flour (you can use white flour at this point) to 1 1/2 tbsp water until you have approximately 1 1/4 cups of starter. At that point, you have enough to make a loaf of bread. You must have enough starter to be able to remove 1 cup and still have some left to continue feeding for the next time. As the starter grows, it should be bubbly and pungent. Overnight, if a liquid rises to the top, just stir it in and continue feeding. Each time you make bread, it is a good idea to transfer all of the starter into a clean jar or bowl and wash the container that houses the starter to keep mold from ruining it. Dry the container and return any culture that is left after removing a cup and start the feeding process again.
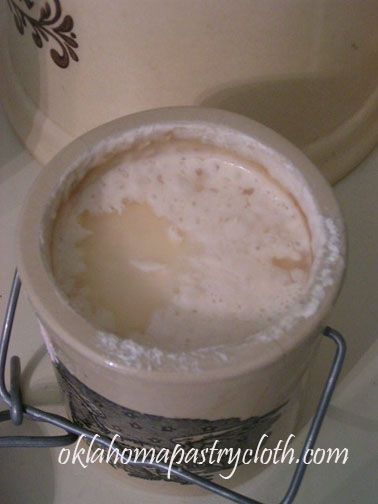
To make bread:
1 cup sourdough starter at room temperature
3/4 cups warm water
2 tsps yeast
2 tbsps honey or sugar
1/4 tsp baking soda
2 tsp dough enhancer (lecithin)
3 cups high gluten flour either whole wheat or white or combination of both
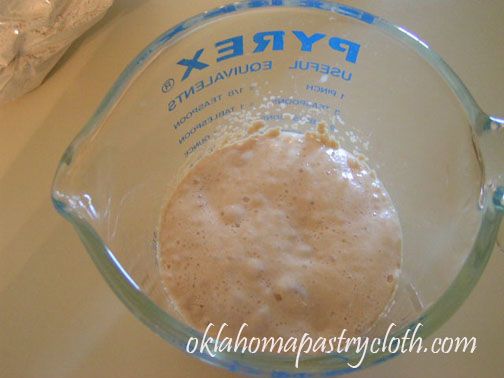
Sprinkle yeast over the surface of the 3/4 cups warm water and allow to “proof” or dissolve in the water and bubbling to the top.
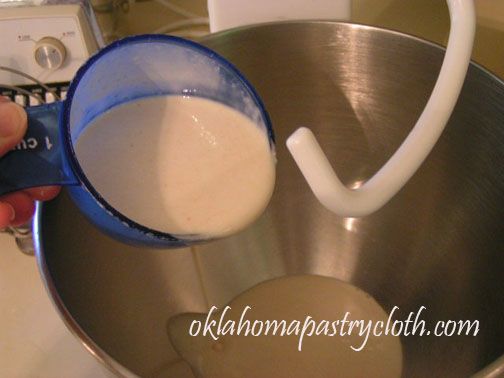
In a mixer with a dough hook, place starter, honey or sugar and yeast water along with one cup of flour, salt, enhancer and soda. Mix to blend.

Dough enhancer can be purchased at Sonrise Grains
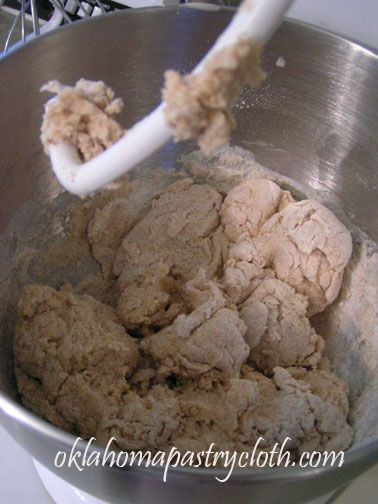
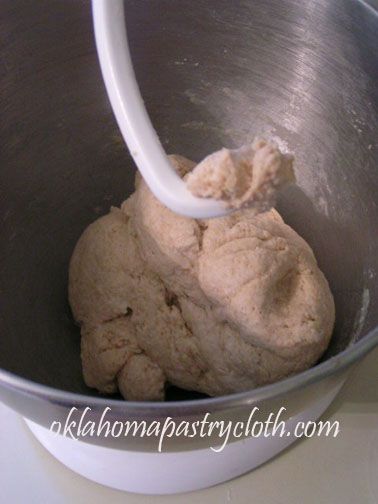
Gradually add second cup of flour. Continue mixing. Add third cup in stages because you may not need all of it. The thickness of your starter will determine how much flour you use. Your dough should pull away from the sides of the bowl. If it does not, add more flour. If it appears too dry, you may add a little more water. This picture shows the dough too dry.
This is better
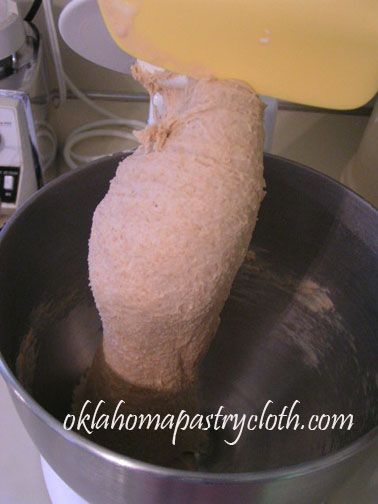
Using the dough hook on low speed, knead the dough for 8-10 minutes. It should be smooth and easily formed into a ball.
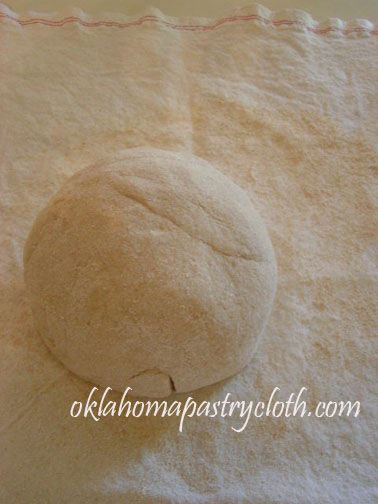
Put the dough out onto the Oklahoma Pastry Cloth™ and form into a ball. Wrap in plastic wrap and allow to rest for 10 minutes.
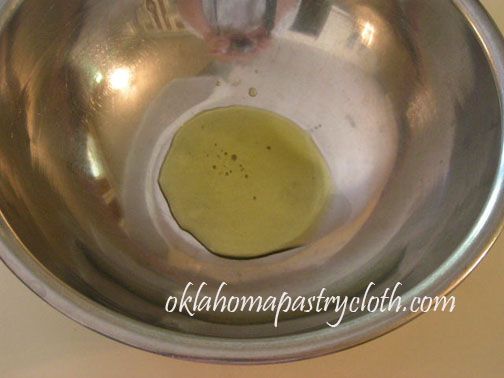
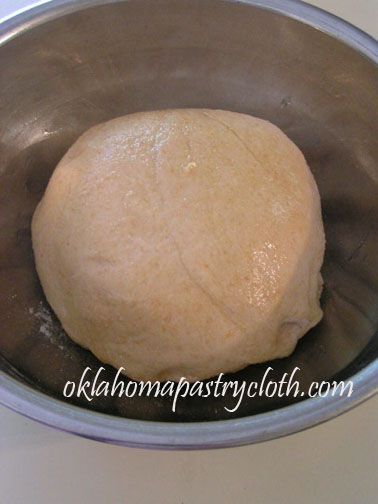
In a bowl, pour a tablespoon of olive oil into the bottom and place the dough, topside down, into the oil. Turn right side up to coat the dough ball in oil.
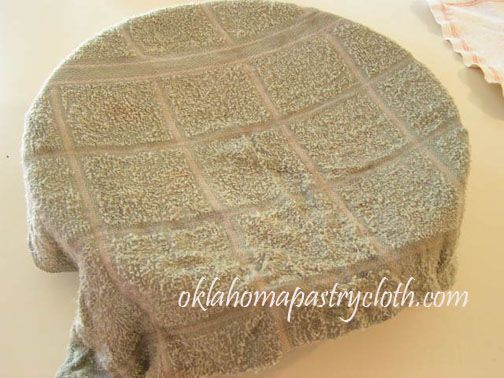
Cover with a warm, damp towel and allow to rise until doubled. If not adding yeast, allow to rise in a bowl that is covered with a wet towel and then covered in plastic wrap. Rise for anywhere from 8 -12 hours until doubled. The longer the rise, the stronger the flavor.
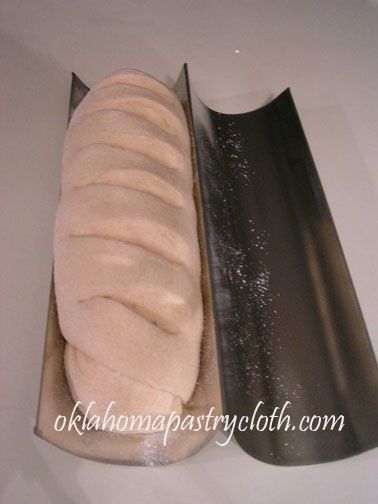
When risen, punch the dough down and put out onto pastry cloth and pat out to 1 inch thick. (If not using yeast, knead in a little flour.) With oil on your hands, wipe the dough with oil and then begin rolling toward you like a jelly roll, firmly pressing the edges into the dough. Continually oiling your hands, continue rolling until loaf is created. Tuck ends under. On a cookie sheet or Italian loaf pan, oil the pan and sprinkle with corn meal. Place loaf onto cookie sheet or into pan and cut diagonally with scissors to make slashes. Cover with warm, wet towel and let rise until double. (If not using yeast in the recipe, cover with towel and spray water mist onto the towel occassionally to keep it moist as it rises for 1 to 4 more hours.)
Preheat oven to 400 degrees. Spray the bread with a mist of cold water before placing into oven and then bake for 20 minutes until browned. Turn bread over in the Italian loaf pan and bake 4 minutes longer to brown bottom.

Remove from oven and cool on rack. While hot, you can brush melted butter over the bread. Cover bread with towel as it cools for 30 minutes to make the crust soft yet crunchy.
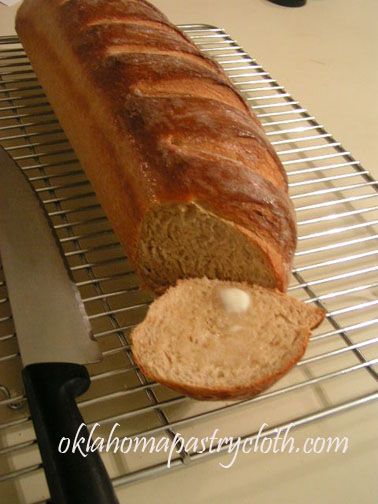
Slice and serve. And it IS good with jam and tea!!

 Homestead Revival
 Paratus Familia
 Rural Revolution