 The good news is that my meds seem to be working and I don’t feel like I’m burning up from the inside out, with the accompanying clammy persperation from a metabolism gone haywire. And my eyes are a teeny tiny better and that is awesome. Thank you so much for your kind words, thoughts and prayers. But the bad news is that it is 105º outside. There was a roadrunner on the drive, carrying a frilly, little parasol to beat off the heat as she looked for a lizard. OK. So, I’m exaggerating a little. It was actually just a tiny fan.  I have to tell you about my adventure with our little Ellie-dog, our long-haired mini dachshund, in this heat. I was driving on the interstate, after having made some deliveries, and Ellie went along for the ride. She was in the front seat, panting from the very hot day and trying to get comfortable, when all of a sudden she jumped down to the floor. I told her to get back into the seat, but she dove under the car seat to the crackling and rustling of paper and plastic wrap. Backing out of her hideout, she jumped into the seat with a stale, partially eaten, chocolate cupcake. Chocolate can be deadly to dogs and I knew it. Just to give background: A few weeks ago, in a moment of absolute insanity, I had purchased a packaged “Super Chocolate” cupcake from a huge pile on a table at the grocery store. The pile was so inviting to a person who is supposed to be totally abstaining from such things and besides, there was a big, big sign that declared, “SALE!!”. They were on sale. That’s a siren song to this coupon shopper. I had to have one. So I did. When I got to the car, I opened the package, took one bite and thought, “Bleh! That’s awful!!” and put it back into its plastic wrapping, intending to toss it in the trash. That was a sale down the drain. I don’t know if my separation from such things made that cupcake taste bad or if it was just a sorry product, but whatever, my picky tastebuds saved me from myself. I placed the wrapped cupcake in a small bag and put it on the floor of the car, where I promptly forgot about it. I must have stopped fast or something, because that little bag rolled under the seat where it went to live in a cupcake no-man’s land. That is, until Ellie found it. As soon as she had grabbed that cupcake, she jumped onto the seat cushions on the passenger’s side of the car while, at the same time, my hand shot out to grab her nose. Now, remember that I am on the interstate going 70 mph. Ellie was trying with all her might to wolf down her treasure before I could pry her mouth open. Driving with my left hand, I stuck two fingers of my right into the back of her jaw, opened her mouth and scooped out wads of slobbery cupcake as Ellie tried valiantly to grab it back along with my fingers. I yelped. Using the elbow of my left arm, with hand on the wheel, I managed to get the window open partway in order to toss the offending cupcake onto the highway. I figured that it was so slobbery that it would decompose and that wouldn’t be considered littering? I managed to hold Ellie’s collar in such a way that she could not move to grab the chocolate pieces that had broken off and scattered all over the seat. And I mean ALL over the seat. Instead of heading back to work, I made a detour to the vet and plopped my silly puppy onto the table, stating rather foolishly, “She ate a chocolate cupcake. Not all of it, but some of it and it said that it’s a Super Chocolate cupcake!” The vet dubbed her Cupcake Dog and did an exam, using the name frequently. He determined that she was just going to have a really bad tummy ache because – yes, we read the ingredients on the cupcake package – there wasn’t even enough chocolate to call it just a Regular Chocolate cupcake, much less Super Chocolate. False advertising indeed. And so, Ellie, Cupcake Dog, did fine and I bandaged my fingers where she had been unable to distinguish between them and globby cupcake. No harm done. Better for you than preservative-filled, pretend chocolate cupcakes are the veggies in your garden. You do have a garden, right?! If not, then start thinking about next year! If you are like me, your garden is coming in all at once right now. It makes an overwhelming task to deal with mountains of tomatoes, potatoes, corn and every other kind of vitamin-filled vegetable that show up at this time of year. At the request of a reader, who asked what other kind of soups I process that use potatoes, I thought I’d share a recipe that my friend Janis invented and shared with me a number of years ago. She serves it every cold, Halloween night to volunteers who help with her community project. Her method of making this soup is the “dump” method and the ingredients include the “kitchen sink” but I put together a batch and measured what I did so that I could pass that on to you. The nice thing about this soup is that it makes so much that you are able to can it in the pre-meat stage and then cook up your meat prior to serving so that it is fresh tasting and delicious. The recipe makes about 8 pints of base soup. Of course, you can make this large batch for a crowd and add your meat at the end, without worrying about canning it. So here you go: 6 – 8 cups fresh tomatoes that have been blanched, skinned and quartered or chopped. (You can use canned tomaotes if you do not have fresh, one can being Rotel tomatoes) 1 can chicken broth 1/2 to 1 jalapeno pepper diced (not needed if using Rotel tomatoes) 1/2 teaspoon baking soda 3 medium new potatoes chopped with skin left on 3 carrots, chopped 1 cup corn (frozen is fine) 1 cup green beans (frozen is fine) 1 cup fresh or frozen peas (optional) 1 large onion chopped 1 1/2 cup cooked pinto beans or kidney beans or a can of drained Ranch Style Beans 1 26 oz can of your favorite brand of spaghetti sauce – I like Hunts To Serve Soup (For 1 quart) 1/2 lb hamburger 3 cloves garlic salt and pepper 1/3 cup shell pasta 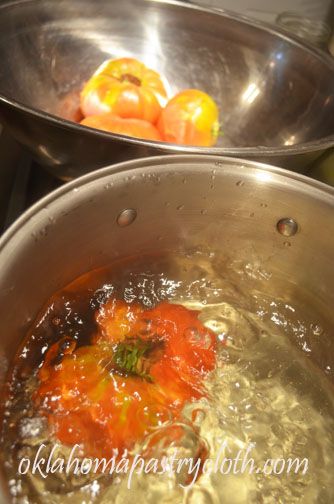 Drop tomatoes, whole, into boiling water and watch for the skins to split. Remove to ice water when the skins split. Slip skins off of tomatoes and quarter or dice tomatoes and place into a large stock pot. 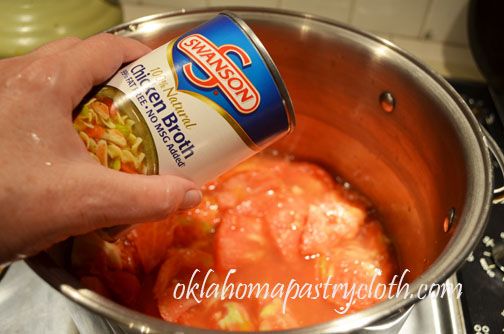 Add can of chicken stock to tomatoes and bring to a boil to stew. 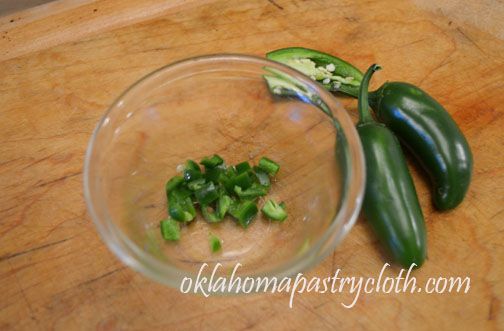 Add jalapeno  Add chopped new potatoes and carrots. Continue to boil until carrots are tender.  Add chopped onion 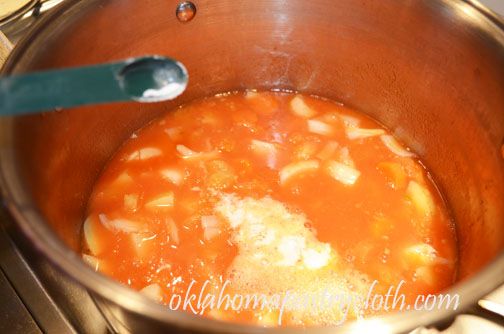 And just a little hint. When using fresh tomatoes and cooking them, often they have a slightly bitter taste. If you make spaghetti sauce or even juice from fresh tomatoes, this can be a problem. The solution is to add about 1/2 teaspoon of baking soda to the tomatoes as they cook. They will foam up like the top of a volcano! But this cuts the bitterness totally and gives a more smooth, nice taste. If using commercially canned tomatoes, this step can also be necessary. Note: Do not add soda if you are going to can tomatoes only, using the waterbath canning method. This cuts the acidity and reduces the safety of using waterbath canning. For this particular recipe, we will be pressure canning it, so reducing the acid will be fine. 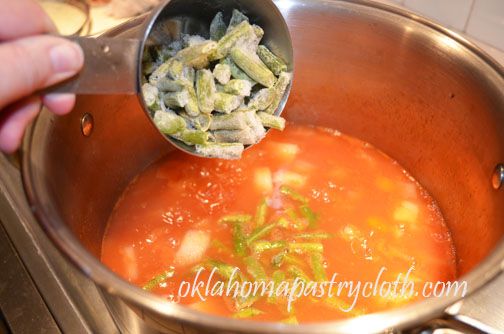 Add green beans, corn and peas (peas are optional). I am using frozen here, but fresh is great. 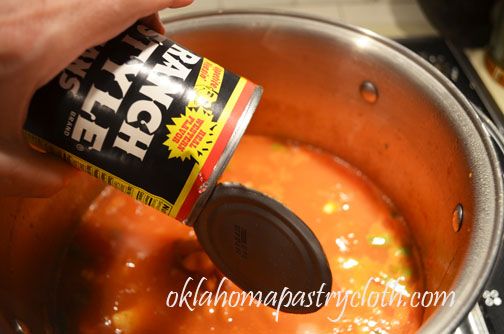 Add beans 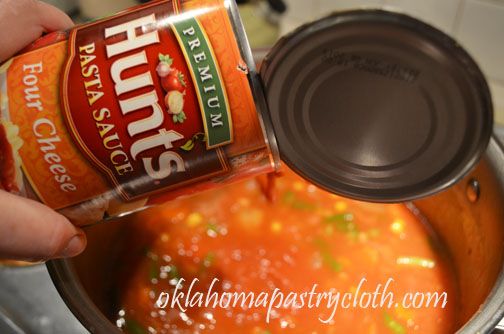 Add spaghetti sauce 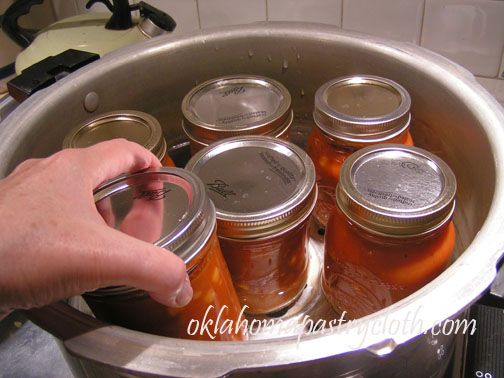 Put soup into jars, either pints or quarts, and process in a pressure canner on 10 lbs of pressure for 60 minutes for pints and 75 minutes for quarts. 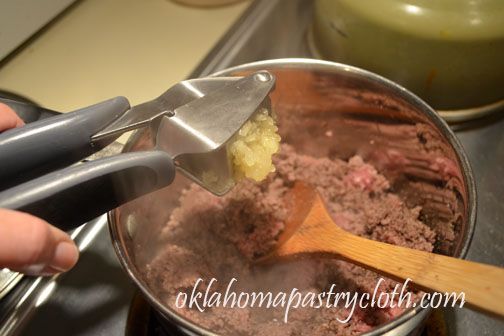 To serve, open a jar or two of the soup base and put into a deep pan. Add one cup of water for one quart of soup base. For 1 quart of soup, cook 1/2 lb of hamburger or ground chuck with 3 cloves of pressed garlic, salt and pepper, until browned. 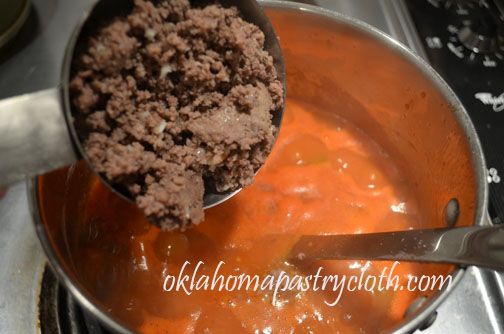 Add beef to the soup. I like to add pasta shells too. Boil until the pasta is tender and add more water as it cooks to thin if need be.  Serve hot with fresh cornbread. This is a wonderfully quick dinner on a cold, winter night. Also, just for information, this is great for camping. Dehydrated hamburger can be purchased at many hunting/camping stores, as well as at Costco. This meat can be rehydrated and cooked with the garlic and salt and pepper and then added to the soup. Great meal for around the campfire or when the electricity goes out!  |
|
|
Oklahoma Pastry Cloth™ Company on Facebook
|
|
 |
|
|
Posts Tagged ‘canning’
It’s 105º And Soup?!
Wednesday, June 27th, 2012
Canning A Refreshing Drink
Wednesday, June 6th, 2012
 Boy, do I love this time of year…I think. Everything is coming in at once – peaches, apricots, nectarines, raspberries, blueberries, potatoes. And all of these things have to be processed before they go bad. Waste not – want not!! God has been good to us Okies this year and what we are given, we must use!! It just means that the kitchen becomes our sole domicile for awhile, along with the heat and mess that includes. I am a messy cook. I DO wash dishes as I go, but it just seems that I can’t keep up with those dishes or the juices and goo that come from my various food sources. By the time I am finished, hard as I try, I’m still walking slower than usual as my shoe soles stick to the floor and I’m trying to reach gummy splatters on the walls two feet over my head, wondering how in the world they got there. And then of course, there’s my stupid choices of cooking utensils as happened with my first run of strawberry jam his year. I don’t ever seem to remember that I flunked the spacial perception test in the 8th grade. 1st Law of Jamming: Attempting to make jam in a pot that is too small always results in an overflow of thick, sticky jam onto the stove surface and under the stove top, down the front of the oven door and pooling in an oozing mess on the floor. 2nd Law of Jamming: The number of rolls of paper towels needed to clean up after making jam or jelly is directly proportional to the lack of spacial reasoning of the cook. It was with joy and relief that I was introduced to a recipe for my newly picked strawberries, by reader Margaret D., because it did not require boiling and the subsequent mess associated with such. She shared this amazing and refreshing fruit drink and of course I had to try it. Oh my. Delicious!! And what is so neat is that the drink is canned in jars to be used all summer, and even winter long! The process is easy – well, minus all the juicing required but if you have an electric juicer, no big deal – and the result is a concentrate that can be added to tonic water, ice water, Sprite or Ginger Ale. Here is her simple recipe: 6 cups hulled strawberries 4 cups freshly squeezed lemon juice (or lime juice) 6 cups granulated sugar Note: Blackberries or raspberries can be used for the fruit. Have a waterbath canner ready with warming water. Place lids into hot water to soften and have jars sanitized, warmed and ready. This recipe makes about 7 pints of mix. I did a combination of pints and half pints since there are only two of us. 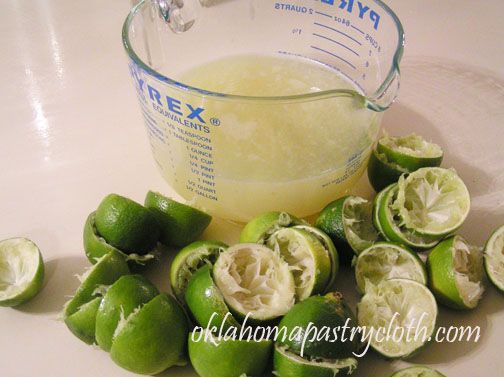 There’s an excellent opportunity for strengthening arms if one uses an antique juicer like I did!! If you have an electric juicer, congratulations! I made this recipe with lime juice because we love limeaids. 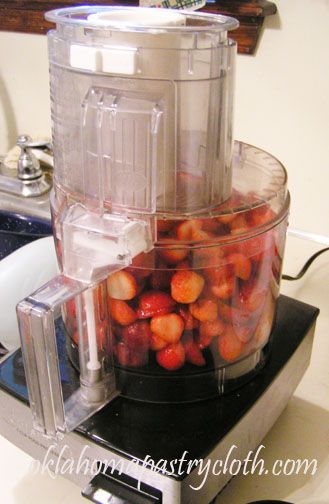 Puree the strawberries in a food processor or a blender. You CAN strain the juice of any strawberry seeds through cheesecloth if you are a hardworking and organized soul. I decided to live with the seeds!! 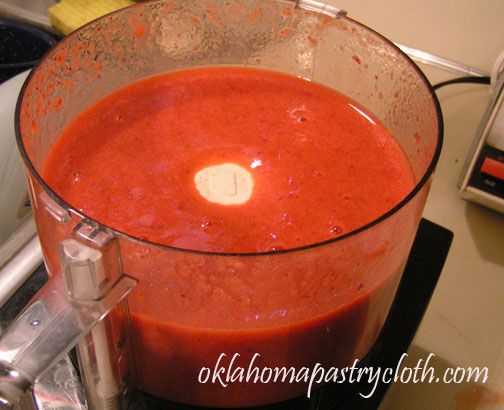 Liquify the berries. 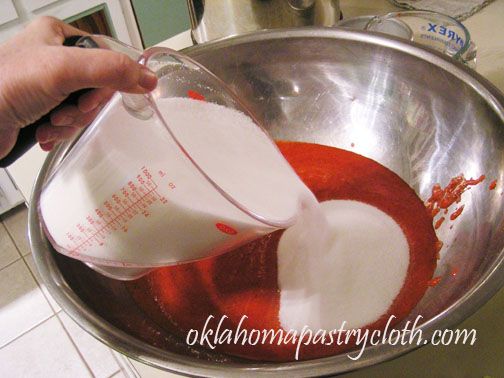 Add sugar to the berries and stir until incorporated. I mixed everything in a large bowl and transferred to my pot, but you can mix directly into the pot if you like. 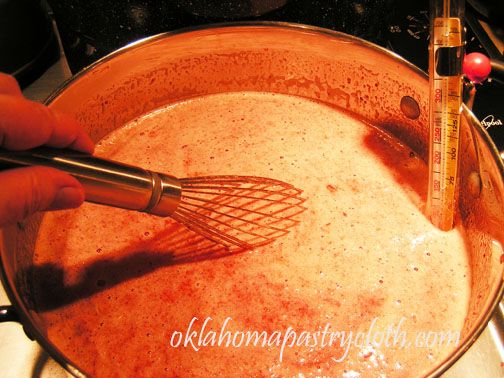 In a large stock pot, heat the mixture over medium-high heat. Using a candy thermometer, bring the liquid to 190º while stirring once in awhile. 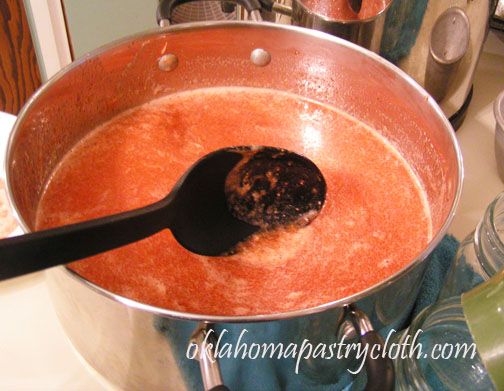 When heated to 190º, remove from heat and skim the froth off of the top. Just for info, I put the froth into a jar and threw that in the frig. Adding ice water to that made a wonderful drink! But removing the froth makes for prettier jars, especially if giving for gifts. 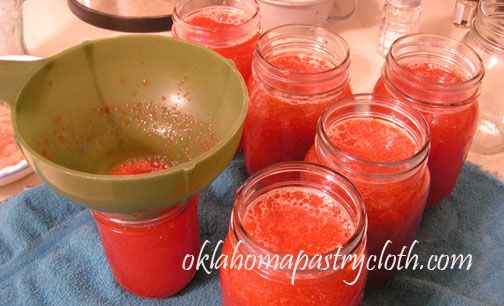 Pour hot liquid into jars 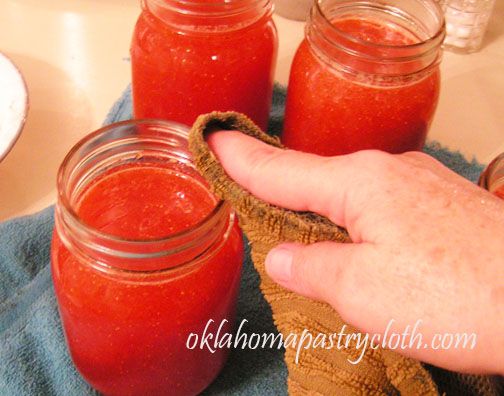 Wipe the rims of the jars of any drips with a warm, wet washcloth 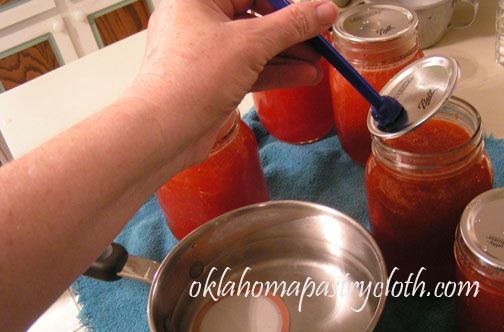 Place lids onto the jars and attach rings. Tighten and then back off slightly. Process in a waterbath for 15 minutes. Allow to stand and cool for 24 hours. Check seals. You can remove the rings and wash both jars and rings in soapy water to remove any residue. Replace rings when they are totally dry and the jars are totally dry. 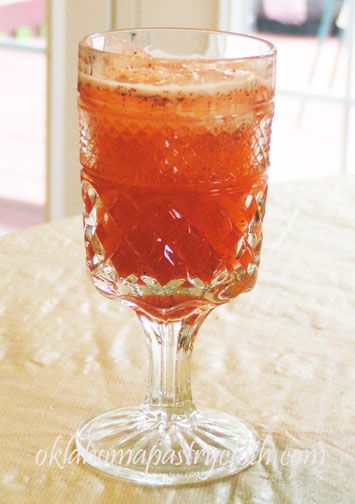 Reconstitute mix with equal parts of either ice water, tonic water, Sprite or Ginger Ale. Isn’t that a pretty drink? And so tasty too!! So thank you so much for sharing, Margaret!!  |
|
|
Oklahoma Pastry Cloth™ Company on Facebook
|
|
 |
|
|
Adventures In Canning
Tuesday, May 1st, 2012
 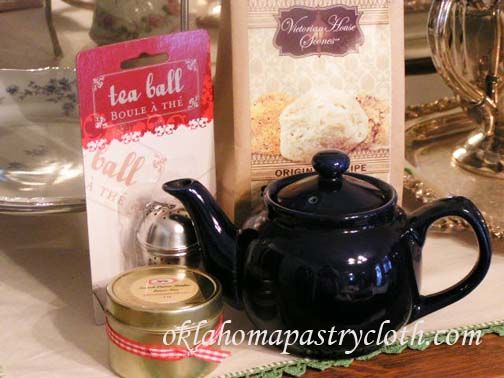 I like to think of myself as “Low-maintenance”. It doesn’t sound all that spectacular, I know. Mr. Fix-It says that he considers me to be “pretty low maintenance”. I think he appreciates that I don’t beg him for the latest $250 shoes or a bigger house with swimming pool and hot tub.. I’m positive he was relieved when I liked a Nissan Versa rather than a Mercedes (as if we could afford a Mercedes!). And it’s been a really, really, really long time since I’ve gotten a piece of jewelry. I don’t wear it and so I don’t care about it. I’m at the age where I’ve finally figured out that “you can’t take it with you”, and so practical and useful in the here and now is more on my wish list than gorgeous and flashy. Out here in the country, the squirrels, cows and bunny rabbits could care less whether any of us has a diamond or a cubic zirconia. I guess what I’m trying to say is that I get more excited over kitchen items then I do a fur coat! So, you can understand how excited I’ve gotten over a new product introduced to me by friend and reader, Shari. As an avid canner and as a canning teacher, any new-fangled canning item is a treat for me. When I learned about the Tattler Reusable Lids, I just had to try them. These lids can be used over and over instead of tossing them as one must do with traditional lids after use. The website offers free shipping, which is awesome, and sometimes there is a sale – which is how I ordered mine! I have been waiting until my first crop – the strawberries – came in to try the lids out and so this past weekend’s pick of 8 quarts of strawberries gave me the opportunity. 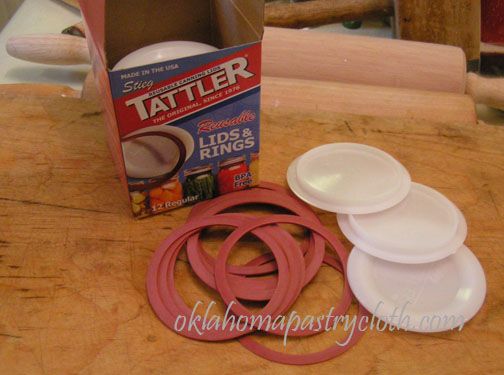 A box of 12 reusable lids includes 12 plastic lids and 12 rubber rings. These items are BPA free. 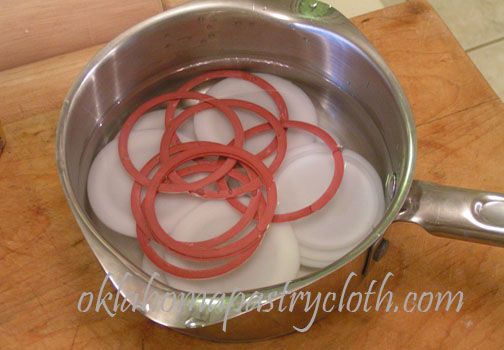 The lids and the rubber rings are prepared in hot water (do not boil) just like the traditional metal lids. 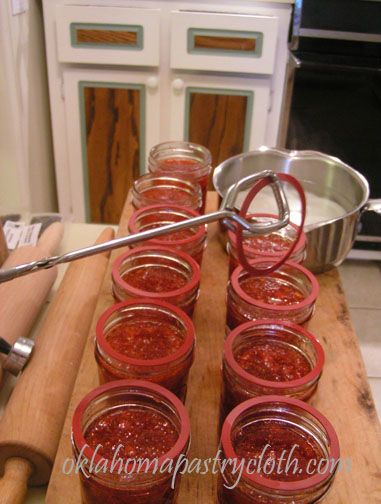 After washing the rims of filled jars, the rubber rings are placed onto the rims. 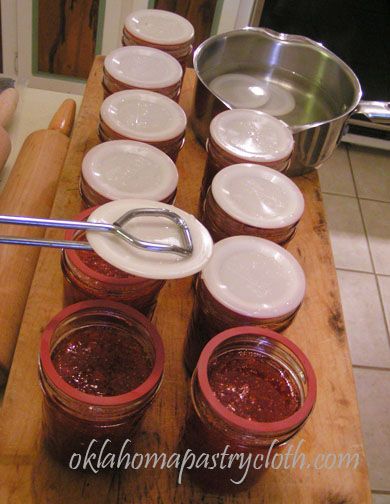 Then the lids are carefully placed over the rubber gaskets. 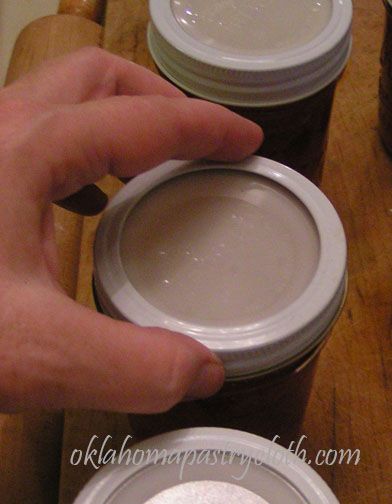 Metal rings are screwed onto the jars but not tightened. Using one finger to press onto the lid, finger tighten the ring. (I had to use one hand to take the picture so no finger on the lid!!) 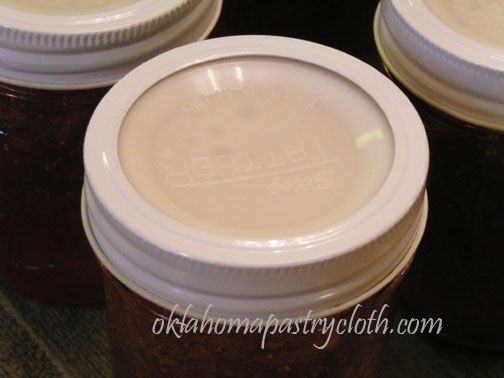 Jars are processed exactly as jars with the traditional lids. Since this is strawberry jam, I waterbathed the jars for 15 minutes. When jars are removed, the lids are immediately tightened. When the jars have cooled completely, remove the metal rings and pull gently on the lids to make sure they have sealed. You can either store with the metal ring reattached or without it. To use the food in a jar, a dull table knife is gently inserted between the rubber gasket and the glass rim to pry up the lid. Once used, just wash the lid and rubber ring in warm, soapy water and store for next time. Reusable! Cool, huh?  |
|
|
Oklahoma Pastry Cloth™ Company on Facebook
|
|
 |
|
|
Canning Turkey
Friday, February 24th, 2012
 Mr. Fix-It’s birthday was yesterday and I was all ready to surprise him with tickets to a Thunders basketball game. I was going to go all out with a Beef Wellington complete with deuxelles! (Just had to throw that in to mess with you all!) 🙂 And then….he got called out on big job. I guess people don’t matter, but let a computer situation arise and the whole world comes to a screeching halt. So I got him the two movies, “Flywheel” and “Courageous” with one of those buckets of Orville Redenbacher’s Movie Popcorn. We’ll have a movie night this weekend! Just as good as any ol’ Thunders game, wouldn’t you say? 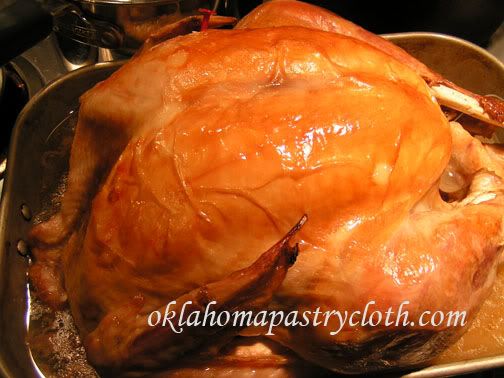 I was going through pictures and found a couple that I forgot to post awhile back and so I thought that I would take the opportunity to put them up. I don’t know about you, but we eat turkey more than just at Thanksgiving. We love Turkey, but with fewer people in the house, a big Turkey could go to waste. So, I rectify that problem by canning the leftovers. In a past post, I showed you how to can chicken by using the raw pack method. The chicken cooks in the processing. However, already cooked meat may be canned as well. The steps are the same as in this post. I bone my turkey and cut the pieces into nice chunks and place the meat into jars to about a 3/4″ head space. I then mix the juices from the cooked turkey with water and chicken bouillon to make a broth, or you can mix the drippings with canned chicken stock as well. I pour that over the meat in each jar to 1/2″ from the top of the jar, wipe the rims, add the lids that have been warming in hot water, add the rings and adjust and process in a pressure canner at 10 lbs pressure for 75 minutes. 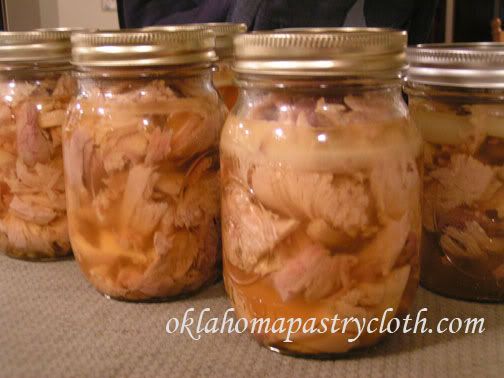 Canned turkey makes the most amazing pot pies. I just make a crust to lie a pie pan, spread the turkey on the bottom (reserve the liquid for the sauce), add some potato chunks that have been parboiled with some chopped carrots (to make sure they cook all the way through in the baking) and some frozen peas, and cover with a sauce mixture of 1 can cream of chicken soup, 1 pouch McCormick’s turkey gravy mix and two to two and a half cups of liquid combining the liquid from the jar with water. I put a pie crust over that, flute it, slice the top in a few places to let air escape and bake at 400º for one hour or until golden brown and bubbly. Yummy!!  |
|
|
Oklahoma Pastry Cloth™ Company on Facebook
|
|
 |
|
|
Canning Citrus Fruits
Monday, January 23rd, 2012
 Boy, today has been quite appropriate for thinking about canning fruits. We are so dry in Oklahoma that I’m having to put a humidifier near my piano to keep the soundboard from cracking!! And today, nearly 50 mph winds stirred up loose dirt from drought stricken fields, sending it airborn, dimming the sun and leaving trees and a horizon with a snow flurry like appearance. It’s pretty certain that a boatload of Okies are thinking back to the days when fruits, vegetables and meats, in glass canning jars processessed when items were in season or available at the stores, were their only defense against starvation during the Dust Bowl days. A very interesting website about the kitchens of that time and of many other eras is The Historic Cooking School where Rena has kindly linked to my posts on vintage cooking. In talking with my dad about those times, he remembers his family buying grapefruit in canning jars and eating this citrus delight because it was not readily available fresh. My family has always been overly fond of oranges, tangerines and grapefruits and when I was growing up we had relatives along the Indian River in Florida which guaranteed us succulent fruit. This year, for Christmas, my parents surprised me with the most wonderful variety of white and ruby red grapefruits, navel oranges and tangerines. There were so many grapefruits that I decided that I had better do something with some of them before they spoiled. In doing research about the history of the canning process, I found this really neat site called Tasteful Inventions where I learned that nearly 250 years ago a French man named Nicolas Appert, encouraged by a 12,000 franc prize issued by the government, introduced his 14-year-in-the-making canning discovery as a way to preserve food for Napolean’s army because, “An army marches on it’s stomach.” Napolean awarded Monsieur Appert the money in 1810. So folks, canning has been around for a long time!!! C’est bon!! I have to say that when citrus fruits are canned, the taste is changed somewhat. Adding sugar or sweetened juices helps to reduce these changes and serving ice cold makes a difference too. Also, it is very important to remove all of the white pulp from any fruit prior to canning because the pulp adds a bitterness that you don’t want. When doing grapefruit, I do not peel and section, but rather slice and use a grapefruit knife to remove sections that easily leaves any pulp behind. Oranges and tangerines are much easier than grapefruits to deal with when peeled. Note: I used half pint jars for single servings, but pints and quarts are fine too. Directions: Place your jars into water to boil for sterilization or run through the dishwasher on sanitize cycle. Place lids into a saucepan and cover with water. Bring to almost a boil and then keep heated. 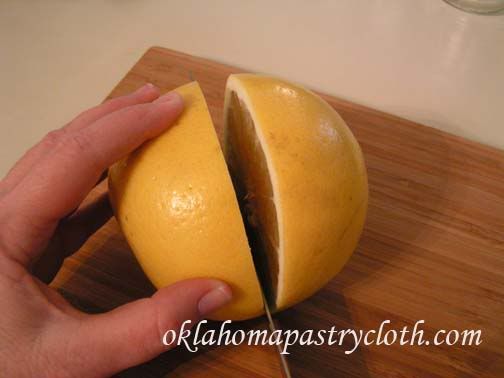 Slice the grapefruits. I used a total of 6 very large grapefruits, both white and ruby red, for this particular project and got 6 half pints. 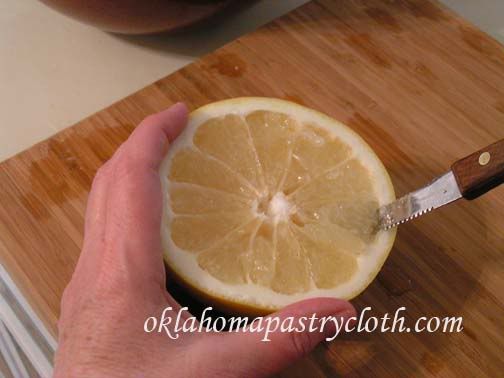 Using a grapefruit knife, which is serrated and curved, cut around each section moving from section to section. 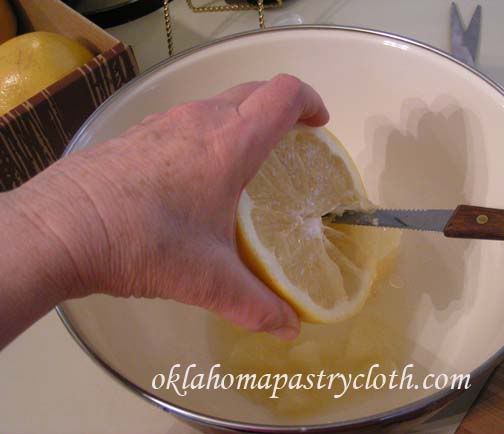 Scoop the grapefruit sections into a large bowl. 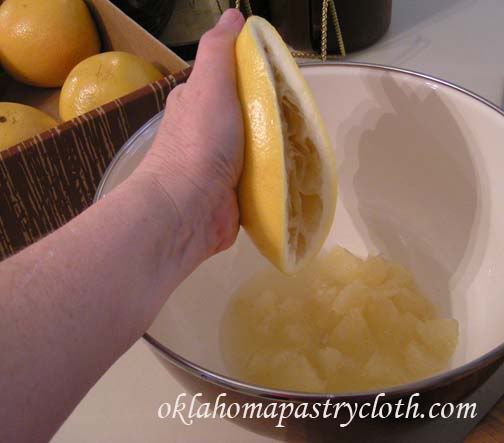 Squeeze grapefruit juice from each half into the bowl 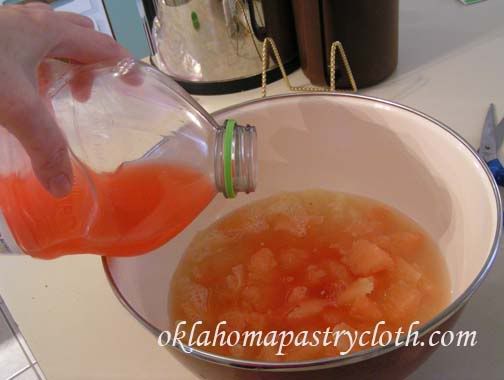 You can make a light syrup with water and sugar, but I like to add real juice that has been naturally sweetened. Any grapefruit juice sweetened with apple juice and white grape juice works great. Add enough juice to cover the fruit. 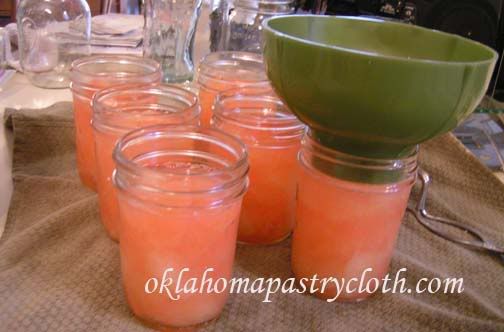 Using a canning funnel, evenly divide pulp and juice between jars, filling to a 1/2″ headspace. 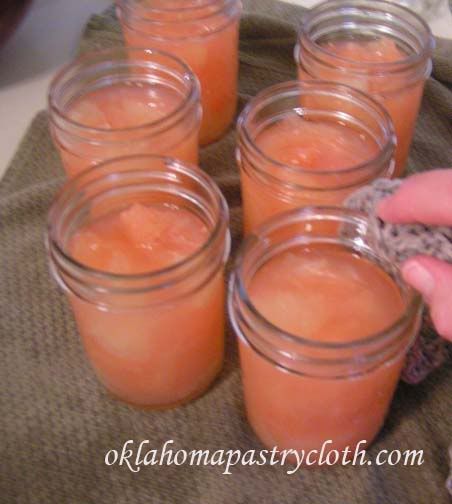 Wipe the rims with a warm, wet washcloth. 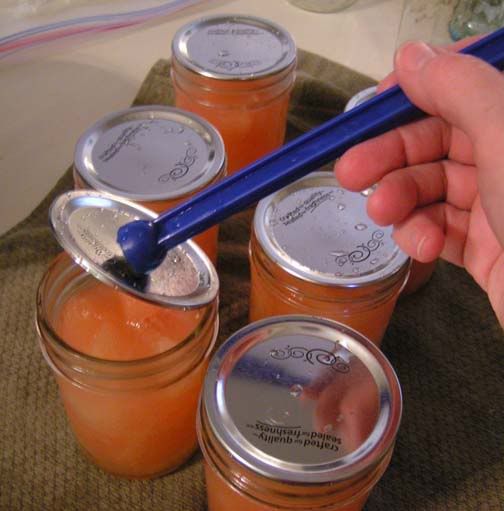 Remove lids from hot water and place onto jars. Add rings and adjust. 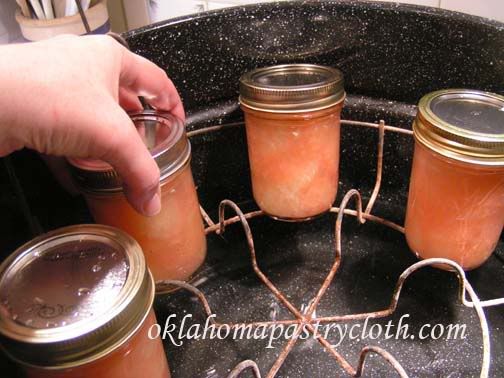 Place jars onto the rack of a waterbath canner that is sitting on a burner and has only slightly warm water in it. Do not place jars into hot water as jars can crack. 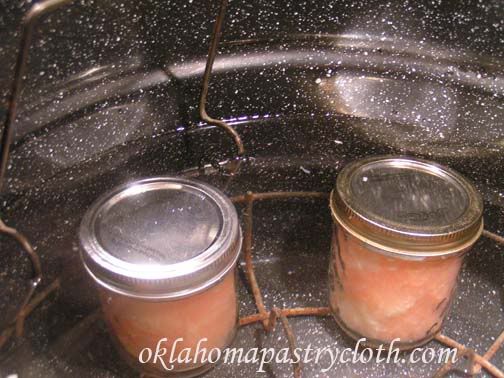 Make sure that the jars are completely submerged with about an inch of water above the lids. Turn the burner on ‘high’. Process the jars for 10 minutes at the point that the water starts boiling. 15 minutes for quarts. Store in a cool dark place and refrigerate before serving.  |
|
|
Oklahoma Pastry Cloth™ Company on Facebook
|
|
 |
|
|
Canning Bacon
Friday, September 2nd, 2011
|
I told Mr. Fix-It the other day that I have decided that my purpose in life is to be a “cup bearer” of sorts – you know, the person who drinks the king’s beverage and dies if it is poisoned. I try foods and processes and if they don’t kill me or taste like they could, I then pass them on to you! You wouldn’t believe how many recipes my poor Mr. Fix-It has had to endure only to have me scratch them with a “Well, THAT one is going in the trash!” He is such a dear and patient man. His worst response to anything I cook is, “It’s ok.” He can say it through clenched teeth and a galant effort to swallow, all the while looking for a way to spit his food out while I am not looking and still graciously offer, “It’s ok.” However, I must admit that he was very sceptical of my newest canning project. I had read about canning bacon at Patrice Lewis’ The Rural Revolution and on Enola Gay’s blog, Paratus Familia, and I have been meaning to try it myself lo these many months. But bacon didn’t go on sale until just recently and so, when it did, I snatched boatloads of it up and made my plans. Believe it or not, I got it for 99¢ a pound because it was nearing its “sell by” date. I have this vague memory of my parents receiving a can of expensive bacon from Denmark and it was rolled in white paper and tied in the middle. We thought it was amazing, so I knew it could be done.  Now, according to instructions that I found, kraft paper or paper sacks were used in the packaging and I used kraft paper on this first run. However, this is where that “cup bearer” roll comes in – I’m suggesting that you use boxed parchment paper. I found in this first run, that the kraft paper leaves a flavor of the paper in the bacon. You know how wet paper bags smell? Well, that’s the hint of flavor left in the bacon. I did not find that in a subsequent run with the parchment paper. Perhaps that is because white parchment paper is meant for cooking!! Duh. The pictures I have here, however, are from my first run and are with the kraft paper. Just pretend it’s white and do the same thing! Finally, be sure and use thick-sliced bacon. The instructions told me this, but you know me. I never follow instructions. I tried a package of regular sliced bacon. You’ll see the results. Not good. The outcome of canning the bacon was amazing. It fried up beautifully and Mr. Fix-It was duly impressed. Talk about a wonderful companion for camping!! (The bacon – not Mr. Fix-It – although he is a wonderful companion for camping.) No need to mess with wet, sloppy packages of bacon floating in melted ice in a cooler. Just open a jar and there you have it! So here are the directions for canning bacon. Just remember – PARCHMENT PAPER!  Lay strips of bacon side-by-side onto sheet of paper, leaving 1/3 of paper to be folded over the the top half of the bacon. You can put a half pound, 3/4 pound or whole pound onto one sheet. I put 1/2 pound for each jar because there are just two of us.  Fold top third of the paper over the top half of the bacon. If your parchment paper is not tall enough, then place a cut strip of parchment paper over the top half of the bacon strips.  Now fold the top over to the bottom, folding the bacon in half. There will be paper between the top and bottom halves of bacon.  Starting at one end, begin rolling “package” like a jelly roll, allowing some end paper to overlap. Cut off any extra paper.  This was my addition to the process. Because I remembered way back into my childhood that bacon we had received in a metal can was tied with a string, I did the same thing because it keeps the roll nice and tight. I did not tie the string snug, but just let it hold the roll together. I used kitchen twine also known as “butcher’s twine”.  Drop the rolls open side down into preferably wide-mouthed quart canning jars (I had to use a couple of small mouth because I was short two jars) that have been washed and sterilized in the dishwasher, in boiling water or in the oven. The wide-mouthed jars make it easier to remove large rolls.  Wipe the rims of the jars with a warm, soapy and wet dish cloth to remove any oils from the glass that would keep the jars from sealing.  Having kept lids warming in nearly boiling water, place them onto the jars and add rings.  Process in a pressure canner at 10 lbs of pressure for 90 minutes.  When jars have cooled, remove rings and wash jars and rings in hot, soapy water to remove any oils that may have escaped. Allow to dry and place rings back on. Store. Jars aren’t real pretty because the bacon fat coats the sides.  To use bacon, remove ring and lid from jar and allow the roll to slide out. Carefully unroll paper package and fold back paper off of bacon.  Carefully remove bacon from paper with a fork. This is where packaging thick bacon comes in. Thin bacon simply falls apart. See below what happens in the removing and the cooking.  The thin bacon made a mess in the removal and cooking!  Place bacon into skillet and add oil that is the bottom of the jar. Fry just like fresh bacon. It takes a little longer to crisp than raw bacon.  A great addition to a good Okie breakfast – Western omelet, grits, English muffins…and bacon. Yum!! And even if Ol’ Man Winter gives us another electricity blackout, I’ll have bacon for breakfast to cook on the wood stove! |
|
|
Oklahoma Pastry Cloth™ Company on Facebook
|
|
 |
|
|
Canning List For The Beginner
Tuesday, August 30th, 2011
|
I’m sorry about the tardiness of the post, but the web hosting servers in Georgia have been down and I have not been able to get onto the site. If you’ve been unable to reach the site too, that is why. Anyway, I’m going to break away from the recipes today at the request of new canner and reader, Judy, and do a quick pictorial run-through of items needed for the two canning processes. Some are required and some are suggested in this list that I am offering. But the whole idea is to give all of you new canners out there, pictures of items so that you will know what to look for in the stores or online! There are two kinds of canning processes: Waterbath for fruits, tomatoes, pickles, jams and cheeses, and Pressure Canning for low-acid meats, veggies and soups. You can actually buy Litumus paper at the drugstore or online to test your fruits, veggies and anything of which you are not certain. A PH measure of 4.6 (±.5) or lower is considered acidic in canning (waterbath) and anything higher is considered basic (pressure canning required). These are levels advocated by the county extension offices and are not the same as what is scientifically referred to as acidic (7 and below) and basic (above 7). Tomatoes are a little iffy these days because some of the hybrids have been bred to not be as acidic. The heritage varieties should be fine. If there is a question, add 1/2 tsp of vinegar or lemon juice to each jar of tomatoes or tomato products. And finally, invest in a good canning book. Walmart, Lowes, Home Depot, Ace Hardware – all of these carry the Ball Canning book which will answer most of your questions. But there are other books too that can be found in book stores, on Half.ebay.com, on Ebay.com and in used book stores.  These are the two books that I have on hand – The Ball Blue Book and The Farm Journal Freezing and Canning Cookbook that was my aunt’s.  A waterbath canner is usually made out of enamel ware or stainless steel. It includes a rack that can be balanced on the sides of the canner. This canner is used for high acid foods. There is also a steamer canner that is used for the same purpose, but I have never used one or even know anyone who has used one so I can’t attest to the quality or the success of the steamer canners.  There are two kinds of pressure canners. This 12 quart Mirro brand ‘weighted’ canner is very simple with just a variable weight on the pressure release to determine the amount of pressure reached inside of the canner when heated. The only maintenance required for this type of canner is to replace the rubber gasket each year and to keep the canner clean.  The removeable weight has a hole at each of 5 lb, 10 lb and 15 lbs of pressure. The weight is placed onto the pressure release valve at the appropriate pressure poundage before the canner is heated.  This All American brand pressure canner is a gauged canner. If you notice, there is a gauge with a needle that indicates the pressure achieved inside the canner. More maintenance on these canners is required because not only should the gasket be changed each year, but the gauge must be tested for accuracy at a local extension office each year. Either type of canner works well and it is purely personal preference when choosing a suitable one. Canners come in multiple sizes depending on how many jars they can hold. They can range from holding 4 quart jars to 19 quart jars and variations of the smaller jars.  You will need jars, of course. There are quite a number of sizes of jars and here are just a few.
 You will need Lids and Rings which can be bought as a set or, if you already have rings, as just lids. There are two sizes for the two mouth sizes of the jars – wide and regular.
 Important utensils to have on hand for all canning projects include:
 A candy thermometer can come in handy when making jams and fruit butters.   Some useful utensils to have on hand, depending on what you are canning, include:
 A variety of measuring cups is essential. An 8 cup batter bowl is handy for measuring fruit pulp to figure sugar additions for jam and fruit butters.  A handy item for fruit butters is a collandar. This one was my mother’s but you can still buy them online.  Another handy item for pastes and sauces is a food mill. It separates the skin and seeds from the pulp of tomatoes beautifully.  You will need a warm, wet dishcloth for wiping the rims of the jars and a dish towel on which to place the jars as they are being filled. It makes clean-up much easier by absorbing drips. It also makes a good cusion for the hot jars when they are removed from the canner. A Sharpie pen is handy for labeling the lids of your canned items with the contents and the date.  You will also need a small pot to fill with water and warm your lids  One of the best investments I made way back in the ’70’s was in a set of stainless steel nesting bowls. They have been invaluable for holding large amounts of fruits and veggies for raw packing. That biggest one can hold a whale of alot of tomatoes!  For stews, soups, chili and for blanching fruits and veggies, you will need to have some large stew pots. For years, I used hand-me-downs or thrift store finds, but about 10 years ago, I finally decided to save my money and invest in a set of Tramontina pots. There are four of them in different sizes. The largest holds 4 gallons of liquid. I love them because they are heavy weight 18 gauge stainless steel and the bottoms are three-ply stainless so that items don’t burn very easily on the bottom. I’m sure that I have forgotten something and if I think of other things, I will add them to the post, Hopefully this will help you have a visual list of items that you need for a day of canning and another list of items to which you can aspire! And if you have any questions, be sure to email them at the contact page or post in the comment section below! |
|
|
Oklahoma Pastry Cloth™ Company on Facebook
|
|
 |
|
|
National Can It Forward Day
Sunday, August 14th, 2011
 I am soooo out of the loop!! Did you know that Saturday, August 13th was National Can-It-Forward Day?? I didn’t!! NCIF Day was supposed to be honored by canning something or by teaching someone else to can something or by hosting a home canning party! How did we miss this fact? Canning Across America knew all about it, as did the Ball Company which sponsored canning parties, but heh – they invented the day!! I mean, as a canner, I think it’s kinda cool that my passion has its own day!! So, I’ll be making note for next year.  So, what did you do for NCIF Day? I canned of course, but not because I knew I was supposed to in honor of anything! I did it because that’s what I do all summer long to get ready for a very long and cold Oklahoma winter. So I canned 26 pints of beef vegetable soup while dehydrating 2 1/2 pounds of beef strips for jerky to vacuum seal in quart jars. And yes, there is a jerky post coming up! You bet!  So tell us if you did anything unusual to celebrate NCIF Day – or just tell us what you canned and pretend that you really knew that you were celebrating something!! |
|
|
Oklahoma Pastry Cloth™ Company on Facebook
|
|
 |
|
|
Canning Beef Stew
Tuesday, July 12th, 2011
 How hot is it? It is so hot in Oklahoma the snakes are looking for air conditioning and they’re cold blooded!! It so hot here that the nectarines are going straight from the tree into jars as jam. It’s so hot that the Gila Monsters have moved to Oklahoma from the Mohave Desert because it’s warmer here! Yeah, we’re setting records. The disturbing news for the rest of you is what this is doing to part of your food supply. Grain and cotton crops have simply burned up, causing both to rise in price. As a result, grain is becoming cost prohibitive for ranchers for their livestock. Grass is gone and so many ranchers are having to resort to expensive hay as well. I just talked with a friend, in south-central Oklahoma, who owns a very large cattle ranch and she said they are preparing to sell their entire herd of cows. She said the cows are losing weight so fast that they must be sold this week or she and her family will take an even worse beating. There is no grass and there is no water. I see cheap beef in the grocery stores in the shortrun, from ranchers selling off herds, and a shortage of beef/high prices in the longrun, so plan accordingly!! One would think that in this furnace that is the midwest, one wouldn’t even think of hot meals. But planning ahead is the stuff that makes us prairie folk able to contend with the unexpected. Using garden staples that have managed to survive to can foods for the winter is a great way to use these days indoors. I have been finding beef on sale and so, I’ve been putting up a Fall and Winter supply of beef stew, a veritable meal in a jar! Just open a jar, heat the stew in a pot, mix up a batch of cornbread and you’ve got supper! And if the electricty goes out in one of our famous ice storms, the wood stove or the grill make perfect heat sources for a pot of stew accompanied by bread or crackers. So here is how I do my beef stew for Mr. Fix-It. He loves having this around because he can fix it himself! (carrots, celery, potatoes, onion, etc)
 Pat 10 lbs of meat dry with paper towel. I use either chuck roast or rump roast, depending on what’s on sale. Today I’m using chuck roast.  This is a rump roast. If you will notice, the chuck roast has more fat and more loss, but it is also more flaky.  Cut meat into cubes  Remove fat and membranes by lifting as you cut underneath. As you lift, this gives more area to slice under the membrane or fat and also helps to release them from the meat.  Lightly salt the meat  Add a little of the meat at a time to a very large stock pot that is on medium heat. Brown and add more meat until most meat cubes are lightly browned on at least one side. Juices will begin releasing.  Add 4 1/2 pounds of mixed veggies. I am using potatoes, carrots, onions and celery. You can use whatever amounts of each that you prefer and you can add other vegetables according to taste.  Add water to cover  Add garlic powder  Add thyme  Add bay leaf  Add beef bouillon  Mix package of brown gravy with 1/2 cup water and add to the stew, stirring. At this point, if you like wine or burgandy in your beef stew, add 1/2 cup. Mr. Fix-It likes his without.  Cover and allow to simmer vigorously 1 hour, adding water to keep at the same level and stirring occassionally to keep from sticking.  Mix 1/2 cup corn starch with one cup of cold water. I start out with this much and add more if I need more thickening. I usually wind up using 3/4 cup corn starch with 1 1/2 cup water, however, I like to start out with less and adding more if needed. Do not make the broth too thick. It can always be reduced after opening a jar and bringing to a boil. If you get your broth too thick, it will thicken more in the processing and will become way too thick.  Stir continually as you pour into boiling stew broth to keep from lumping.  Find and remove bay leaf. Place stew into jars, dividing broth evenly between jars. Leave 1″ headspace.  Using a canning spatula or knife, remove any air bubbles by running around the inside perimeter of the jars.  Wipe the rims of the jars to remove any juices or oils  Add lids that have been warming in a pan of nearly boiling water  Add rings, tightening and then backing off just a hair  Place jars into canner, cover and process for 1 hour 30 minutes for quarts and 1 hour 15 minutes for pints at 10 lbs of pressure  Meanwhile, place all the trimmings into a pot and cover with water. Boil until trimmings are cooked down to very tender, continually adding water as needed. Strain broth from the trimmings and add broth to pint jars. Add 1/2 tsp salt to each pint and process with any extra jars of beef stew to make canned beef broth.  Place trimmings, a carrot and about 1/4 cup oatmeal into food processor or blender and turn into a puree. You can put this into jars too, with extra water, leaving 1 inch of head space to can. Or you can freeze it. Use it as canned dog food! Nothing has been wasted. |
|
Oklahoma Pastry Cloth™ Company on Facebook
|
 |
Canning Peach Pie Filling
Tuesday, June 28th, 2011
 There is just something about the smell and taste of peaches. The smell is great in potpourri. The smell and taste are awesome in iced tea and are especially good in our Peach Cordial and Peach Berry teas. Peaches just have a heady fragrance that even draws you to the grocery bins with an invisible wave that says, “You HAVE to have some peaches!” We only have one peach tree. But more are going to be planted this fall. It is best to have at least two different kinds of trees – and we did – but one died. Oklahoma has many peach orchards, but the heat is brutal and it got our other tree. Actually, one tree is plenty for one family, but as I said, two make for better fruit. I was very excited to see all the fruit on our tree this year. It got bigger and bigger and then one day we noticed little, clear sappy things oozing from tiny holes. Arrggghhh. Oriental Fruit Moths had had their way with my peaches!!! How depressing. These beautiful fruits look so pretty, but when sliced, brown tunnels weave through the ripe and juicy meat. So, next year, pheromone traps will be hanging from the tree like Christmas ornaments! What fruit we did get has been incredible. It’s like eating peach candy and so I have been diligent at getting these precious peaches stashed away for future use. One thing I love to do is make pie filling. I use the same method as my Apple Pie Filling, but I adjust the syrup for peaches – a litle thinner. The following is the recipe that I use for peaches. To see how to make the syrup just click on the link for the Apple Pie Filling and directions and pictures are there. Mix dry ingredients together in a large pot and slowly add water, stirring with a whisk until well blended. Bring to a boil while continually stirring and allow to boil until mixture thickens and becomes more transparent. Remove from heat and add lemon juice. Stir.  Wash 6 – 8 pounds of peaches. In this case, I used more because I had to cut so much off of each peach due to those nasty Oriental Fruit Moths.  Peel peaches  I find the easiest way to slice peaches is to make cuts about 1/2″ apart, cutting at an angle toward the pit so that there is very little meat being pulled away from the pit. In the case of most of my peaches, I ended up cutting out chunks around the worm holes so this batch isn’t very pretty!! I slice my peaches into a bowl that has a cup of water mixed with a tsp of FruitFresh in it. I continually toss the peach slices as I cut to keep them coated with the citric acid mixture.  Pack the peaches into jars leaving a 1″ head space from the top of the jar. I’ll be rearranging peaches from the jar on the front right to distribute among other jars because it is too full. Add 1/2 tsp apple cider vinegar to each jar of peaches.  Ladle syrup into jars leaving a 1″ head space of syrup. This prevents any from boiling out in the processing. I usually have around a quart of syrup left over and just use it for my next run or I can it and use it for fresh peaches in a pie.  Using a knife or canning spatula, run around the inside perimeter of the jars to release any air bubbles.  Wipe the rims of the jars with a wet cloth to remove any juices, oils or syrup which will keep a jar from sealing.  I like to place my lids in the water in a pan by alternating them rubber side up, rubber side down which helps to keep them from sticking together. The water is brought to just before a boil and then turned on low to keep the lids warm.  Using a canning wand or tongs, remove the lids from the water and place onto jars. Screw on the rings and adjust by tightening and then backing off just a smidge. Place in a water bath canner and fill with warm water to 1″ over the top of the jars. Bring to a full boil and boil for 20 minutes. Remove jars from canner and allow to cool. Listen for the “ping” pop that lets you know the jars are sealing.  These jars are ready to store. I will use one quart and one pint to make a pie, so this batch made enough for four pies! Just pour into your crust, top and bake at 400 degrees. Easy as…umm…peach pie!! |
|
Oklahoma Pastry Cloth™ Company on Facebook
|
 |

 Homestead Revival
 Paratus Familia
 Rural Revolution