 Once in awhile I get a wild hair and just start experimenting. Like splashing paint randomly on a canvas, I’ll play a game of “pull out what you have, throw it together and pretend it’s good!!” Most of the time, the result is pretty successful, but once in awhile I’ll end up with a disaster like my ‘seafood casserole’ which has been the subject of really bad jokes for the past 10 years. Or at least I think they are bad. For some reason, at family get togethers, that meal always finds its way into the conversation. That casserole was big enough to feed our family of six and all the neighbors up the road and across the road. Unfortunately, the kids took one bite and asked when I had started combining WWII MREs for dinner. Actually, WWII MREs would have tasted better. Mr. Fix-It, always the gentleman, smiled through gritted teeth and pretended to chew. I gave the casserole to our Labrador, Toby, who is the canine equivalent of “He likes it! Heh, Mikey!” (The Life commercial, silly!) Toby sniffed the casserole and looked at me with those big, brown, soulful eyes that silently queried, “When did you start combining WWII MREs for dinner?” He didn’t eat it either. Mr. Fix-It is my restaurant critic. No thumbs up from him or five stars. It’s number of helpings that determines the quality of my concoctions. One helping that is barely touched is a signal that failure is the operative word while two helpings is the, “Old gal, you did it!!” Well, this was a ‘Mr. Fix-It Two Helping Recipe” and so I thought that I would share it with you. And please, if you don’t like it, don’t tell me. Just go buy a Labrador! 
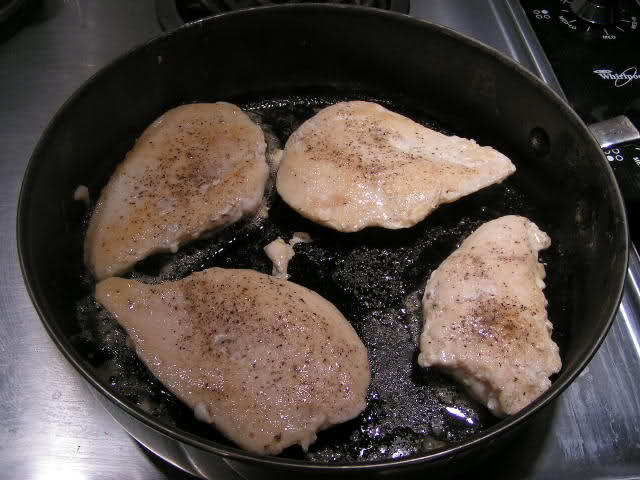 Salt and pepper chicken breasts and brown in 2 tbsp olive oil 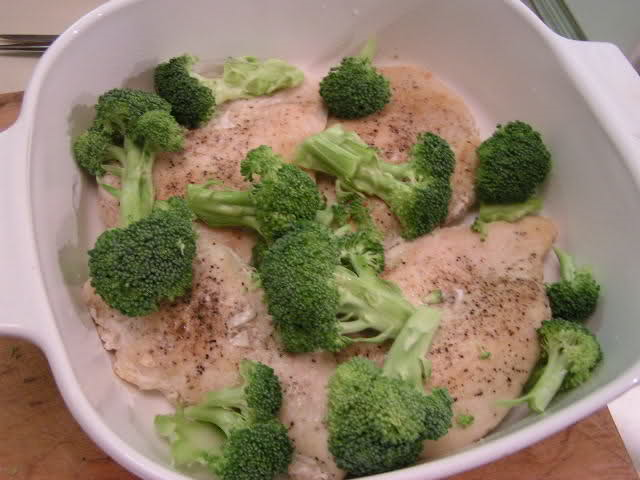 Place chicken in a baking dish. Lay broccoli around and on top of the chicken breasts 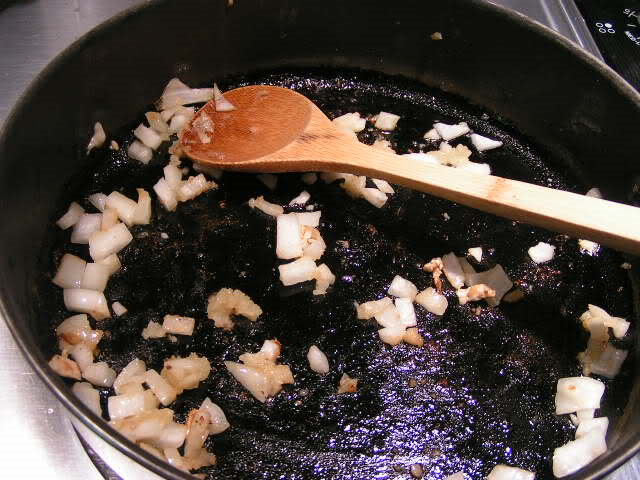 In the same skillet of drippings, sauté onions and garlic until just clear. 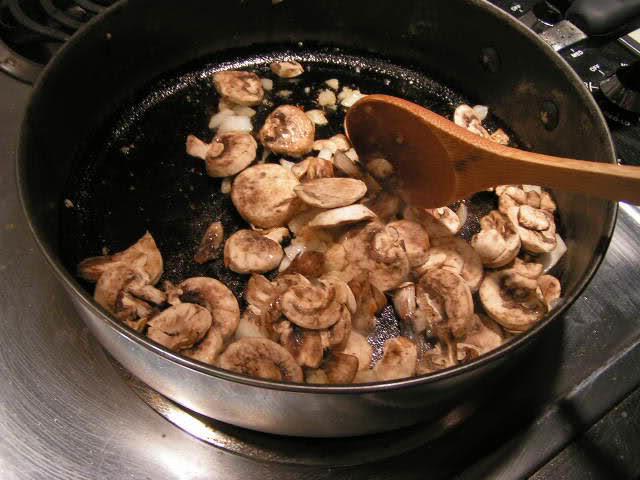 Add mushrooms and cook until tender and browned 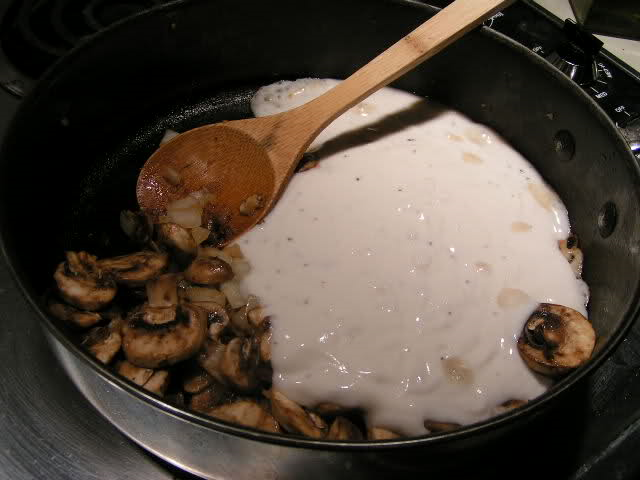 Add prepared gravy mix. I like using the mix because it is lower in calories and fat, but you can make a white gravy mix from scratch, in a saucepan, using equal amounts of melted butter (or other fat) and flour, adding milk a little at a time and stirring until gravy is thickened. Add salt and pepper to taste. 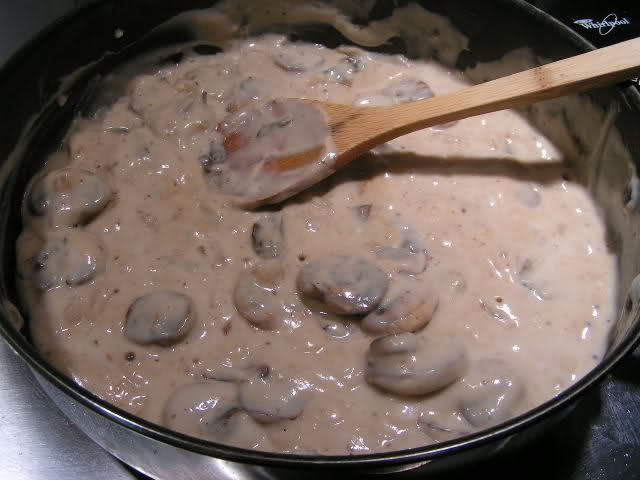 And stir until everything is incorporated 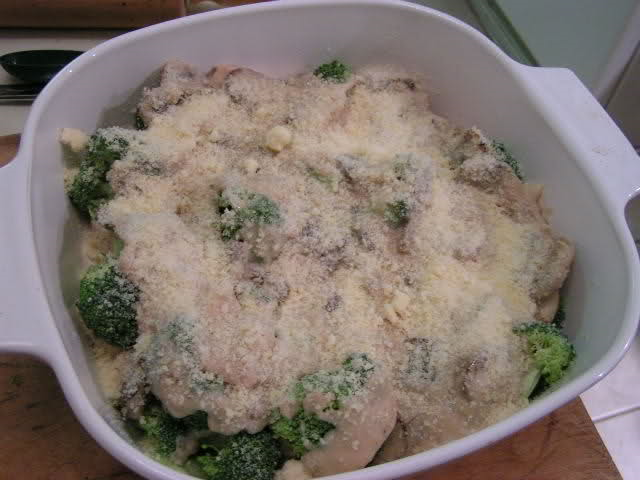 Pour mushroom sauce over the chicken and broccoli and spread to cover and sprinkle parmesan cheese over the sauce 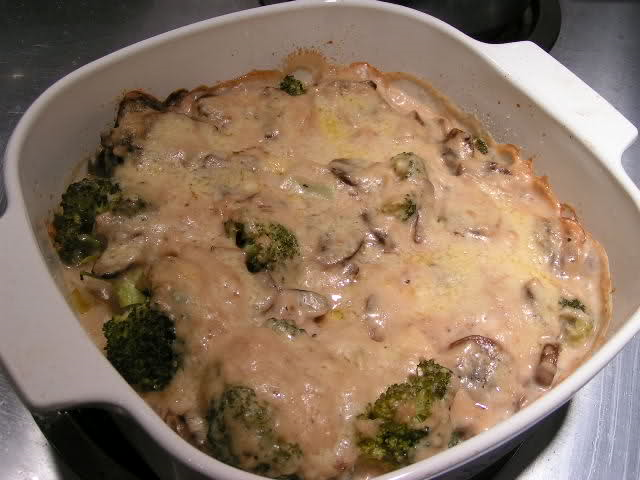 Cover and bake in 350º oven for 30 – 45 minutes until brown and bubbly
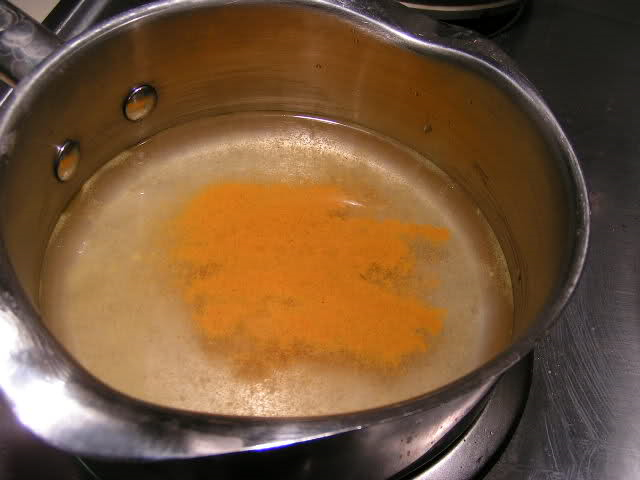 In a large saucepan add bouillon to water and add turmeric 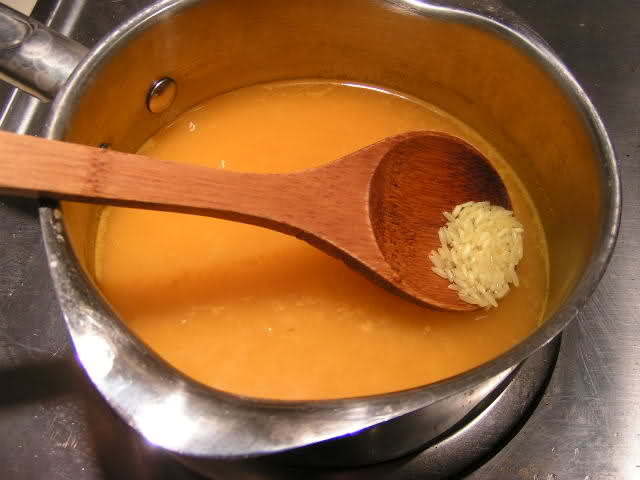 Bring water to a boil and add rice. Cover, reduce heat to simmer for 20 minutes 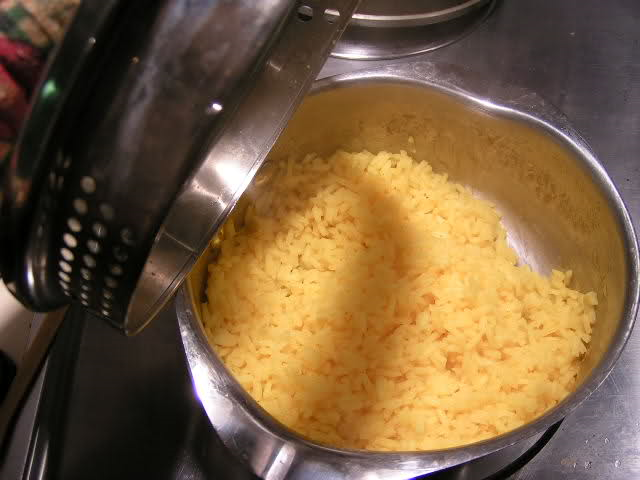 Toss rice and cover to let stand for 5 minutes. 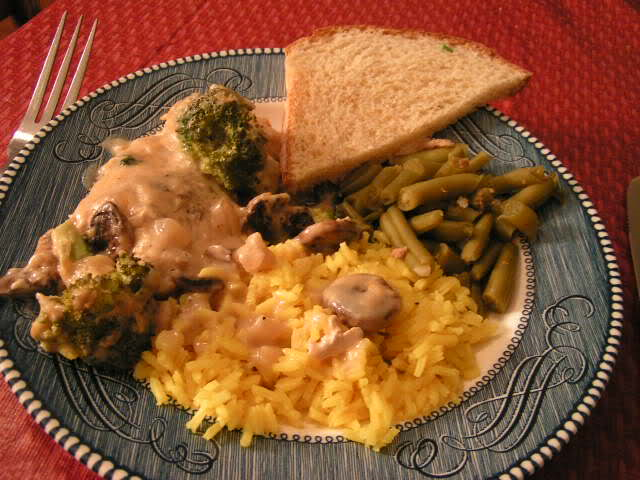 Serve one breast and broccoli with sauce per person. And of course, you’ve gotta have that homemade whole wheat bread! 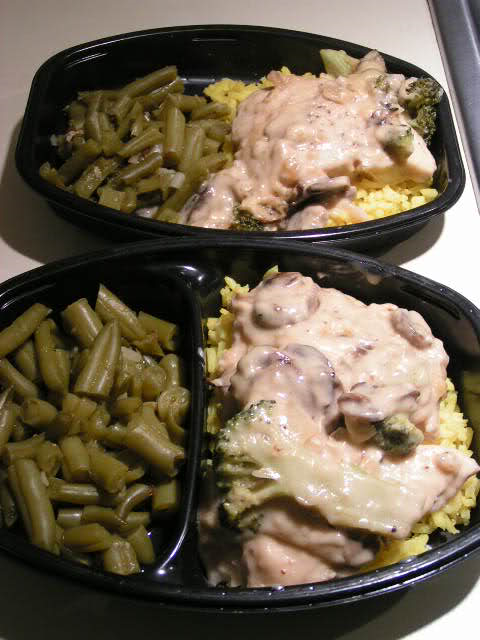 If you have leftovers, pop them into plastic trays, wrap with foil, label and freeze and you have your own ‘TV Dinners’. This is one chicken breast split into two dinners! Can we say, “Lunch?”  |
|
Oklahoma Pastry Cloth™ Company on Facebook
|
 |
Archive for March, 2011
Chicken and Broccoli Bake
Thursday, March 31st, 2011
“Time To Make The Donuts”
Tuesday, March 29th, 2011
|
  My dear friend and reader, Mrs. B., did it again. Not only did she gift me with my wonderful Bosch mixer, but she alerted me to the newest post at one of my favorite and linked blogs, New Life On a Homestead with the recipe for donuts to mix in my new Bosch mixer. The recipe originated at Enola Gay’s Paratus Familia and then Kendra made an edition at her blog. The pictures of the donuts at both sites made Mr. Fix-It drool and since I was tired of wiping up spit from the kitchen floor, I asked him if he’d like me to attempt the confections. You know the answer! And so I did the recipe, as written, with one change. I substituted potato flakes for some of the flour. I used home ground, whole wheat flour that I sifted and sifted but added potato flakes because I know that is the secret ingredient for a famous donut. I figure, what could it hurt? I make potato rolls and bread, so why not potato donuts? The home ground flour works great, but all purpose is fine too. So that’s what I did and the following is the result. The recipe made 27 small donuts + 27 holes. Also, I used a thin glaze and only dipped one side to make them not so sweet. They were just right. We shared these gems with our neighbor up the road and one of the sons said that he loved them because they were not too sweet.
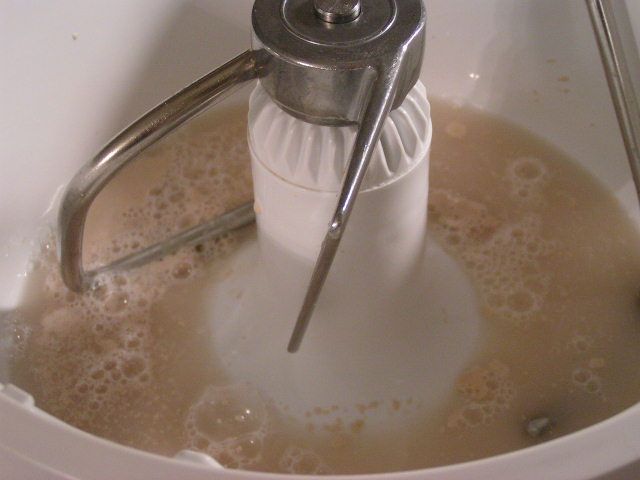 I used my Bosch but you can use any mixer with a dough hook. Of course, you can do this by hand as well. Add 1 3/4 cup warm water and 1 tsp sugar and sprinkle 1 Tbsp yeast over the surface, allowing to ‘proof’. 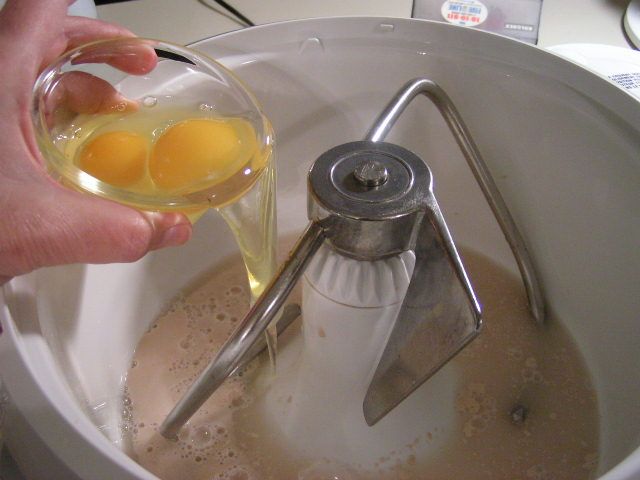 When the yeast water is bubbly,add 2 eggs… 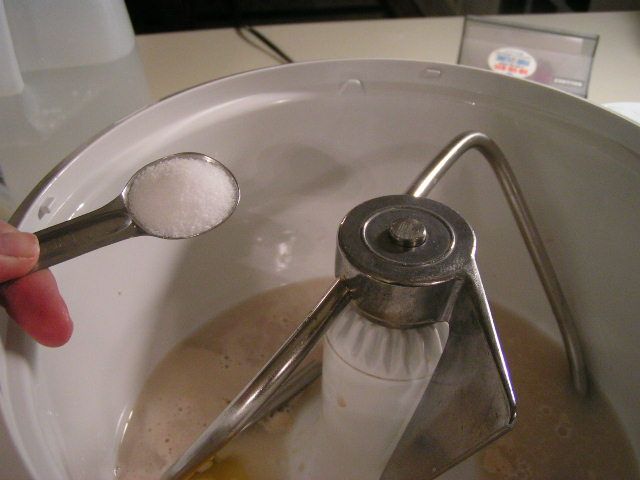 …and 1 tsp salt 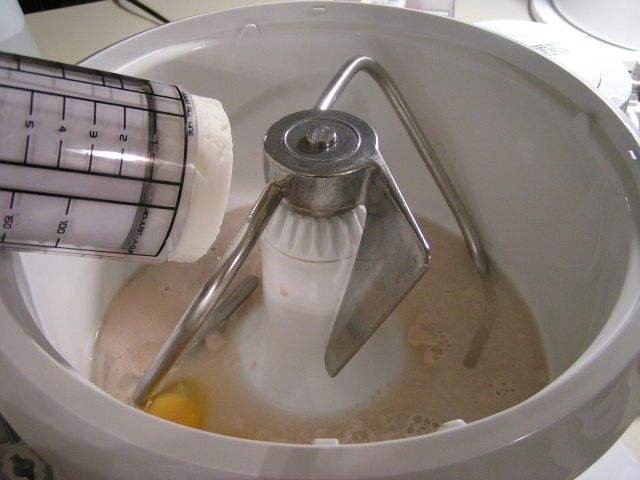 …and 1/3 cup shortening. 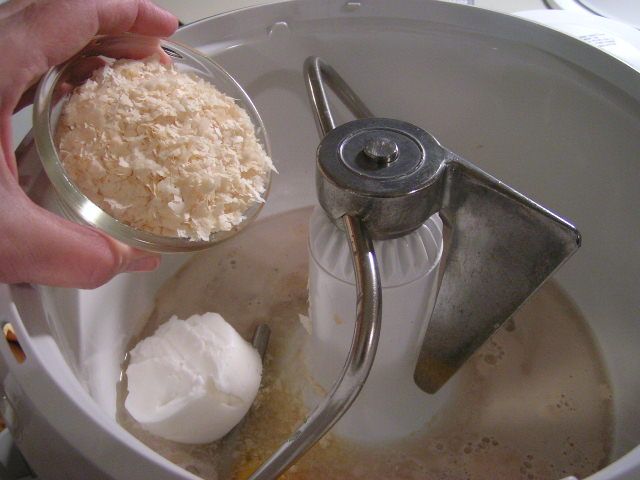 I added 1 cup of potato flakes. 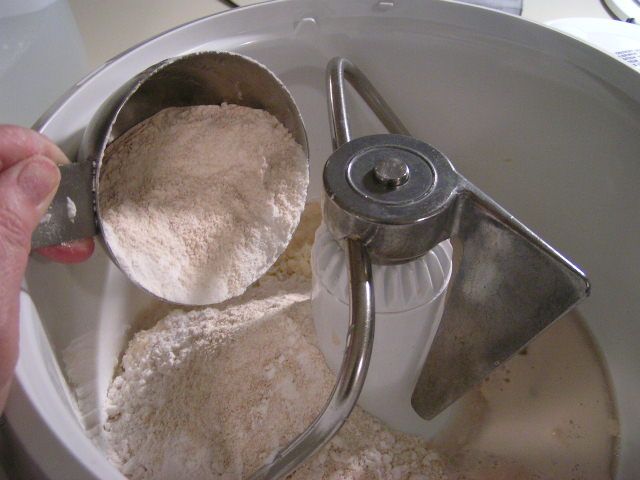 Add two cups of the flour. I am using whole wheat ground from Prairie Gold Hard White Wheat. 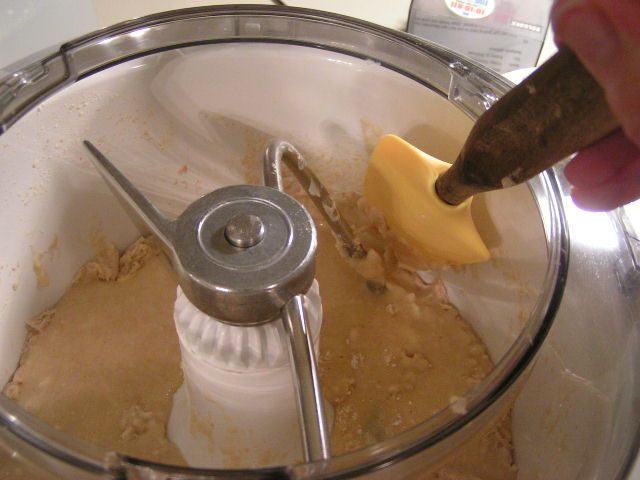 Mix and scrape the sides. 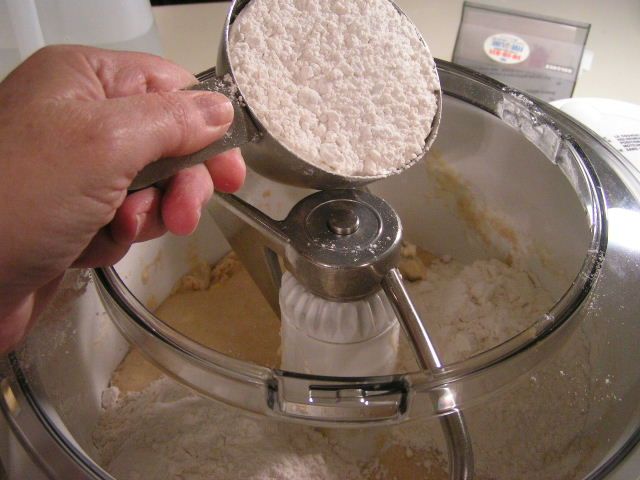 Add another cup of flour and mix. 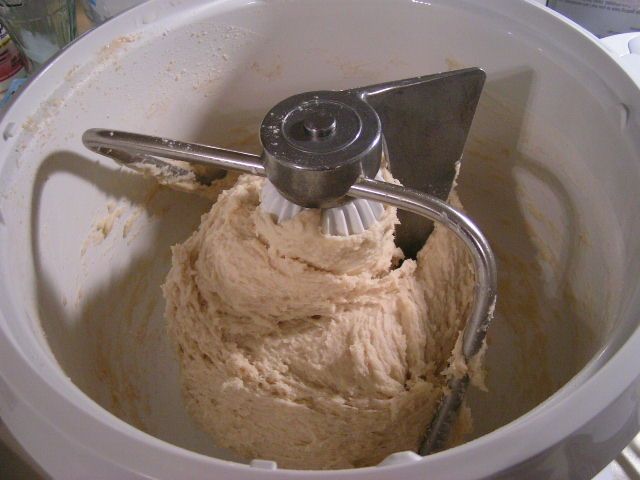 Continue adding flour by the cup until the dough pulls away from the side of the bowl but is still nice and soft. I used a little under 4 ½ cups of heavily sifted flour. Continue mixing on low for 8 minutes to knead. 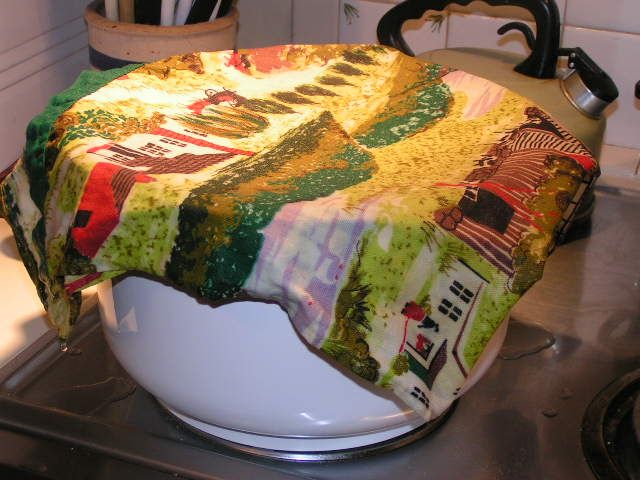 Let the dough rise until double – about an hour if it is in a warm place. Here, I am just leaving the dough in the mixer bowl, covering it with a damp cloth and then it is going into the oven which has been preheated to 150º and turned off.
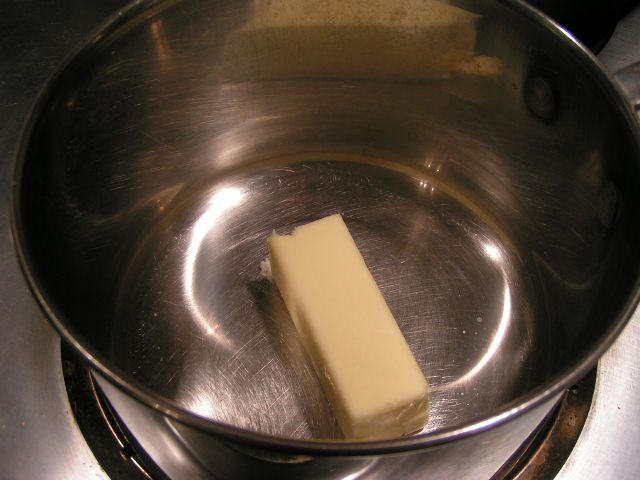 While waiting for the dough to rise, I made the glaze. Melt 1/3 cup butter in a saucepan. 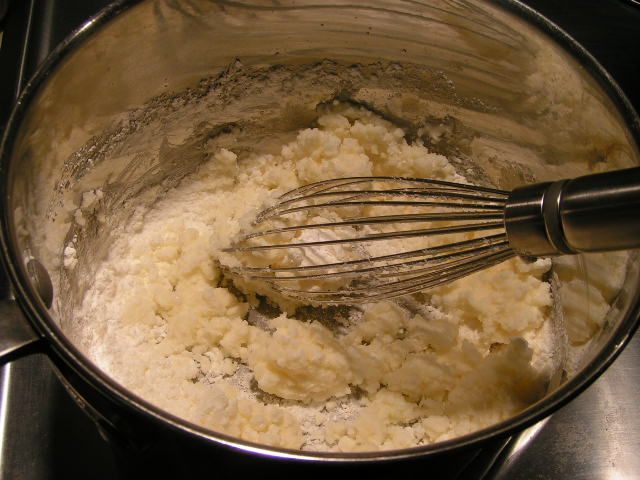 Add 2 cups powdered sugar and stir 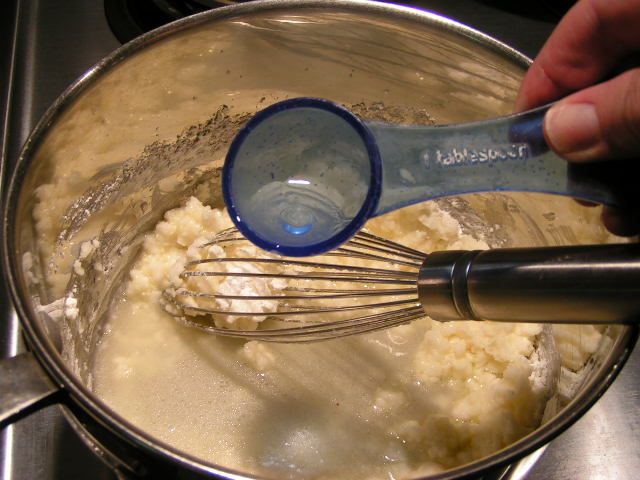 Add 4 Tbsp hot water. I added a little more water because I wanted a thin glaze. However, if you want a glaze that is thicker,1 1/2 or that you can spread, use more powdered sugar. 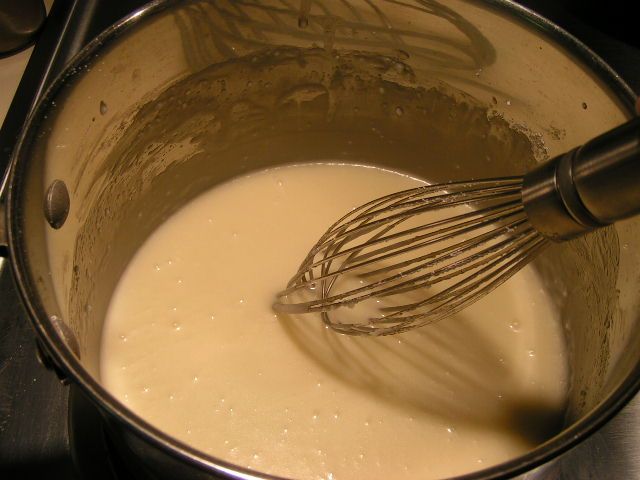 Stir until smooth 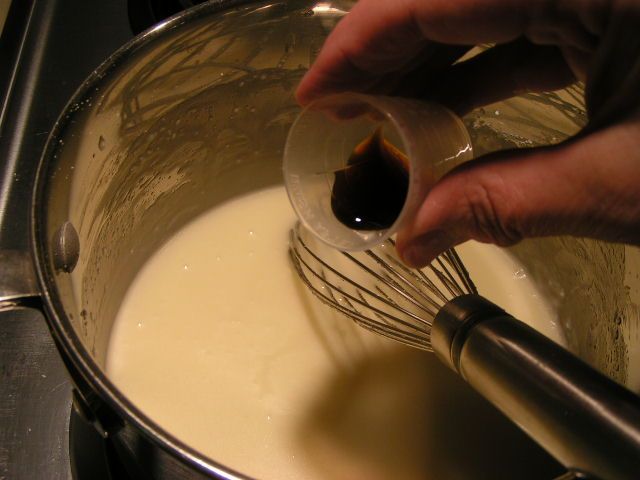 Add vanilla and stir until mixed. Set aside on a warm eye. I did it this way because I grew up with Krispy Kremes and have watched them glaze their donuts. The glaze is kept warm and thin and it doesn’t take much to glaze a donut. I decided to kind of replicate the process. 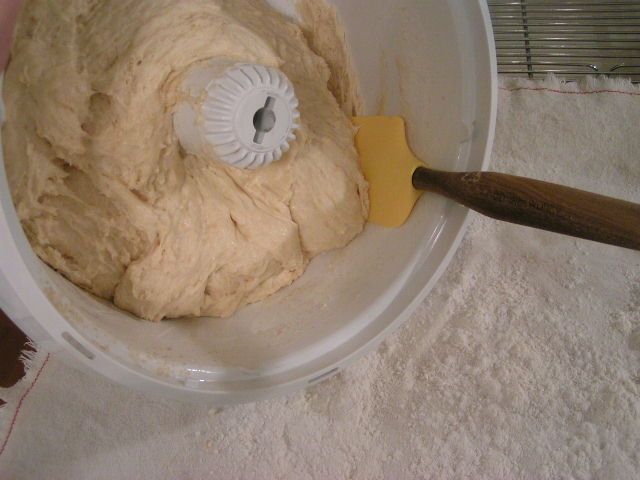 When dough has risen, scrape out onto floured surface. I am using one of the spatulas available on the Shopping Page as well as an Oklahoma Pastry Cloth™. 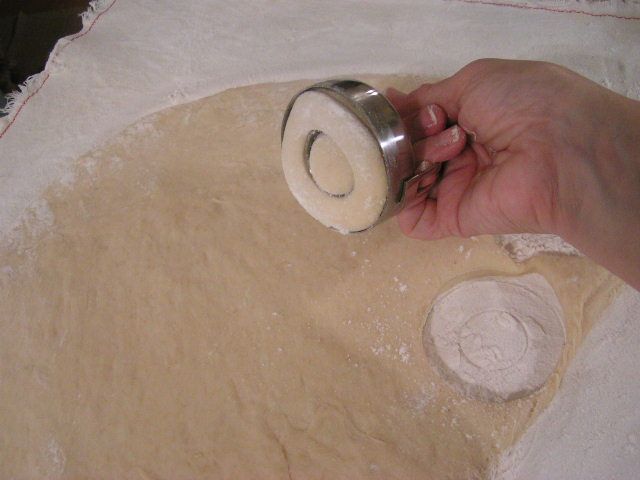 Roll out dough to about ½”. I used a rolling pin. Here I am cutting the donuts with a two part donut/biscuit cutter. It is wonderful because the center is removable so that the gadget becomes a biscuit cutter. 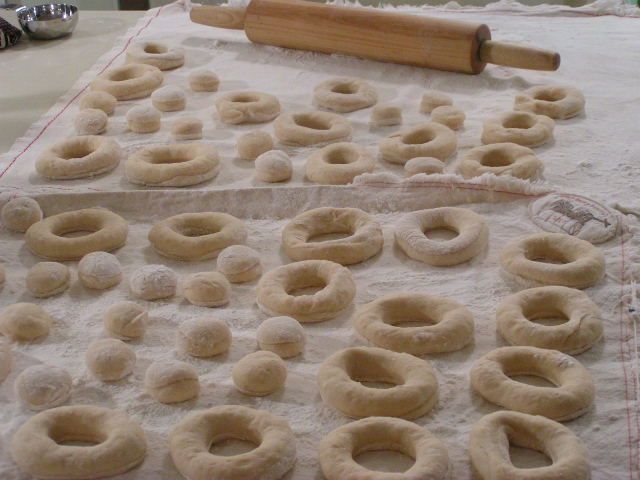 Place the donuts on the floured surface and cover with a damp cloth to rise until double. 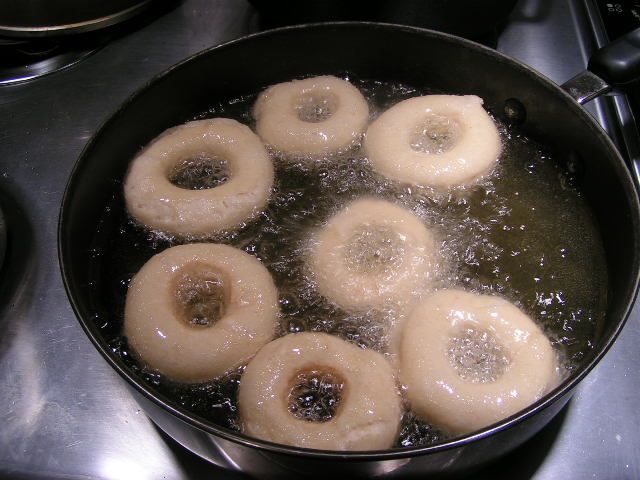 When donuts have risen, carefully place them in oil that has been heated to 350º.  A wooden chopstick is great to turn donuts to their other side when browned on the first side.  Cooked donuts placed on a rack from the oil, waiting to be glazed  Using a chopstick or other utensil, place the donut in the warming glaze.  Lift the donut out of the glaze and place on rack or cookie sheet.   Don’t you just want to dive in? We did!!
|
|
Oklahoma Pastry Cloth™ Company on Facebook
|
 |
Grinding Corn
Friday, March 25th, 2011
 It doesn’t take much to thrill me. I’m one of those people who appreciates the little thngs in life! For probably 12 years, I’ve been grinding wheat to make our breads and other flour products and it’s been grand. I started out with a hand grinder – a Lil Ark – that has large, stone burrs to grind the grain. You’ve heard of stone ground meal, I’m sure. Well, we don’t have a watermill, but we still have the stone ground flour! 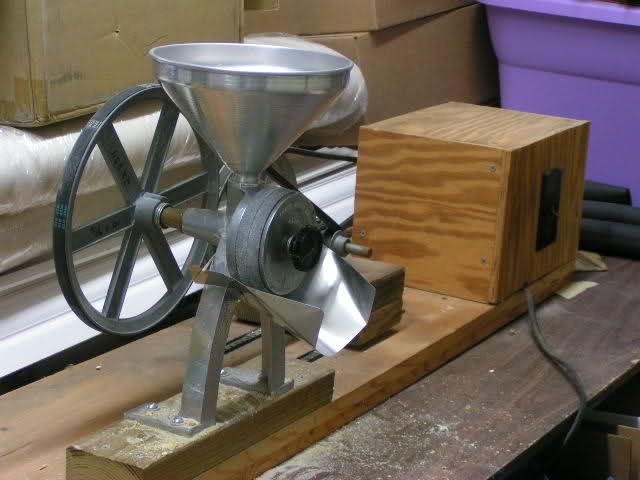 Mr. Fix-It, ever the mechanical genius, watched as I rotated ’round and ’round with the handle to the mill to get about 2 cups of flour for 20 minutes of work. Good exercise, but rather boring. He knew he could get a motor to do the work for me and so he promptly set out to do just that. Two fly-wheels, a couple of auto belts, some pine and an old trash compacter motor later and Mr. Fix-It had indeed fixed it! It isn’t much to look at, but by jove, it does an incredible job. It stays in the garage because it is huge and kinda messy. 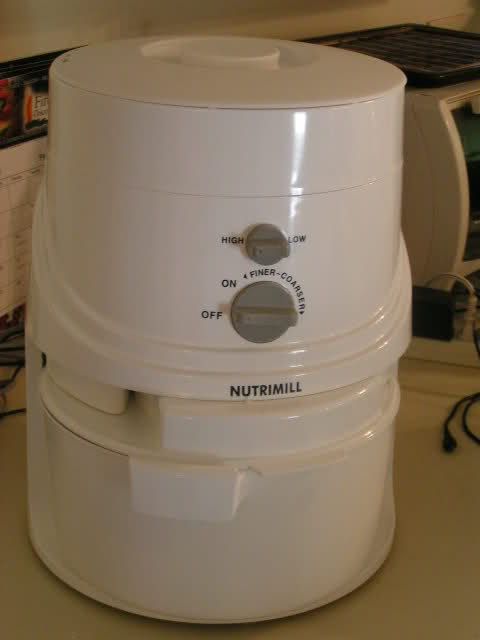 And then I graduated. I got a Nutrimill…the grinder of electric grinders. What took my Lil Ark an hour to accomplish, the Nutrimill does in 10 minutes. All the more flour to bake with, my dear! These grinders can be found at a number of places online and they are sooooo worth it. Some online sources include:
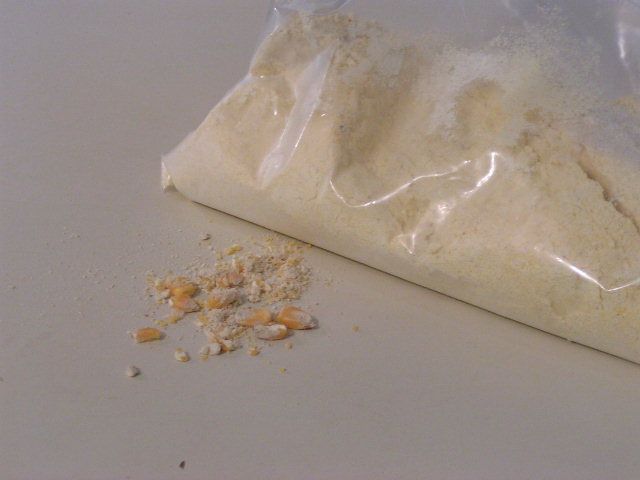 So all of this time, I’ve been making breads and such with wheat flour, but it never occurred to me to purchase corn and do my own cornmeal. Duh. Well, today ended that bit of ignorance. I purchased a sack of corn from Sonrise Whole Grains in Midwest City, and came home to experiment. I used both grinders and combined the results. The Nutrimill grinds the corn pretty fine, which is great for coating fish, while the Lil Ark makes a more grainy meal, which is good for cornbread. But together, it makes a-maize-ing cornbread. 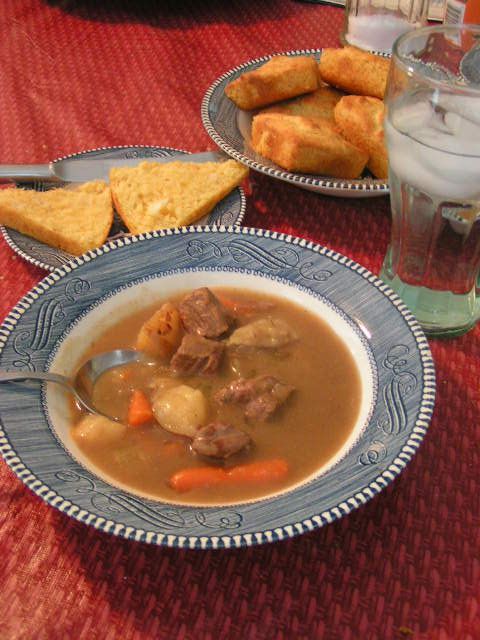 As a result, for dinner tonight, I made cornbread by my recipe posted previously and served that with some home canned beef stew. Now THAT’S livin’! |
|
Oklahoma Pastry Cloth™ Company on Facebook
|
 |
Canning Sausage
Thursday, March 24th, 2011
 But in Oklahoma, we say, “Sausage” like you ‘orta’! I love sausage. There is absolutely nothing like it. And, yes, it has to be made with pork. I’ve made turkey sausage before and I’ve added olive oil to give it some ‘crisp’ on the outside, but heh, it was turkey. That just isn’t real sausage. My favorite brand of sausage, if I haven’t made my own, is Tennessee Pride Country Sausage. Yes, I was born in Oklahoma and I live in Oklahoma, but I had a stint in between there in Tennessee. “Tennessee Country sausage is the best part of the meal”, don’t you know? It is very lean and has a wonderful flavor. Best of all, we get it here in Okie land!! 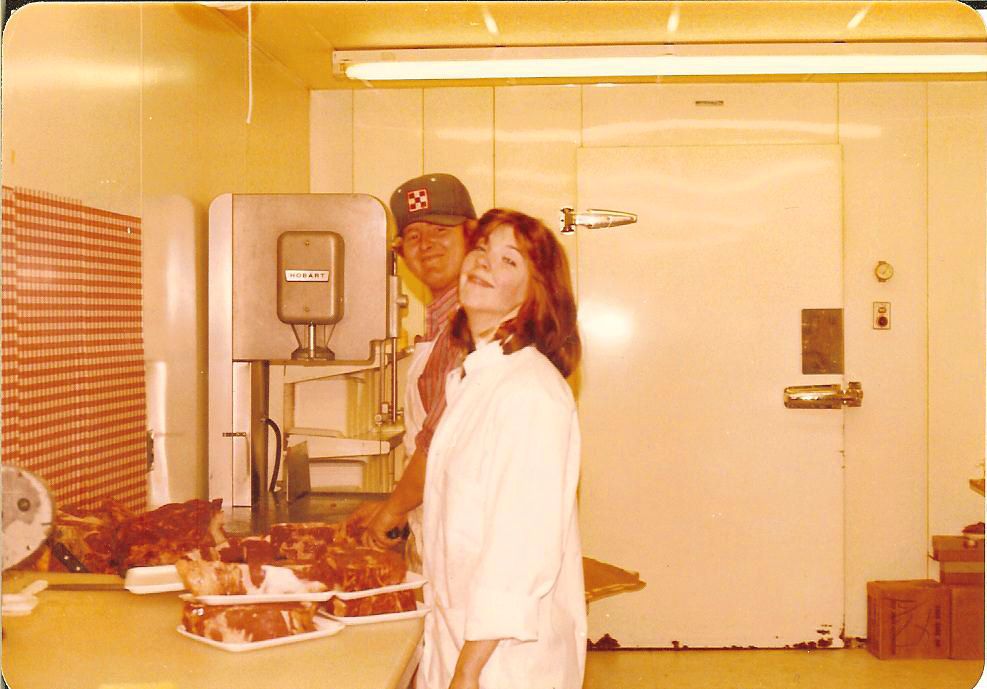 Working in the meat department in Blaine, Tennessee, (and yes, we acted this stupid) I learned to make my own sausage. We ground enough hogs to feed Ireland. I remember when I was expecting my first child, we and our friends, who raised hogs, killed several hogs to put in our freezers and I spent the afternoon grinding, seasoning and wrapping nearly 200 lbs of sausage and curing and hanging the hams and bacon. I was in those first three months of morning sickness and I must say, it took me years to be able to smell sage and brown sugar again. I got ill to put it mildly. My mother-in-law taught me how to can that sausage (sorsage as she called it) and I have been doing it ever since. Either homemade or store bought, sausage does very well canned. It keeps a lot longer than in the freezer and it is so easy to pull out in a pinch. As a side note, the Ball Canning book says not to add sage to your sausage because it could become bitter in the canning, but I have NEVER had that problem…and how is it sausage without sage??! What’s the last 4 letters of sausage? Sage! When I make my own sausage, I use sage from our garden that has been dried and hand rubbed. I have been canning Tennessee Pride sausage for a couple of years, which has sage in it, and it tastes wonderful too. 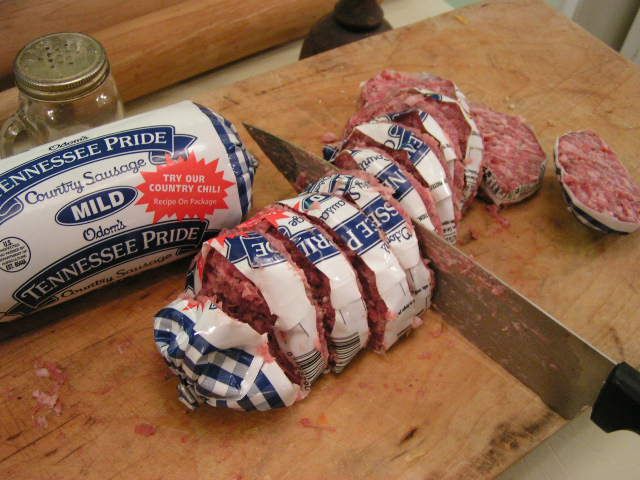 I canned sausage just before Christmas when I found it on sale. I try to do this once a year to last us and so it takes quite a few runs and a full afternoon but one run only takes about an hour and 45 minutes total time (preparation and processing). You can make your own sausage into patties or if you are using packaged sausage, slice the packages into patties. I am using a serrated knife here with tiny teeth. A straight knife just makes mess of soft sausage. Also, you can freeze your rolls slightly to make them easier to cut. But a serrated knife is still needed. 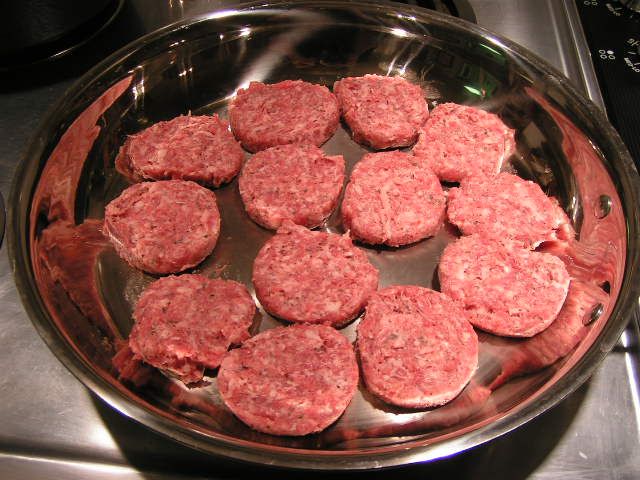 Place the patties into skillet. I add a 1/4 cup of light olive oil because Tennessee Pride is so lean. 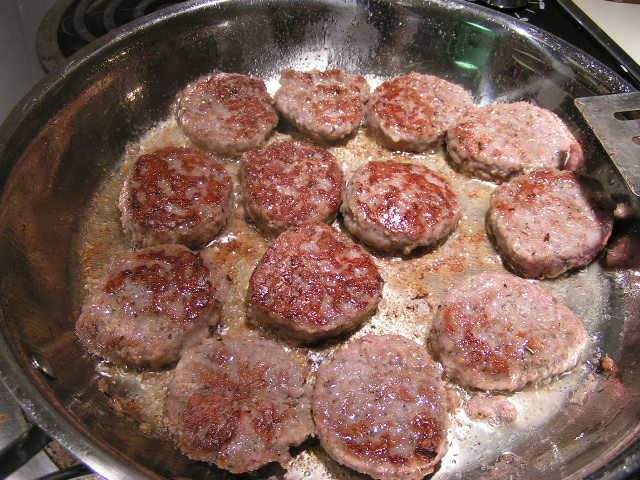 Brown patties on both sides. It doesn’t matter if you don’t get the sausage fully cooked as you would if preparing to serve it. 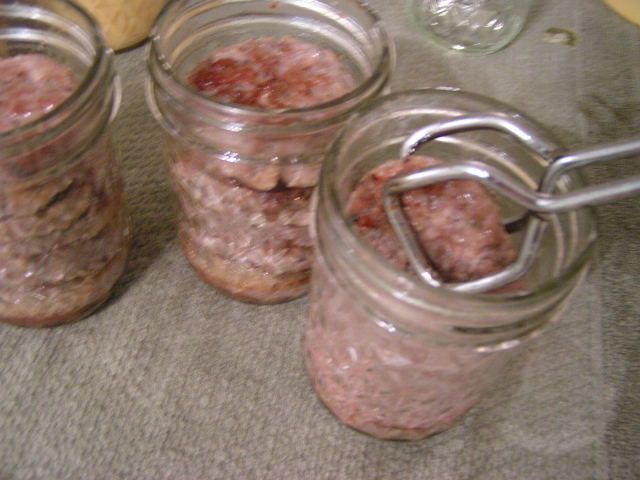 Carefully stack patties into sterilized and hot canning jars. Leave a 3/4 – 1 inch head space. Here, I am using half pint jars because there are just two of us, but when the kids were all home, I packed the patties into pint jars. I can get around 4 – 5 small patties per half pint jar. For larger jars, you can make your patties larger. 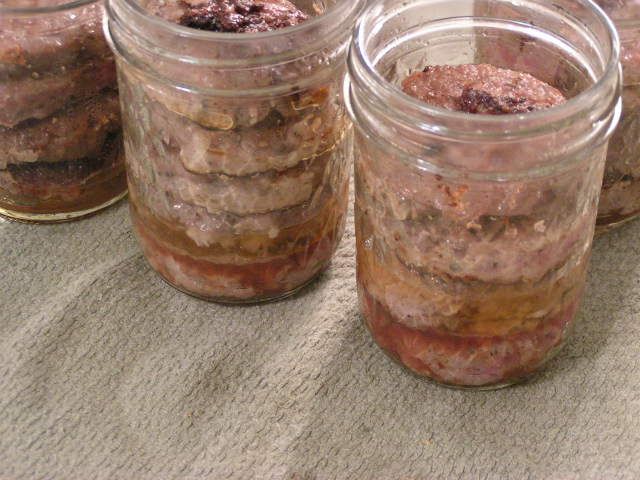 Pour drippings into jars, over sausage, leaving 1″ headspace. If you don’t have enough drippings to fill this high, it is ok. Just fill as much as you can as you see I’ve done in this photo. When the sausage is lean, it is hard to get alot of drippings. That is why I added extra oil in the cooking. Remove all air bubbles with a knife or canning spatula. 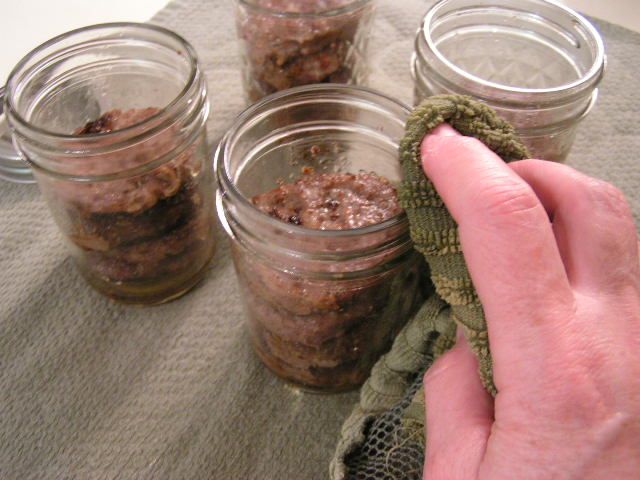 Wipe the rims of the jars with a hot, wet rag to remove all oils. 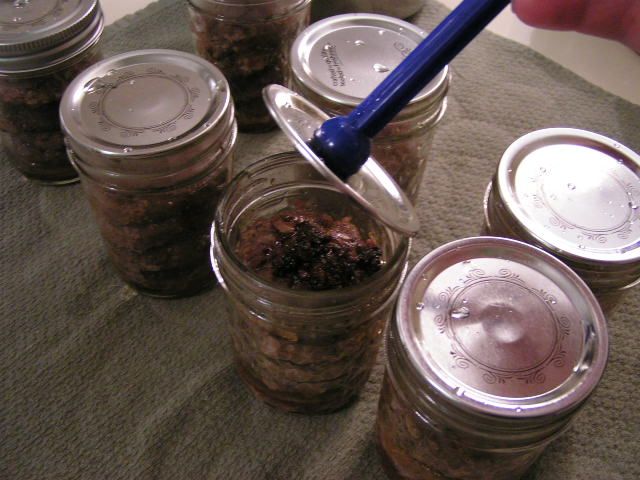 Add lids that have been simmering in nearly boiling water. Add rings and tighten slightly. I tighten and then back off just a smidge. 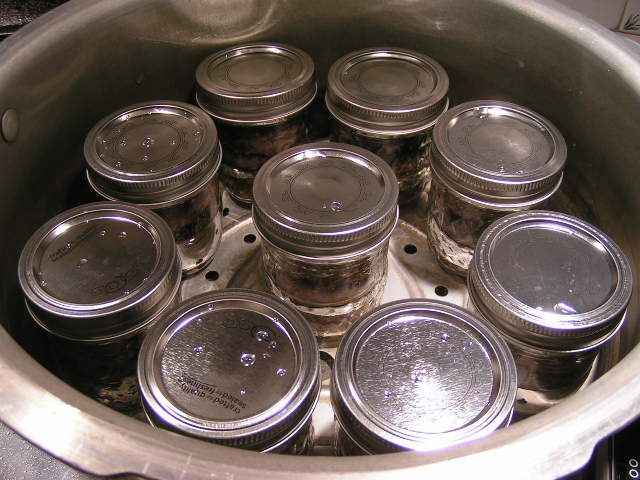 Place jars in pressure canner that has 2 to 3 inches of hot water in it. Pressure can at 10 lbs pressure for 1 hour and 15 minutes. For quarts, pressure for a hour and 30 minutes. 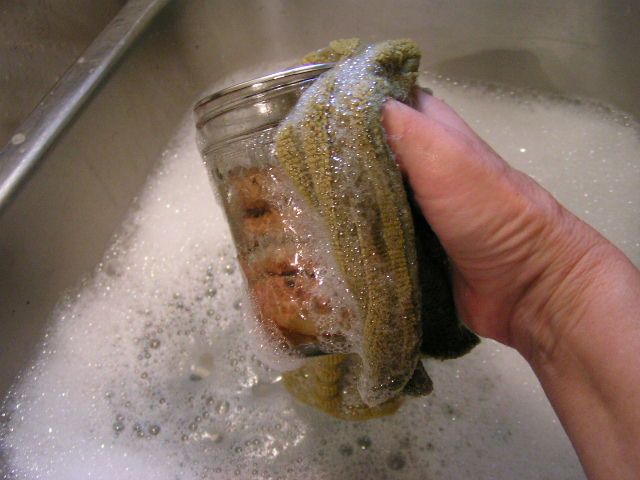 Remove jars from canner and let them cool. For those of you who have not canned before, you will hear a ‘pinging’ sound as the lids seal. All lids should look concave – sucked down toward the inside of the jar – if they are sealed. If the button in the center is still popped up, the jar has not sealed. When the jars are cool enough to handle, remove the rings and wash jars and rings in hot, soapy water to clean off any oils that might have escaped in the canning process. 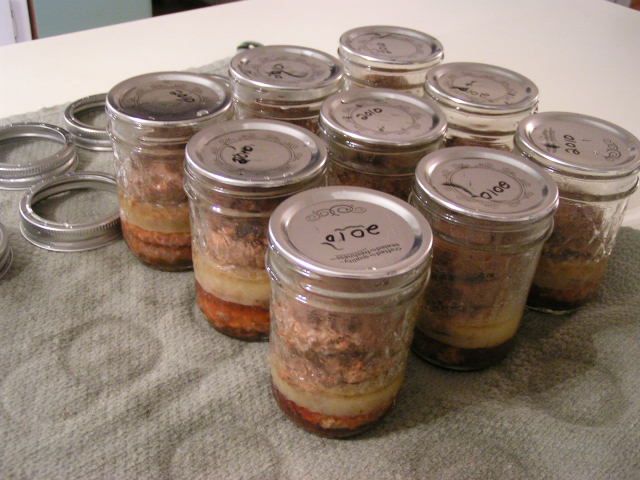 Allow the jars and rings to dry thouroughly and then replace rings to store. It is not required that you replace the rings, but they do protect the edge of the seal from bumping. 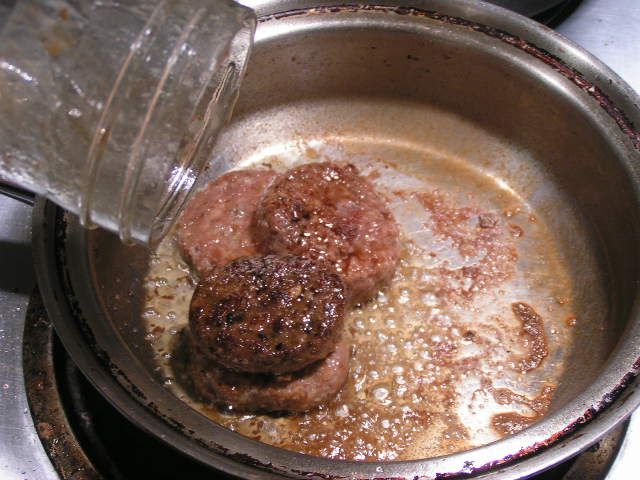 When you are ready to use your canned sausage, just open and place patties in a preheated skillet and include drippings from the jar. Fry the patties to give a little “crust” to each side. The preheated skillet helps to give a nice sear to the outside. 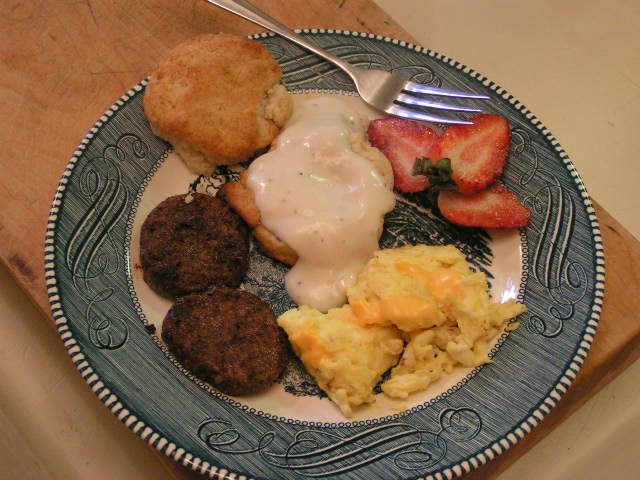 Serve as you would fresh sausage and chow down! |
|
Oklahoma Pastry Cloth™ Company on Facebook
|
 |
Showers of Blessings
Monday, March 21st, 2011
  Friends are so special, but friends of like mind and understanding are that much more special! A friend of that sort, Mrs. B., gave me the nicest suprise this past weekend. You know how you just go about your day in the normal way, thinking normal thoughts and doing normal stuff when all of a sudden, out of nowhere, God uses a person to just overwhelm you with gratitude and humility? Well, He used my friend in that way and I’m still in awe. On Saturday, I got a call to meet Mrs. B at Bass Pro Shop in OKC because she had some things for me. When Mr. Fix-It and I arrived, she and her daughter opened their truck bed cover to reveal boxes and bags of canning jars, buckets of wheat, bags of flax and powdered milk, a ZojiRushi Bread Machine and wonder of wonders, a brand new Bosch Universal Plus Heavy-Duty Mixer. She informed me, because we are “Sisters of the Order of Home Baked Bread” that the mixer was mine!! Oh my gosh. Talk about a dough kneading machine, this thing is the king – queen? And she was giving it to me!! Mr. Fix-It loaded the mixer into our vehicle and the ZojiRushi that Mrs. B was giving to a wonderful woman who has taken in 6 foster children and has mucho mouths to feed. (I get to deliver this surprise to this precious lady with some of the grain, and watch her face!). My friend then gave us the buckets of wheat, some powdered milk, canning jars and flax seed and said, “Have fun!” Fun? It was Christmas in March! 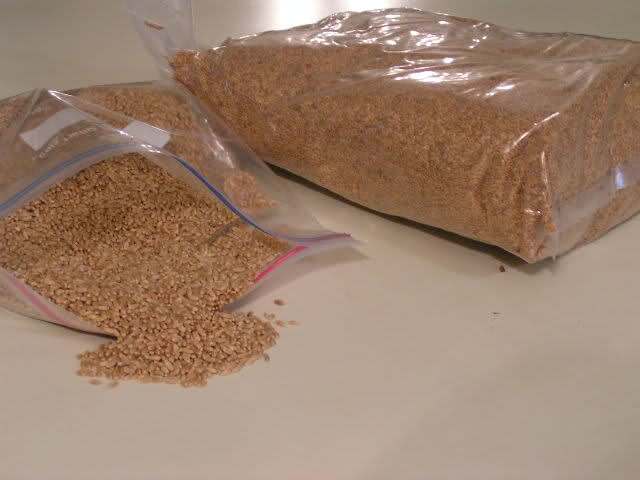 But the “fun” had only started. I got to spread the blessing on the way home by dropping off some of my gifted grain and powdered milk to another large family of many tummies, as well as some canning jars, and will be taking powdered milk to another. 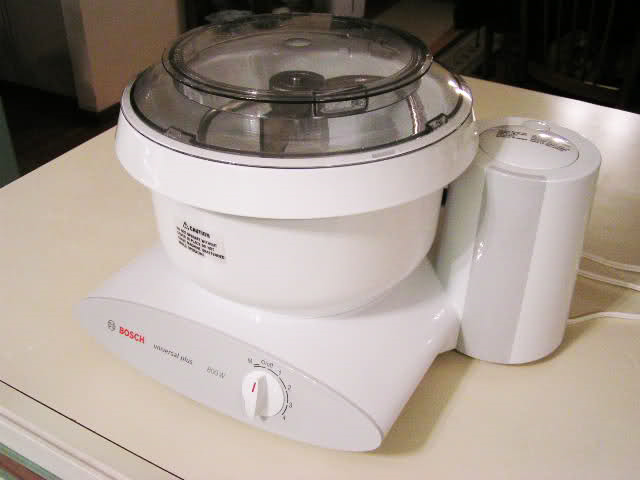 When I got home and unpackaged the mixer, I decided that it was the strangest looking thing I ever saw. If it had beeped, “R2D2” I would not have been surprised. I actually DID read the manual before trying it out, which only goes to prove I am not a man, and decided to try a couple of loaves of bread. Using my sandwich bread recipe, I decided to make one loaf of sandwich and another loaf of cinnamon/cranberry bread. And I used all whole wheat flour that I ground and then sifted and sifted and sifted, instead of half whole wheat and half all-purpose. 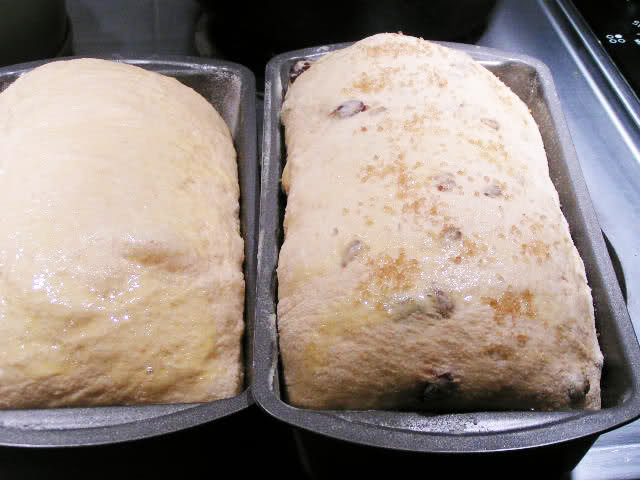 For the cinnamon bread, I removed half of the dough from the mixer and then added 1/2 cup sweetened Craisins and 1/4 cup sunflower seeds. You can actually let your dough rise in the bowl of the mixer, but because I had to divide it, I let each batch rise in two separate bowls, covered with damp towels and placed in the oven that had been heated to 150º and turned off. After the first rising, I formed the sandwich bread loaf and then I rolled the dough with the Craisins and sunflower seeds out about 1″ thick. I sprinkled the surface liberally with cinnamon. Then I formed it into a loaf like I demonstrate in the instructions for the sandwich bread. I put the loaves into greased and floured loaf pans, let them rise a second time and then baked at 350º for 20 minutes. 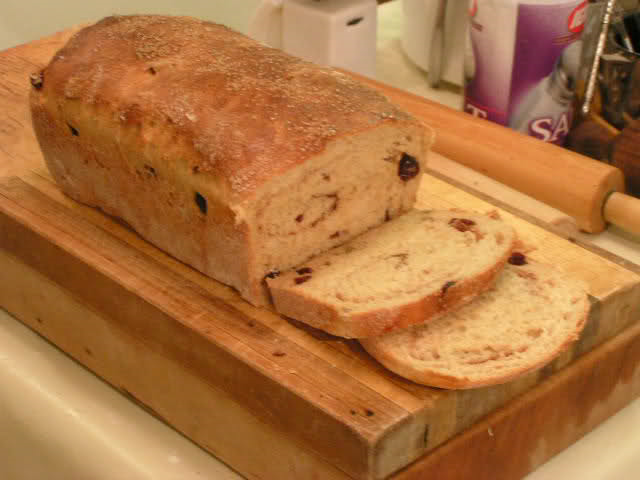 Yes, it was yummy!!! So thank you so much, to Mrs. B for generosity deluxe and for the opportunity to get to participate in spreading the blessing! And you KNOW I’ll be trying out new bread recipes, using my new Bosch Mixer, and putting them on the blog!! |
|
Oklahoma Pastry Cloth™ Company on Facebook
|
|
|
Plantin’ Taters
Friday, March 18th, 2011
  Spring has actually come to Oklahoma! The drab brown of winter is slowly turning into Spring Green! The Bradford Pears are glorious.  Dafodils are peeking out from emerald folage.  Nectarine blossoms seem to have escaped the 21º frosty morning at the first of the week and are lacing the trees as pink, cotton candy flowers.  The rows of strawberry plants proved that they could withstand one of the coldest, snowiest winters Oklahoma has seen in a very long time and are starting to grow and spread.  And the asparagus is poking through the soil like a finger testing the wind to see if it’s safe! Here at the Oklahoma Pastry Cloth™ digs – no pun intended! – gardening season has hit with a vengeance. We plant pretty early here in Oklahoma and we can plant tomatoes as early as the first of March complete with water teepees to avoid any late frosts. The plants start early and grow hardy early. We usually have two growing seasons.  This week, in our garden, potatoes, onions and lettuces were put in while the wind blew 30 mph and out-of-control wild fires raged all around us. It’s been a tough week for many folks here. Our soil is very sandy and it drains really fast. That means that when there is little rain, the bermuda grass becomes the prime fuel for a wayward flame started by some idiot who drops his cigarette butt and pretty soon trees, pastures, houses and barns go up in smoke. After all of these years of fires out here in prairieland, you would think people would learn!! Anyway, here, I’ve planted the onions a little deeper than they will be later because in the sandy loam, it is easy to establish them and then pull the soil away when they have rooted. Planting them deeper helps them stay upright. It’s all these little suckers can do to battle the Oklahoma winds. As I said, the soil is sandy, but we have added, for the past 15 years, horse manure, compost, mulch and peat moss so that it is the richest sandy loam you ever saw. It smells so good!! And it is in that soil that I planted potatoes – a total of 104 cuts or 13 rows. 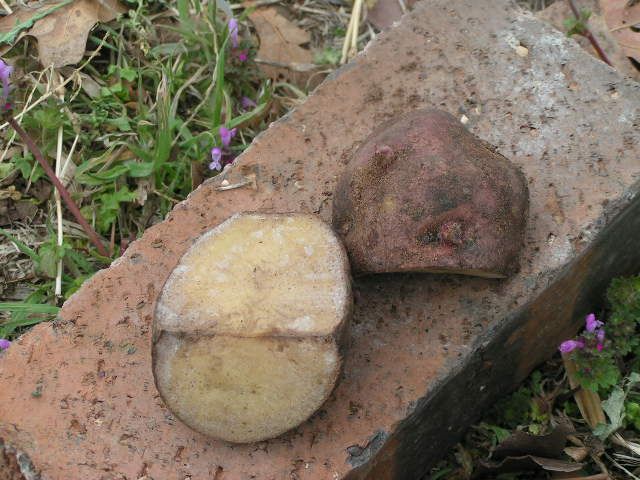 To start off preparing for spud planting, good quality seed potatoes are required. These can be found at any local garden shop and even in some grocery stores. There are all kinds of varieties – Yukon Golds, Pontiac Reds, Kennebec…these are the three that I like. My favorite is just the plain ol’ standard Pontiac Red. A couple of days before planting, I take each potato and locate the “eyes”. These are little indentions that have knobs sticking out of them. These are the buds. I try to get good sized seed potatoes so that I can cut them into pieces with two of the eyes per piece. And the pieces should weigh at least an oz. Cutting them this way, I get more plants per potato than just one. 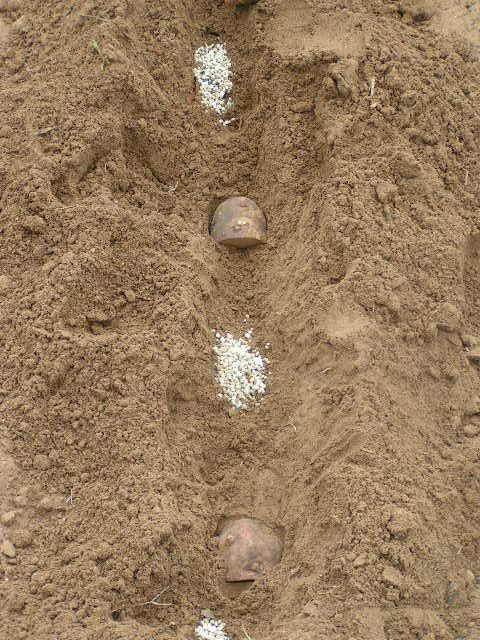 I plant my potatoes differently here in Oklahoma than we did in Tennessee MANY years ago. There, we did mounds that would make for good drainage. Here, in this sandy soil, I have found that rows are more successful. I place each potato cut side or sides face down in the soil about 3″- 4″ deep. This keeps them from freezing if we have a wierd freeze and it keeps them from drying out in our Spring heat. Yesterday, it had already gotten to 86. I place the potatoes about 1 1/2 to 2 feet apart and place about a tbsp of 10-20-10 fertilizer on either side of each potato cut, being careful not to get it too close to the potato which will burn it.  After I get all of the rows done, I go through with a hoe and pull the dirt up to a peak over the potatoes to make an even, covered row. It’s hard to tell in this picture because of the angle, but the rows are also 1 1/2 to 2 feet apart. I’ll keep adding to this post as growing season progresses and you can see how they turn from cut pieces to wheelbarrow loads of potatoes! Stay Tuned! |
|
Oklahoma Pastry Cloth™ Company on Facebook
|
|
|
Hubby Bragging
Thursday, March 17th, 2011
 I just have to brag on the smartest member of our team, my husband, Mr. Fix-It. He never ceases to amaze me. As a side note, by way of explanation, I have a few herniated discs in my back and so I have discovered this awesome creation of technology called The TENS unit. It is the equivalent of sticking your finger into a light socket on purpose and enjoying it. This little unit comes with 9 volt batteries that send juice through lengthy wires to electrodes that you place on various and sundry parts of your body. At the turn of the dials, waves of electric shock pulse through those nerve endings that have decided to let you know you are in pain, and gently put them to sleep. Pretty soon, you’re signing up for an aerobics class and thinking about flying lessons. It’s great. 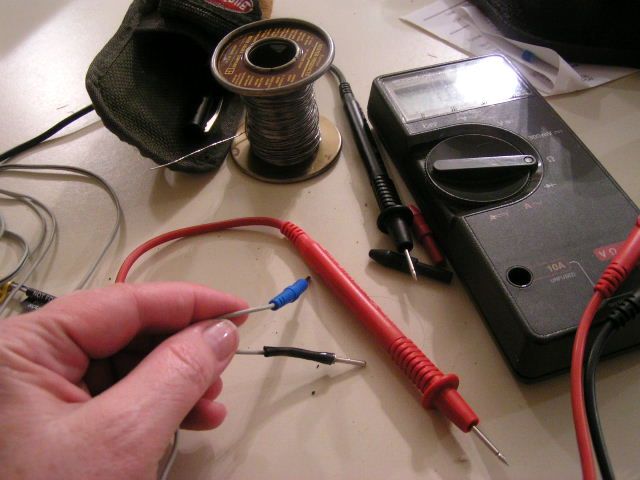 That is, unless you turn it up too high or an electrode loosens. Then, you are dancing around the room, squeaking, “Oh! Oh! Oh!” as you grab for the little battery box in an attempt to turn it off. It is worse, however, when one of the little wires begins to burn up. Such was the case with my TENS unit. One of the wires evidently had a tiny break in it and the thing finally burned up. In the interim, I didn’t realize it and so I couldn’t figure out why I got shocked at really inconvenient intervals. Nothing like carrying on a converstation and letting out a squawk while doing a poor imitation of the “Freddy”! You young ones will have to look that up! Finally, the unit died and I was not a happy camper. In comes Mr. Fix-It, in cape and leotards – ok, well, jeans and tool belt – and began major surgery on the offending wire. I watched, fascinated, as he used a meter to touch every spot along this really, really skinny wire to find the break. With an “aha!” he got his wire cutters and clipped a section right behind the piece that goes into the battery pack of the TENS unit. There it was – all burned up inside its plastic sheathing. With a soldering iron, some solder, my extra hands, and a new plastic sheath, he put it all back together good as new. Now I can go back to zapping myself with no interruptions. I am totally blessed!! What a guy. 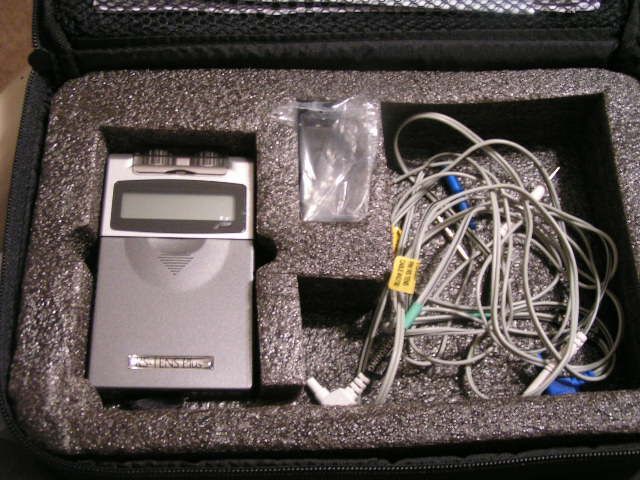
|
|
Oklahoma Pastry Cloth™ Company on Facebook
|
|
|
Time To Think
Monday, March 14th, 2011
  Today, I woke to news photos and videos of Friday’s tsunami that followed the earthquake in Japan. These pictures of utter devastation and loss are too much to get one’s head around. Here in Oklahoma, we see similar pictures that can be a mile wide from tornado damage. But to comprehend that kind of thing for a whole country is just mind boggling. Photos of empty store shelves, long lines of people patiently waiting for rationed food or water and numbed and dazed individuals struggling to crawl through rubble made my heart ache. But it was the news of the staggering flow of bodies floating along the coast to the horror of onlookers that gripped my gut. I have come to a conscious acknowlegment that prepare as one might, one is never physically prepared. I teach classes on canning, dehydrating and cooking, grain storage and grinding or flaking grains, as well as bread making and I encourage the art of buying on sale, in quantity, to process in order to have a well-stocked pantry. I coupon with the best of them and gleefully (I try not to be too smug) cart off my 50 tubes of toothpaste for free. The Girl Scout in me whispers, “Be Prepared” for anything and lately that preparedness has been regarding rising food prices. There is nothing more gratifying than knowing that one does not have to run to the grocery store and can even survive without a grocery store for a very long time. Food storage is like having a savings account. And then I look at the pictures of Japan. Have you seen the one of the man who was rescued 9 miles out to sea, floating on what was left of his roof? His house is gone, as well as his wife – and everything in that house is gone as well. All of the planning he might have done, all of the specials he might have purchased, all of the grains he might have stored would be gone as well. All he has is the clothes on his back just like hundreds of thousands, if not millions, of other Japanese. So where does that leave the idea of preparation? Does it mean just “eat, drink and be merry because tomorrow may never come”? The answer to that question can be found in Mathew 6: “Do not focus on storing up for yourselves treasures on earth, where moth and rust destroy and where thieves break in and steal. But focus on storing up for yourselves treasures in heaven where neither moth nor rust destroys, and where thieves do not break in and steal, for where your treasure is, there will your heart be also.” While there are quite a number of passages in scripture that encourage people to be diligent in putting up a store of food, etc, the deeper truth is that all of the storing in the world isn’t our safety. A trust in God is the only sure thing. I see the numbers of deaths in Japan and it’s just an obvious truth that these people’s provisions helped them not one whit. And as they stand before God today, had they stored up for this day by accepting who He is rather than counting how many pounds of rice they had on hand? My prayer is that they did. But for those of us left staring at the reality that is here on earth, we have this moment to make that very preparation. God is the creater of this earth and all of the power that is in it. We see His power mimicked in the force of the earthquakes and tsunamis of our time. These powerful occurrences only prove to man just how powerless man really is, in spite of all his planning and storing and intellectual mumbo jumbo. It proves how much man needs God. My father used to tell me that when I think I am in control, to just pick up a boulder, hold it over my foot and drop it and then will it to stop dropping. Right. Man can be awfully arrogant in his assumption of his own power. On Friday, we found out that we don’t even have the power to control our own inventions like nuclear plants. The fact is, there is absolutely nothing wrong with storing up in times of plenty to prepare for times of want. Joseph did that very well. But the question one must ask one’s self is, “Is my dependence on my stuff and my plans or is it on God?” If the answer is, “In my stuff and my plans” then one will find that one is not prepared at all. In the words of Robert Burns in To A Mouse, “The best laid plans of mice and men go oft awry.” |
|
Oklahoma Pastry Cloth™ Company on Facebook
|
|
|
Canning Chicken and A Recipe
Thursday, March 10th, 2011
  Buying chicken on sale is a wonderful thing if you have the room to freeze it, but what do you do when chicken is on sale for a matter of cents per pound and you want to stock up for a good, long time? Freezer longevity for chickens is just a few months and so unless you eat chicken every night, it would be hard to make use of a large number of frozen birds. Canning is your option! Shoot, canning is ALWAYS an option because there’s just very little that can’t be canned! 🙂 And so, here are the steps to canning a whole bird followed by a rather surprising recipe – I thought it was surprising, anyway! The method that I am using here is called the “raw pack” method and does not involve cooking the chicken first. 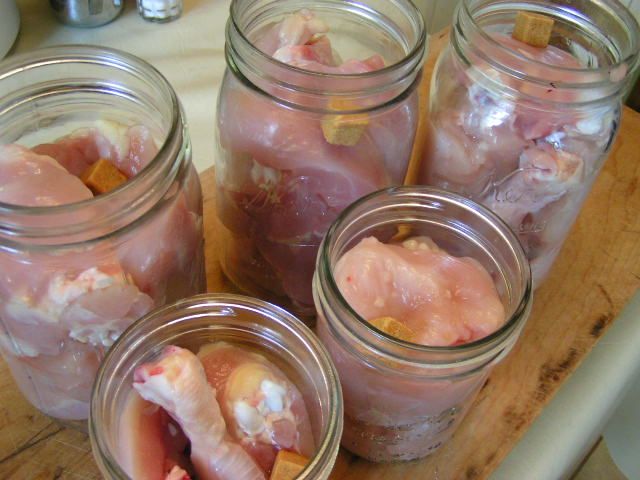 After cutting up the chicken, place it into warm, wide-mouth jars that have been washed and sterilized in the dishwasher or boiled in a large pot. It is important that they are widemouth in order to get the chicken out without tearing it apart. I can get one half of a chicken into a quart jar (minus the back which I use for stock). I also place just the wishbones together sometimes, in a widemouth pint jar, to use for recipes like enchiladas that call for just white meat chicken. I also skin all of my chicken to cut down on fat. I place one cube of chicken bouillon per jar. 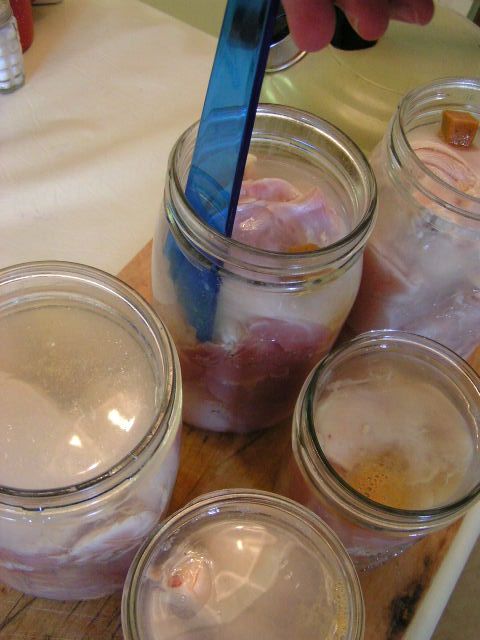 Meanwhile, I have a kettle of water boiling on the stove and slowly pour the hot water over the chicken to leave a 1/2″ headspace. Using a canning spatula or knife, move around the inside perimeter of each jar to release any airbubbles. 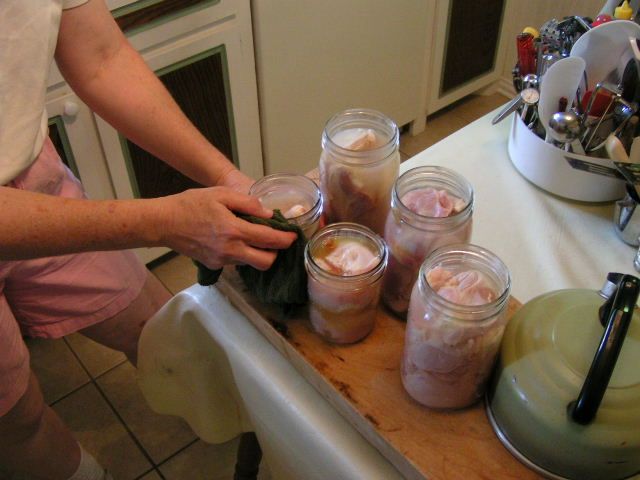 Wipe the top edges of the jars with a wet cloth to remove any chicken juice or oils. 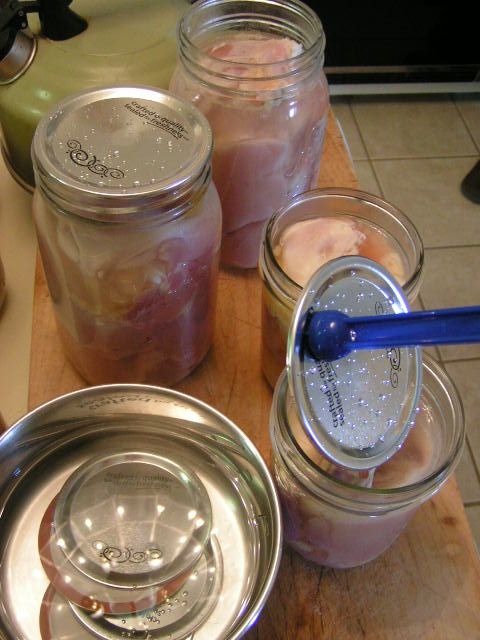 Place lids that have been warmed in a pot of nearly boiling water onto the jars and add rings. Tighten slightly. Place in a pressure canner just like I demonstrated in the post on canning chicken broth. Process for 75 minutes for pints and 90 minutes for quarts once your canner has pressurized. 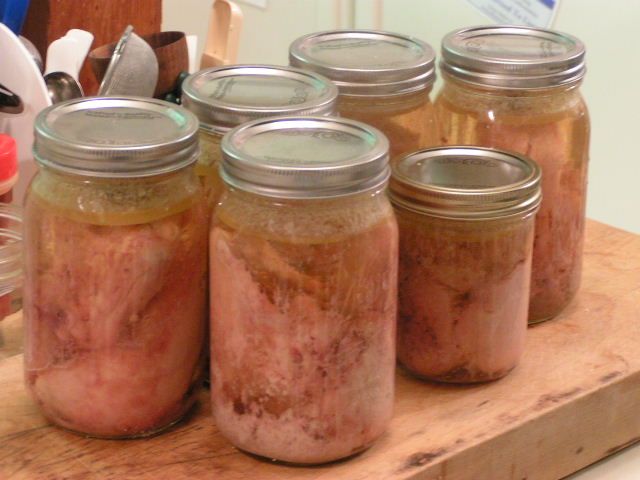 I have to admit that of all the things one may can, chickens make the UGLIEST presentation. The jars just aren’t pretty. There’s no getting around it. Once they come out of the canner and cool, it is a good idea to remove the rings and wash the jars (with the chicken in them) in warm, soapy water and then wash the rings to get any oil off that may have escaped in processing. Let the rings dry and then you can replace them or leave them off, whichever you prefer. Once your chicken is canned, it will last for at least a year. And it is so great for fast meals. Dump a couple of jars into a pot with some onions and broth and bring to a boil and then add dumplings. But that is just normal. How about different? 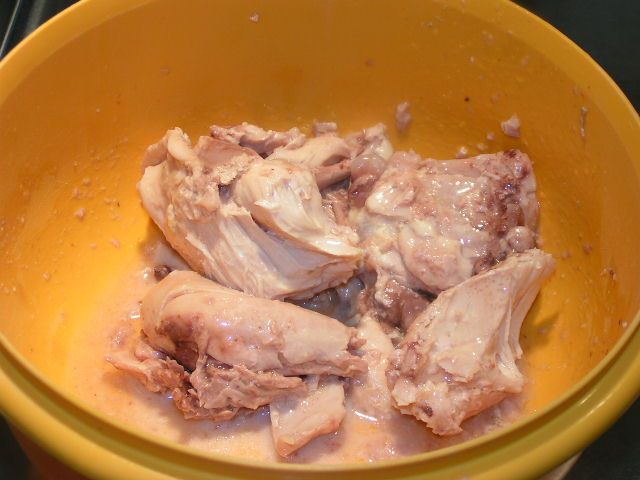 Last night, I opened one quart jar of chicken, drained the broth and carefully slid the chicken pieces into a large bowl. I sprinkled milk over the pieces. 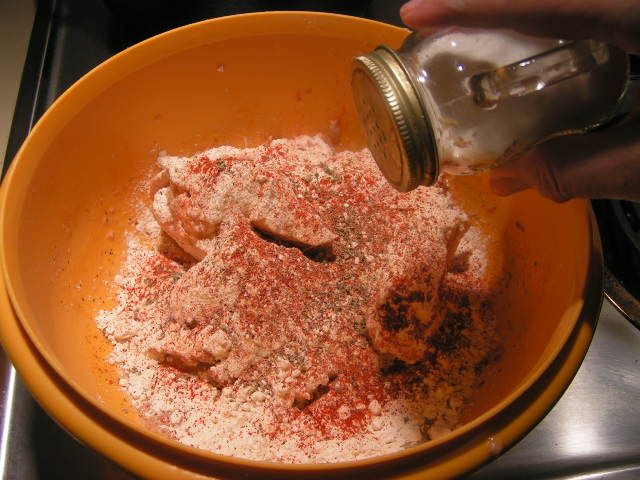 I added a cup of flour, about 1/2 tsp paprika, 1/4 tsp garlic powder, 1/4 tsp thyme, 1/2 tsp sage, 1/2 tsp black pepper and carefully rolled the pieces in this mixture. I salted the pieces at that point. Again, you have to handle the pieces gently or they will fall apart on you. If they do, it’s ok. Just dredge the parts in flour too.  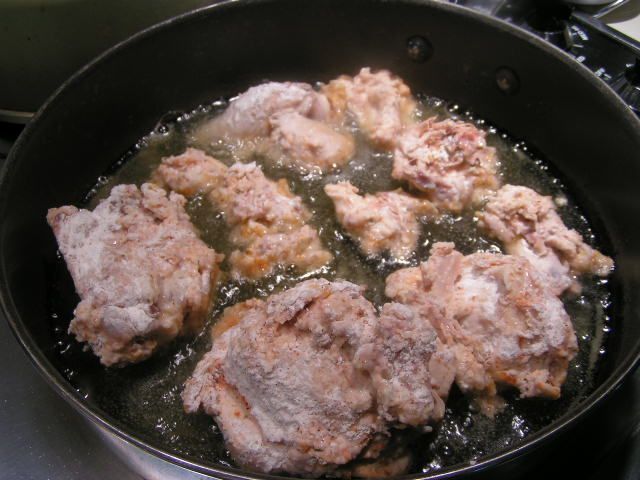 Next, I put just enough canola oil in a skillet to cover the bottom well and heated on medium high. Light olive oil would be fine too. Anything to get those good fats, people! When the oil was hot, I gently placed the floured pieces of chicken in the oil to “fry”. 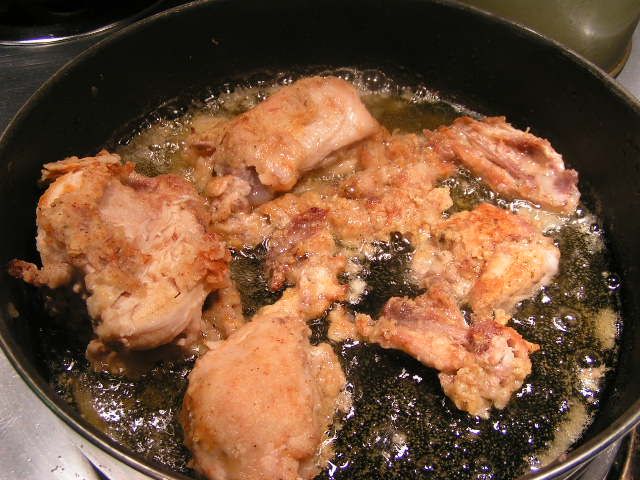 I carefully turned the pieces to brown on the other side. When browned, I transferred the pieces to a cookie rack placed over a cookie sheet and placed in the oven at 250º while I cooked the rest of the meal. This keeps the meat warm, but also lets excess oil drip off of the chicken so that it isn’t too greasy. 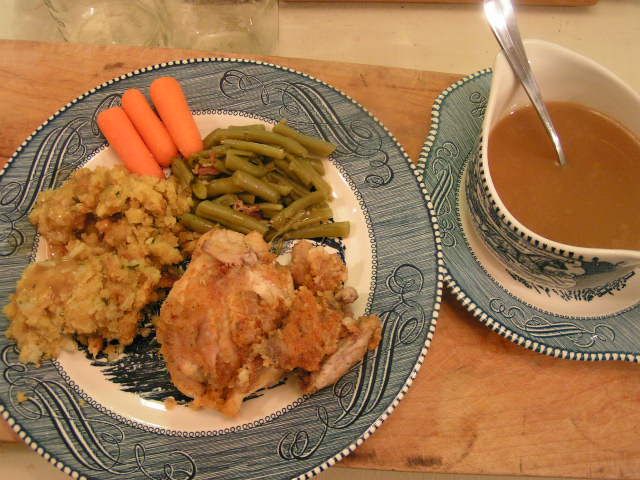  You can make gravy with the broth out of the jar and cornstarch or use a packaged mix. And I added stuffing to this plateful. Since the chicken has been pressure cooked in the canning process, it is tender and falling off the bone even before frying, so frying just gives these tender morsels a crispy covering. Mr. Fix-It was licking his chops and said that the chicken was superb! He’s my most honest critic. So see? You can use canned chicken in all kinds of ways! |
|
Oklahoma Pastry Cloth™ Company on Facebook
|
How To Cut Up A Chicken, Butcher Style
Monday, March 7th, 2011
  I’ve mentioned in past posts that I worked in the meat department of a grocery store in my previous life. At night, I helped cut and wrap custom beefs, lambs, hogs and deer. During the day, I was a butcher’s assistant, helping to cut, wrap and display all of the meats that were sold in the grocery. It was a fun job, believe it or not, made especially fun because of the people with whom I worked. It was a family operation and they treated their employees like members of the family. Practical jokes and laughs were a daily routine. One time, the butcher and his cousin had me convinced that I had guzzled Hydrogen Peroxide in my tea (the tea was fizzy), put there by a coworker who didn’t know any better, such that I was certain the stomach ache that ensued was due to gastric poisoning. There is a skull and crossbones on the bottle for heaven’s sake!!! I was handed the phone to call the doctor, who had been let in on the joke, and I was only encouraged further down the fantasy road of certain demise right there in the meat department. Finally, the giggles erupted and a bottle of Dr. Pepper was produced. My face could not have gotten any redder. I returnd the prank by heavily lathering the phone earpiece with vaseline and then calling the meat department from the phone at the front of the store. My boss answered the phone. Oh yeah. 🙂 I had to learn fast and hard in this job and being the competitive person that I am, thanks to the genes inherited from my tennis-playing grandfather, I was bound and determined to master whatever I was given to do. One of my first jobs involved wrapping the cuts of custom beefs in freezer paper and labeling the packages. It is a job that I still practice today every single time I freeze our own meats. There IS a method to wrapping! But that is for a later post. In my day job, the first task I was immediately tossed into learning was the job of cutting up a chicken. My first attempt was a joke, but as time went by, I got faster and faster and could finally cut and package a chicken faster than you could say “Cocka-doodle-doo”. This is a skill that has helped me more than you can imagine! Whether raising your own chickens for meat or purchasing yours at the grocery, knowing how to cut them quickly is a blessing. Today, I buy whole chickens on sale and cut them up, dividing them into packages of separate parts. The other day, I found whole chickens for 65¢ per pound. After cutting them, I packaged breasts together, legs together, thighs together, and packaged cut-up wings for hot wings, while cooking the backs, skin and “innards” for broth. A package of breasts for 65¢ a pound? Find THAT in a store near you! So here is the way that I learned to cut up a chicken. I learned from a pro – Greg, the Butcher! Thanks Greg, for all you taught me!! 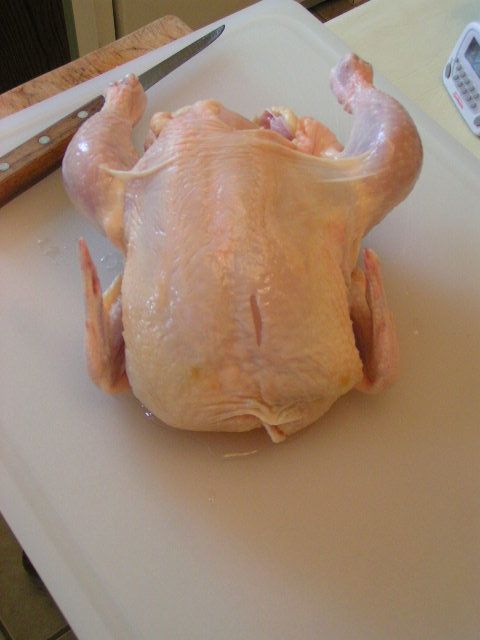 You will need a cutting board that is not wood. Wood soaks up bacteria that is found in chicken and it is very difficult to disinfect afterward. You will also need a good boning knife that is sharp. I use Forschner brand knives which are the brand that we used in the meat department. I like them because the blades are flexible and can bend slightly. Also, if you like, you can do what we used to do in the meat department and use rubber dishwashing gloves. These help you hold the chicken easier to avoid slips, and you are less likely to cut yourself if you do slip. 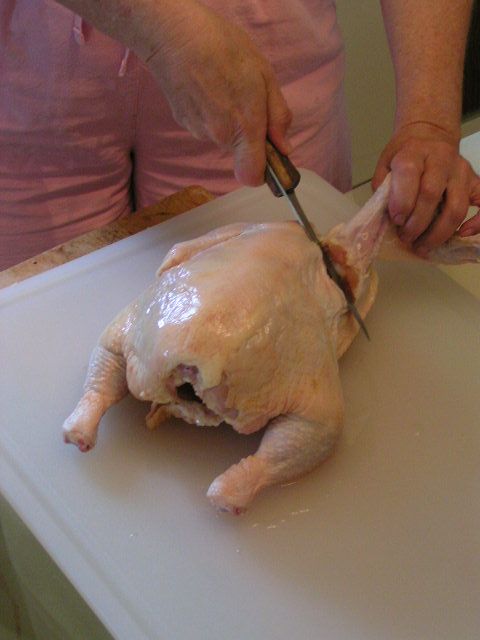 With the breast side down, pull one wing out and away from the body and feel for the main joint. Slice between the two bones of the joint. You will slice down and around the joint bone. 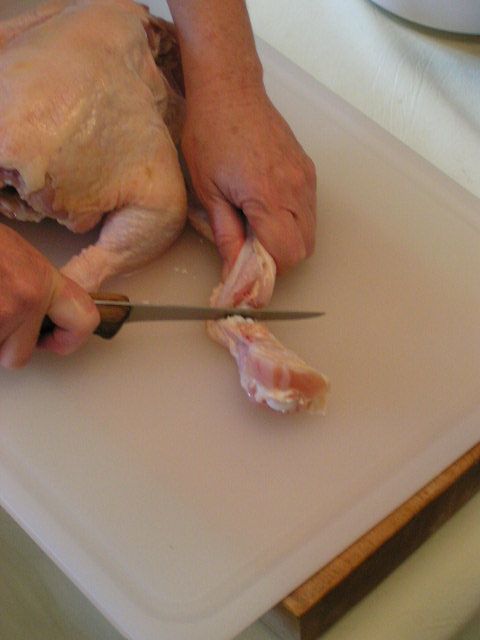 Cut at the joint between the shoulder section of the wing and the “bicep” section of the wing. 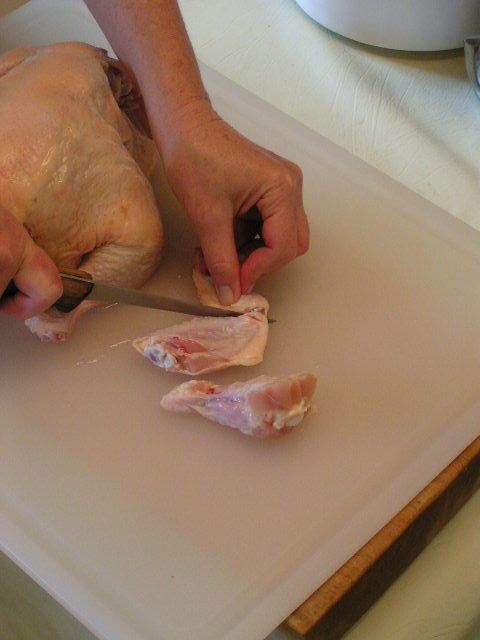 Then cut between the joints that hold the “forearm” of the wing to the “bicep” section. I throw that little front part of the wing in with the back and other excess pieces to stew for broth. The two larger sections are packed together for “hot wings”. 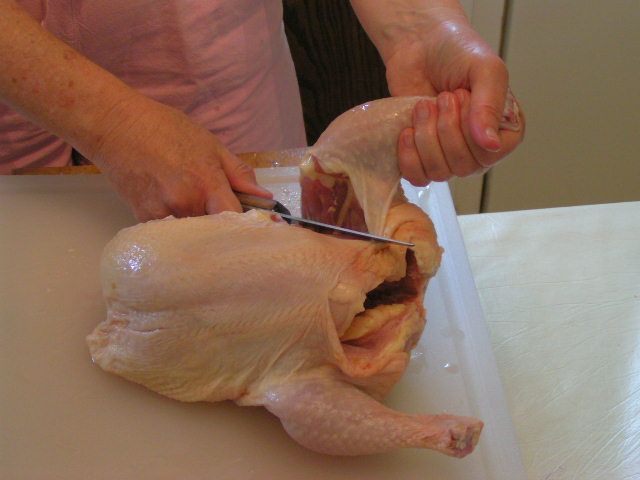 Next, turn the chicken on its side and pull a leg up so that it is pulled away from the body. Slice your knife right through the center of the skin until you hit bone. Stop. 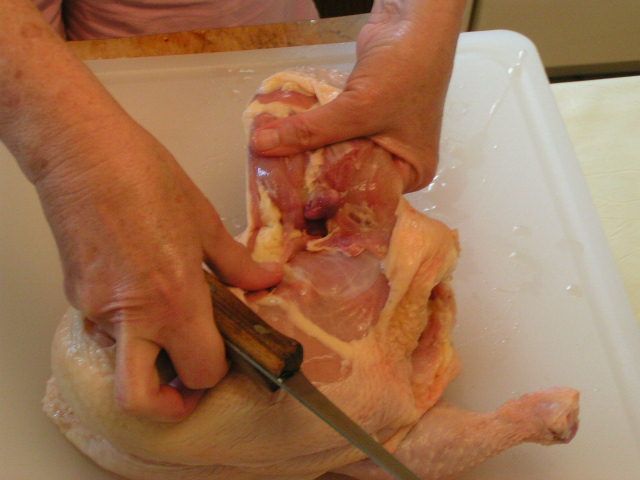 Using both hands, hold the body of the chicken and pop the thigh bone out of joint so that you see the end of it protruding. 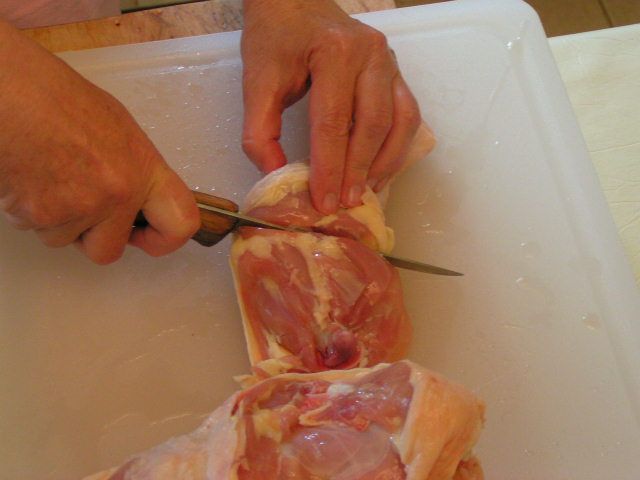 Cut between the round end of the bone and the body to remove leg and thigh section. If you want to separate the leg and the thigh, on the inside of the leg and thigh section, using your first finger, feel for the indention that indicates the joint between the leg and the thigh. Slice between the two bones and separate the leg from the thigh. 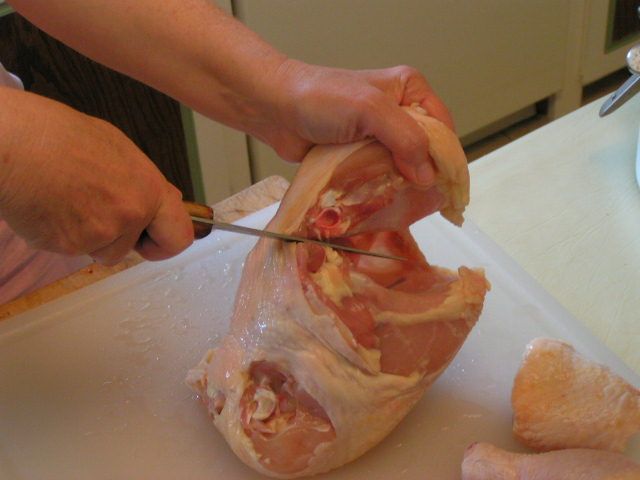 Turn the chicken up on its front end and look for the soft section of skin between the back and the breast section. It is just a flap. Put the knife at a 45º angle to the back and slice in toward the backbone. 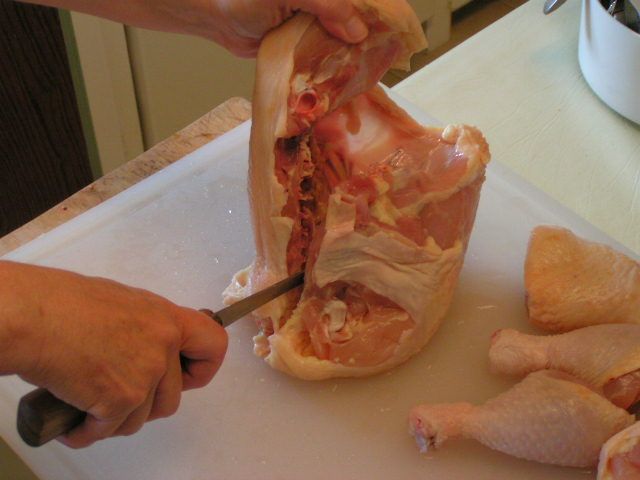 As soon as you hit bone, turn the knife blade down and slide the knife down along and between the backbone and the breast. There will be resistence because you are cutting through soft bone, but just push hard all the way to the end. 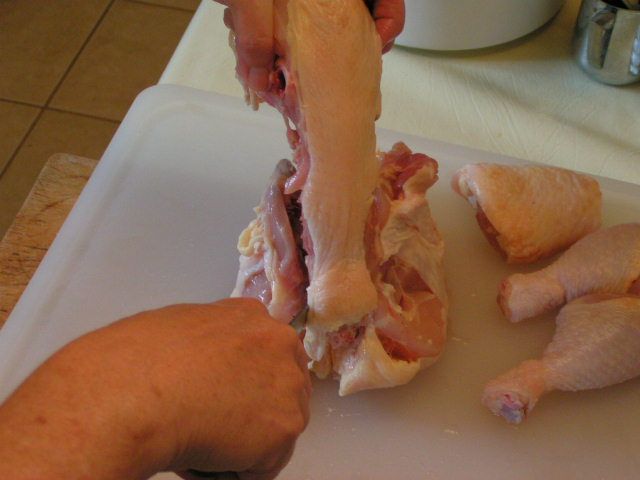 Repeat the same process on the other side of the backbone and lift the backbone out. 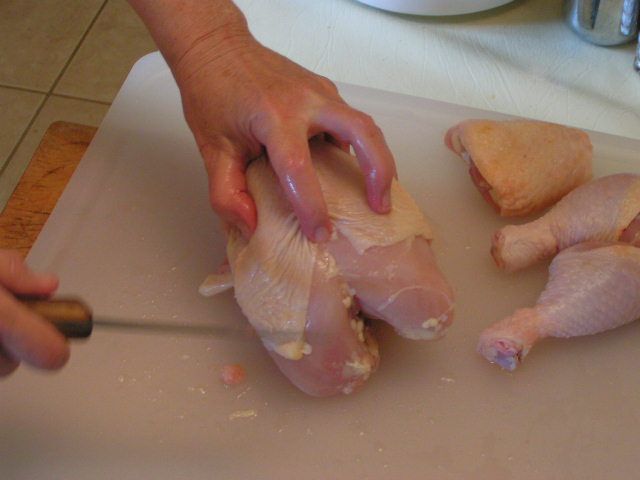 Now you are left with the breast section. If you like the ‘wishbone’ or your kids enjoy breaking it, simply turn the breast section over and slide your first finger down the center until you feel the tip end of the wishbone. 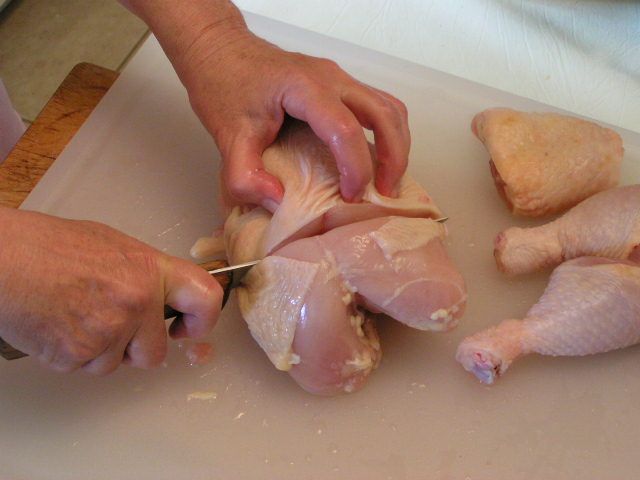 Cut straight down behind the bone tip and between the rest of the breast section and stop when you meet resistance. 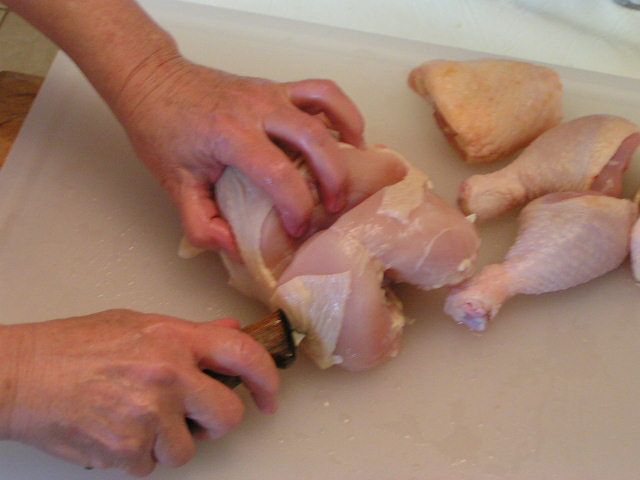 Now turn the knife blade nearly parallel to the cutting board and slice along the front of the breast bone and under the wishbone. 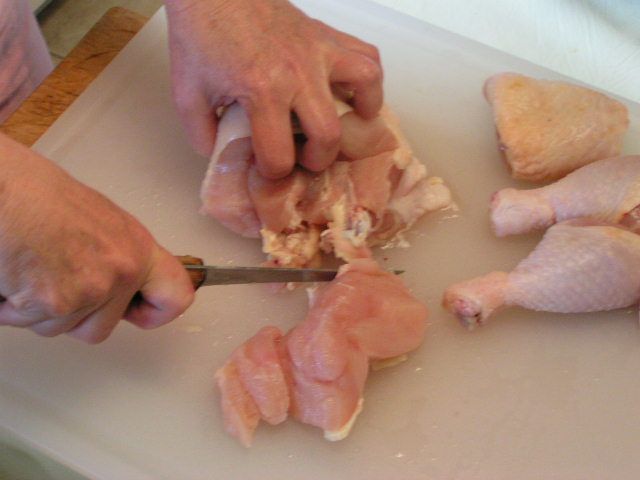 Separate the wishbone from the breast 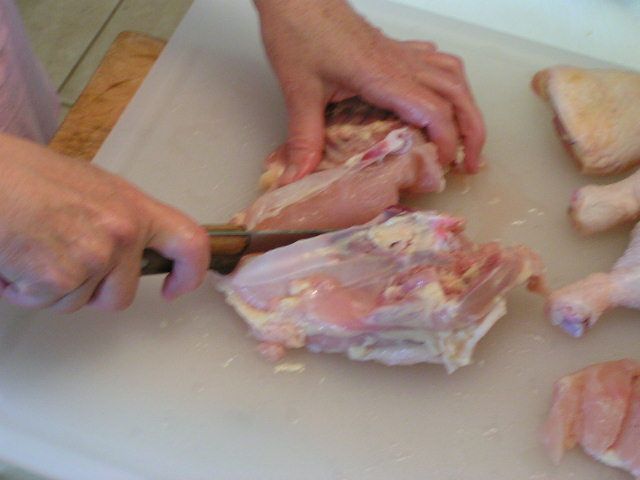 Turn the rest of the breast section on its back and cut right down the middle of the bone. This is soft bone and so with a sharp knife you can cut it. Start by putting the point of the knife down into the bone and press down. It will snap that top of the bone in two and then you can start cutting. 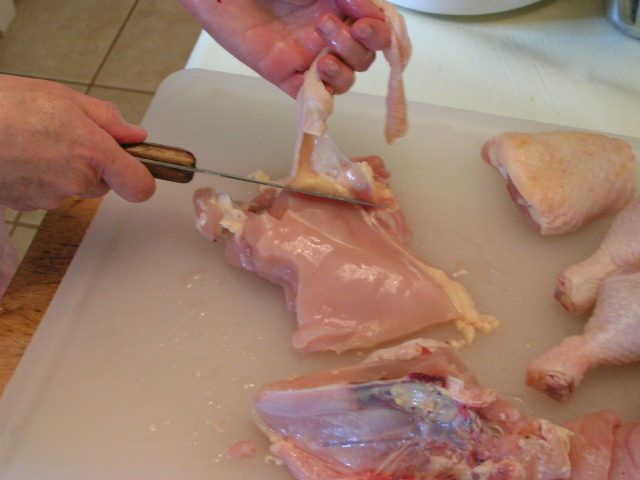 If you are like me and want to cut back on the fat and cholesterol of the skin, you can skin your pieces. This is a simple task, as the chicken skin easily separates from the meat. Just slide the point of the knife under the skin with one hand and with the other, pull the skin up to separate as you cut. And so there you have it – a totally cut-up chicken that you can now cook, can or freeze. I’ll show how I can mine in the next post and how I use it out of the jar. Once you have processed the main pieces, you can boil all of the leftovers into the stock found in this previous post.  |
|
Oklahoma Pastry Cloth™ Company on Facebook
|

 Homestead Revival
 Paratus Familia
 Rural Revolution