 You know me by now. I can’t leave anything alone. I have to tweak it, experiment with it and see how many ways I can change it before I can be still. And “IT” can be a recipe, a sewing project, a painting, dehydrating/canning or the directions to a new movie theatre in Oklahoma City. My motto is, “Waste Not, Want Not” and though some might try to convince that this statement comes from the Bible, (Like “God helps those who help themselves,” right?) I’m pretty sure it came from my dad – or Benjamin Franklin – or that Wesley guy. Whomever coined it, it is ingrained in my chromosomes. Therefore, when I made my most recent batch of bread for the week, using a combination of 3 parts Prairie Gold Hard White Wheat flour to 1 part barley flour, I wound up with my usual 1/2 cup of wheat germ sifted out of 5-6 cups of the flour after a round of four siftings and did not want to waste it. Yes, I sift the fire out of my freshly ground flour to add air and lightness and to take out some of the heavier germ/hull which makes bread heavy. Mr. Fix-It likes his bread to carry him off like a magic carpet of the mouth. He says, “Open Sesame” and it floats right in! Anyway, I had all of this germ and I didn’t want to throw it away. I continue to toss that 1/2 cup of germ in with the other 1/2 cups of germ in a freezer bag to store in the freezer. I have always known that I will use it for something like on salads, in peanut butter or to sprinkle on top of risen bread loaves for crunch and appearance, but that won’t use up as much as I have! It was then, with my Okie Pioneer spirit, that I hit on an idea. Here it is in pictures. Oh, and by the way, it worked!!  I brought 1 cup of water to a boil and added a pinch of salt and 4 tbsp of the wheat germ, and stirred then until everything was smooth.  I boiled the mixture for 6 minutes until it was nice and thick, uncovered, stirring occasionally.  You got it!! Cream of Wheat!! And it was good too, especially with butter and brown sugar. I now have a new breakfast favorite with 4 grams of fiber to boot! See, I could have survived in those pioneer days!! |
|
Oklahoma Pastry Cloth™ Company on Facebook
|
 |
Archive for the ‘Breakfast’ Category
Wheat Germ!
Thursday, May 12th, 2011
“Time To Make The Donuts”
Tuesday, March 29th, 2011
|
  My dear friend and reader, Mrs. B., did it again. Not only did she gift me with my wonderful Bosch mixer, but she alerted me to the newest post at one of my favorite and linked blogs, New Life On a Homestead with the recipe for donuts to mix in my new Bosch mixer. The recipe originated at Enola Gay’s Paratus Familia and then Kendra made an edition at her blog. The pictures of the donuts at both sites made Mr. Fix-It drool and since I was tired of wiping up spit from the kitchen floor, I asked him if he’d like me to attempt the confections. You know the answer! And so I did the recipe, as written, with one change. I substituted potato flakes for some of the flour. I used home ground, whole wheat flour that I sifted and sifted but added potato flakes because I know that is the secret ingredient for a famous donut. I figure, what could it hurt? I make potato rolls and bread, so why not potato donuts? The home ground flour works great, but all purpose is fine too. So that’s what I did and the following is the result. The recipe made 27 small donuts + 27 holes. Also, I used a thin glaze and only dipped one side to make them not so sweet. They were just right. We shared these gems with our neighbor up the road and one of the sons said that he loved them because they were not too sweet.
 I used my Bosch but you can use any mixer with a dough hook. Of course, you can do this by hand as well. Add 1 3/4 cup warm water and 1 tsp sugar and sprinkle 1 Tbsp yeast over the surface, allowing to ‘proof’.  When the yeast water is bubbly,add 2 eggs…  …and 1 tsp salt  …and 1/3 cup shortening.  I added 1 cup of potato flakes.  Add two cups of the flour. I am using whole wheat ground from Prairie Gold Hard White Wheat.  Mix and scrape the sides.  Add another cup of flour and mix.  Continue adding flour by the cup until the dough pulls away from the side of the bowl but is still nice and soft. I used a little under 4 ½ cups of heavily sifted flour. Continue mixing on low for 8 minutes to knead.  Let the dough rise until double – about an hour if it is in a warm place. Here, I am just leaving the dough in the mixer bowl, covering it with a damp cloth and then it is going into the oven which has been preheated to 150º and turned off.
 While waiting for the dough to rise, I made the glaze. Melt 1/3 cup butter in a saucepan.  Add 2 cups powdered sugar and stir  Add 4 Tbsp hot water. I added a little more water because I wanted a thin glaze. However, if you want a glaze that is thicker,1 1/2 or that you can spread, use more powdered sugar.  Stir until smooth  Add vanilla and stir until mixed. Set aside on a warm eye. I did it this way because I grew up with Krispy Kremes and have watched them glaze their donuts. The glaze is kept warm and thin and it doesn’t take much to glaze a donut. I decided to kind of replicate the process.  When dough has risen, scrape out onto floured surface. I am using one of the spatulas available on the Shopping Page as well as an Oklahoma Pastry Cloth™.  Roll out dough to about ½”. I used a rolling pin. Here I am cutting the donuts with a two part donut/biscuit cutter. It is wonderful because the center is removable so that the gadget becomes a biscuit cutter.  Place the donuts on the floured surface and cover with a damp cloth to rise until double.  When donuts have risen, carefully place them in oil that has been heated to 350º.  A wooden chopstick is great to turn donuts to their other side when browned on the first side.  Cooked donuts placed on a rack from the oil, waiting to be glazed  Using a chopstick or other utensil, place the donut in the warming glaze.  Lift the donut out of the glaze and place on rack or cookie sheet.  Don’t you just want to dive in? We did!!
|
|
Oklahoma Pastry Cloth™ Company on Facebook
|
|
|
Canning Sausage
Thursday, March 24th, 2011
 But in Oklahoma, we say, “Sausage” like you ‘orta’! I love sausage. There is absolutely nothing like it. And, yes, it has to be made with pork. I’ve made turkey sausage before and I’ve added olive oil to give it some ‘crisp’ on the outside, but heh, it was turkey. That just isn’t real sausage. My favorite brand of sausage, if I haven’t made my own, is Tennessee Pride Country Sausage. Yes, I was born in Oklahoma and I live in Oklahoma, but I had a stint in between there in Tennessee. “Tennessee Country sausage is the best part of the meal”, don’t you know? It is very lean and has a wonderful flavor. Best of all, we get it here in Okie land!!  Working in the meat department in Blaine, Tennessee, (and yes, we acted this stupid) I learned to make my own sausage. We ground enough hogs to feed Ireland. I remember when I was expecting my first child, we and our friends, who raised hogs, killed several hogs to put in our freezers and I spent the afternoon grinding, seasoning and wrapping nearly 200 lbs of sausage and curing and hanging the hams and bacon. I was in those first three months of morning sickness and I must say, it took me years to be able to smell sage and brown sugar again. I got ill to put it mildly. My mother-in-law taught me how to can that sausage (sorsage as she called it) and I have been doing it ever since. Either homemade or store bought, sausage does very well canned. It keeps a lot longer than in the freezer and it is so easy to pull out in a pinch. As a side note, the Ball Canning book says not to add sage to your sausage because it could become bitter in the canning, but I have NEVER had that problem…and how is it sausage without sage??! What’s the last 4 letters of sausage? Sage! When I make my own sausage, I use sage from our garden that has been dried and hand rubbed. I have been canning Tennessee Pride sausage for a couple of years, which has sage in it, and it tastes wonderful too.  I canned sausage just before Christmas when I found it on sale. I try to do this once a year to last us and so it takes quite a few runs and a full afternoon but one run only takes about an hour and 45 minutes total time (preparation and processing). You can make your own sausage into patties or if you are using packaged sausage, slice the packages into patties. I am using a serrated knife here with tiny teeth. A straight knife just makes mess of soft sausage. Also, you can freeze your rolls slightly to make them easier to cut. But a serrated knife is still needed.  Place the patties into skillet. I add a 1/4 cup of light olive oil because Tennessee Pride is so lean.  Brown patties on both sides. It doesn’t matter if you don’t get the sausage fully cooked as you would if preparing to serve it.  Carefully stack patties into sterilized and hot canning jars. Leave a 3/4 – 1 inch head space. Here, I am using half pint jars because there are just two of us, but when the kids were all home, I packed the patties into pint jars. I can get around 4 – 5 small patties per half pint jar. For larger jars, you can make your patties larger.  Pour drippings into jars, over sausage, leaving 1″ headspace. If you don’t have enough drippings to fill this high, it is ok. Just fill as much as you can as you see I’ve done in this photo. When the sausage is lean, it is hard to get alot of drippings. That is why I added extra oil in the cooking. Remove all air bubbles with a knife or canning spatula.  Wipe the rims of the jars with a hot, wet rag to remove all oils.  Add lids that have been simmering in nearly boiling water. Add rings and tighten slightly. I tighten and then back off just a smidge.  Place jars in pressure canner that has 2 to 3 inches of hot water in it. Pressure can at 10 lbs pressure for 1 hour and 15 minutes. For quarts, pressure for a hour and 30 minutes.  Remove jars from canner and let them cool. For those of you who have not canned before, you will hear a ‘pinging’ sound as the lids seal. All lids should look concave – sucked down toward the inside of the jar – if they are sealed. If the button in the center is still popped up, the jar has not sealed. When the jars are cool enough to handle, remove the rings and wash jars and rings in hot, soapy water to clean off any oils that might have escaped in the canning process.  Allow the jars and rings to dry thouroughly and then replace rings to store. It is not required that you replace the rings, but they do protect the edge of the seal from bumping.  When you are ready to use your canned sausage, just open and place patties in a preheated skillet and include drippings from the jar. Fry the patties to give a little “crust” to each side. The preheated skillet helps to give a nice sear to the outside.  Serve as you would fresh sausage and chow down! |
|
Oklahoma Pastry Cloth™ Company on Facebook
|
|
|
Egg and Muffin Sandwiches
Monday, January 3rd, 2011
|
“De-Serve” (A Recipe To Serve!) OK, so that was kind of a crazy thing to write, but I was thinking about that place with the golden arches and their old slogan. Remember? It was that catchy song about what you deserve – you know – like a break today? However, as I grow older and older I am finding that what I think I deserve ain’t all it’s cracked up to be! I bet you can’t get that song out of your head now, can you?  In my youth, I had the “prestigious” honor of being a “crew member” of the McDonald’s Restaurant team – aka, a “hamburger flipper”. I lived, breathed and literally ate McDonald’s. I don’t know how it is now, but back then, McDonald’s was run like the army and there was a real pride in the job and a sense of ownership in the company. Each year there was a competition for all crew members in order to become part of the “All American Team”. The more All American Team members at a store, the more prestigious the store in the eyes of the corporation. Competition was fierce and hard and not just a little scary. It was like participating in the Olympics, only instead of swimming you were waiting on and serving customers in under a minute, or in place of throwing the shot put, you were assembling, wrapping and tossing cheeseburgers onto a warming tray to a stop watch. The competition went on during the day while customers were actually being served and “The Suits” were there watching your every move. The one year that I decided to take the plunge, I competed at the cash register and outside the restaurant in grounds cleanliness. I won. I have proof. But I’m still waiting for the endorsement offers.  Now, I need to remind you that cash registers at the time were not the electronic wonders they are today. Computers were something only ‘brainiacs’ even considered and, as far as we were concerned, still occupied an entire room with magnetic wheel thingys (my hubby tells me they were called column tape units and he would know) whirling synchronistically . If that isn’t a real word, it sounds good – can’t you just see it?? Yep, the cash box on which I registered counter sales was an upright mechanical monster with round, brown keys in rows all down the front of the unit. The first vertical row was for the cents, the second, tens of cents, the third, ones, the fourth, tens and so on. The number totals showed up in white on black placards, side-by-side, in a window above the buttons. In order to put in a monetary amount, one had to punch each row of places matching the numbers of the entry. I remember starting out punching one button at a time with one finger as the customer stood there looking at me like, “You moron, can’t you work any faster than this? My Big Mac is gonna mold before I get it.” However, I eventually mastered the beast and could use multiple fingers to put in a total all at once – three fingers for “$1.99” and the thumb and first finger to “enter”. I thought I was hot stuff. And, oh yes, I was there when the Big Mac was first introduced. I had a “Mac Attack” on a regular basis.  I learned to count back change. Those cash registers only told you what the total due was, not the total cash back. A $20 bill for that $1.99 order? A penny – two dollars, three dollar bills – three dollars, four dollars, five dollars, a five dollar bill – ten dollars, and a ten dollar bill – twenty dollars. Give a clerk today, if there is no computerized cash register, a ten dollar bill and a nickle for a $1.95 purchase and watch him slowly come unglued trying to figure out how much money you should be getting back!!! Crew members were required to be “versatile” and one’s pay scale and evaluation was based on just how many things one could do in the restaurant. That meant that I didn’t just work the front, but I cooked too and I loved it. It was a fascinating process and I am here to tell you that a McDonald’s hamburger or French fries are no more unhealthy for you than a hamburger or French fries that are fried at home. Food is food and frying is frying. Back then, however, there was one breakfast ingredient that seems to be missing these days and that was butter. But I’m getting sidetracked – back to versatility. Another job that was a requirement back then was being a morning host or hostess. That has gone by the wayside too, apparently, but it was a fun job that involved making sure tables were clean, visiting with the customers, refilling coffee and bringing extra food items requested. It is a job that taught me the value of a servant attitude. I found that the more gracious I was and the more willing I was to do for the customers, the kinder they were and the more appreciative they were. Even when I would get a real grouch, I found that if I didn’t take offense and just treated them kindly, their grouchiness didn’t bother me and they seemed to leave a little less grouchy. It’s a lesson to practice every day.  I never would have picked McDonald’s as my career of choice at that time. I was fresh out of college with a degree in Fine Arts, but there weren’t any jobs out there in “Art” even if one did think that one’s art was “Fine”. McDonald’s was the only job I could land. I found out however, that even though I was not getting what I thought I “deserved”, I was learning an enormous amount of information and wonderful skills that would serve me the rest of my life. I’ve found that to be true in everything I’ve done that hasn’t jived with what I thought I had to have. I have figured out that I really don’t know what is always best for me and that I just have to chill and let God do the leading to whatever “best” is. It has led to a much more peaceful life, believe me!! We are at the beginning of a new year and stress is pretty heavy in the country and in the lives of many individuals. Seeking to serve rather than to be served is a heck of a way to deal with stress. When we seek to serve, rather than focusing on what we think we “deserve”, there is a change in attitude and actions for everyone involved. Anyway, because with any life’s lesson there really has to be food involved, it is time for a recipe. The following is my way of using the homemade English Muffins, from the last post, for egg and muffin breakfast sandwiches. Your kids will love you for them! Sandwiches Per Sandwich: 1 egg or two egg whites 1 English Muffin 1 slice American Cheese 1 slice Canadian Bacon or 2 slices thin-sliced Smoked Ham Melted butter or olive oil              |
|
Oklahoma Pastry Cloth™ Company on Facebook
|
|
|
Makin’ Smoothies
Friday, October 15th, 2010
|
|
|
As a homemaker, there is nothing more fun than getting inventive, inspired by some tidbit of food leftover and useless for anything major. When a great concoction is created and the family smacks their lips in appreciation, the homemaker feels that all is right with the world. Such was the case tonight as I noticed a fruit fly winging its way around and around a lone banana left ripening on the counter top. It was pretty ripe and would have been useful for banana bread had it been one of three bananas, but alas, it was alone. What does one do with one banana in a short time? What else? Make a smoothie. Smoothies are so easy and quick. And they are great at any time of the year. They are also healthy, especially when made with yogurt. Any fruit combination can be used and any yogurt flavor can be used. I use frozen fruit as much as possible to make it colder and thicker. My favorite is as follows and used that lone banana: 1 banana 1 thick slice of fresh pineapple, frozen 1 cup frozen, sliced strawberries 1 tbsp frozen orange juice concentrate 1/2 cup vanilla yogurt    |
|
Oklahoma Pastry Cloth™ Company on Facebook
|
Belgian Waffles
Monday, October 11th, 2010
|
Of course, with any new-fangled idea, there were bugs, the major one being that when the cook used one of these pans, what looked like bugs appeared in the scrambled eggs or the white gravy, due to flakes of the nonstick surface loosening. Small sheets of Teflon® floated in the cooking food and small, shiny hints of the base metal were exposed. If you were the least bit paranoid, you worried that your family was ingesting some poisonous substance that the government had invented to get rid of half of the population to save the planet. If you weren’t paranoid, you surmised that maybe Teflon® wasn’t such a great invention after all. Then came the nonstick surface that was co-mingled with the base metal of the cooking utensil. That was better. I think that T-Fal® was one of the first. It worked pretty well, but we quickly figured out that nonstick didn’t really mean, NONSTICK. It just meant “not-as-likely-to-stick-especially-if-you-use-oil-to-coat-the-pan-like-you-did-for-your-old-pans-that-were-not-nonstick.” I had a whole set of T-Fal® and still have a few cookie sheets, but while they were the “thing” in the ‘70’s, as I became more and more entrenched in the kitchen, I gravitated back to my perfectly seasoned, cast iron skillets and wonderful three-ply bottomed, heavy-weight, stainless steel pots and pans. Wouldn’t trade them for the world. It is with this background of wisdom that I should ask myself, “What were you thinking?” because, recently, I couldn’t resist the purchase of a nonstick surfaced Belgian waffle maker that was on sale. Actually, another waffle iron was on sale, but the store was out and because I had such a pained expression on my face and the manager probably thought that my gray hair indicated that I might be hard to get along with, I was handed a more expensive, with more gadgets, Belgian waffle iron at the sale price. It had a timer that beeped! I took my prize home, predictably thrilled at beating the system of sales, and quickly unboxed it to prepare for the next day’s breakfast surprise for Hubby – waffles topped with strawberries and whipped cream. I read the directions for the batter – easy enough – decided on how I was going to change it (added vanilla) because it isn’t in my nature to just follow directions, and made sure that I had all ingredients required. I got up the next morning, whipped up the batter in a matter of minutes, heated the waffle iron until the light went out and carefully measured ¼ cup of batter into each section. Closing the lid, I flipped the whole assembly on the stand, over to the opposite side as per the directions. Steam gushed from the seam of the surfaces and a wonderful sizzling sound let me know that breakfast was on its way. The timer automatically began its countdown.  At the ear-piercing shriek of the waffle siren, I jumped out of my skin and rushed to flip the waffle iron back to the other side of the stand. I gently lifted the lid – well – attempted to lift the lid, but nothing separated. I got a plastic fork and slipped it between the layers of metal to carefully pry them apart but nothing budged. But it’s a nonstick surface! The box said so…. no oil needed. It’s 2010! It’s new and improved! I flipped it back to the other side and tried gently pulling the sections apart. No dice. I turned it over to its original position and thought, “Maybe I’m not pulling hard enough.” I gave it a hard tug and jerked the top lid off of the bottom surface. One half of the waffle traveled with the lid and the other half stayed on the bottom. Now you know that you are NOT to use ANY metal utensils on nonstick cookware. Plastic only. And so, I took the plastic fork and carefully slid it under the top half of the waffle. Fully expecting for the waffle to lift off the surface, I was sorely disappointed. The tines of the fork slipped through the cooked dough, and succeeded only in removing a couple of chunks. I tried a different location with the same results. At this point, I was frustrated and I started digging at the center of the mess. Some of the pastry lifted out of the multiple indentions, but the majority remained adhered to this “nonstick” epitome of false advertising. The tines on the fork broke. Of course, it never occurred to me, at the time of purchase, to see if the two cooking surfaces could be removed for easy cleaning. And of course they could not be removed. They opened into a gigantic “L” with teeth, every tooth encrusted with waffle plaque. The lettering on the base cautioned, “DO NOT IMMERSE”. Why would I need to immerse it?? It is nonstick, for crying out loud! My only recourse was to concentrate on one surface at a time, digging out as much of the now rock-hard waffle as possible. I poured hot water just to the batter level to soak and finally washed with a brush, repeating the process for the other side. This took most of the morning. Did I mention that my husband ate cereal that day?  Yes, all of the labor saving brilliance that is dangled before us cooks have obviously been created by inventors who never really watched the process of food preparation and cleanup, let alone attempted it themselves. However, I will say that one such item HAS put its comrades to shame, as it has proved to perform in exactly the way it was intended. It has made available for my dear husband, the Belgian waffles that he loves, baked on the aforementioned, offending waffle maker. This product states on its label, “no stick, fat free, cholesterol free, calorie free, sodium free, naturally clear”…Yep. It’s spray olive oil in a can and it works like a charm. Who would have ever thought of putting oil on the surface of a cooking utensil to keep food from sticking? What will they think of next?? |
|
1 3/4 cups all-purpose flour or pastry flour 1 tbsp baking powder 1/2 tsp salt 2 tsp sweetener (honey, sugar, splenda, etc.) |
1 3/4 milk (2%, whole, skim) 2 eggs, separated 2 tbsp vegetable oil Possible additions: 1 tsp cinnamon 1/2 cup chopped pecans |
|
Oklahoma Pastry Cloth™ Company on Facebook
|


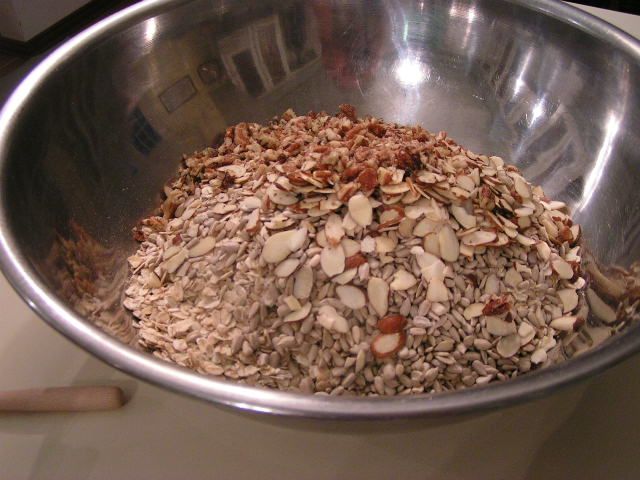
Making Granola
Sunday, June 6th, 2010
 In my former life, we raised horses. Quarter horses. And I loved them. Mucking out a stall was not so bad for me because it meant that riding came next. Rounding up our sheep on horseback was a daily joy. I can’t remember when I decided that horses were God’s greatest creatures ever given to man, but I know that I was really little. At 5 years old, I would feed grass to the two aging mares across the road from our house and dream of the day when I could have one all my own. There was the time, in the fifth grade when I decided that I would have a horse all of my own. Of course, we lived in the city and though our yard was large, it wasn’t that large. However, I determined that I could make it work and so I began the tedious process of begging my parents to death. I cried. I begged. I searched the newspapers and came up with arguments “pro Ol’ Dobbins” that I was sure could not be dismissed. I thought that the labor-saving, non-machinery, grass-cutting qualities of the equine mammal had to be of some great benefit. I knew how to argue the environment early. Eventually, I decided that if I produced the money myself, there could be no argument. The result: A table at the street curb with broken toys, tiny multicolored ‘ratfinks’, and troll dolls with soft hair, all for sale and advertised by a large sign stating, “Help Kids Buy A Horse.” My sisters assisted in the hope of sharing in ownership. My eloquent pleading and early entrepreneurialship did little to impress my parents and I had to be satisfied with Marguerite Henry and Walter Farley books, along with a suitcase full of Breyer model horses with which to pretend.  It was marriage that brought me my first horse and a beautiful Tennessee farm. Kimmie was ½ Quarter Horse and ½ Thoroughbred so she was pretty tall – 16 hands – but she was gentle as a kitten and she was my pal . My one mare, eventually turned into over a half a dozen mares and geldings and one stud. Feeding time was an experience of sounds and smells. Opening the trashcan of sweet feed drew my face down to drink in the aroma as fast as it attracted the flies. Oat grains slathered in molasses rattled into the measuring can and poured like tiny pebbles into the feed buckets with the most pleasant of “whooshing” sounds. As the grain was placed in each stall, muzzles pushing me away to bury deep into dinner, the steady, crunching of satisfied mouths made that feed sound like something I wanted to dig into as well! I must confess that I did so on many occasions – chewing on a little sweetened grain as I went about my work. I was eating granola before it was the world’s newest, healthy snack! Never mind that there were probably all kinds of horse vitamins in there. I never started counting with my foot and so I couldn’t have been too damaged. But as I said, that was in my other life. So, as I make my granola these days, those sounds and smells come back as peaceful memories. Honey, instead of molasses, oats, nuts and fruits are all baked to a crunchy cereal that makes the same ‘whooshing’ sound as it is poured from its container. I wonder if some Swiss farmer just took some horse feed one day, mashed it and baked it and said, “Yah. Dis is goot! I tink I’ll call dis ‘granola’!” (translated from the Swedish) I have to interject here that I have splurged and gone one step further in seeing what else I can add to my daily work routine. I purchased a Marga oat flaker and a bucket of oat groats from Debbie Barton at Sonrise Whole Grains, so that I can hover around the hot cereal isle in the grocery store and sidle up to strangers to whisper with authority, “I roll my own oats” and so that they can respond, “So what?” The flaker really is pretty cool to play with! It is neat to watch those tiny grains get mashed flat as you turn the handle to the rollers. It’s kind of mesmerizing. Oatmeal takes on a whole new flavor and consistency and this “I hate oatmeal” girl has turned into a “Let’s have oatmeal again for breakfast because I hear it lowers cholesterol” kind of addict. The hot oatmeal is nutty and chewy, not the usual bowl of gluey gruel fit for the movie “Oliver”. And so, fight as I might, I am being dragged into healthy eating through the seductive temptations of new kitchen gadgets. They’re so shiny and pretty!! Who can resist?   With that confession, I’ll end with a recipe for granola that my cousin contributed to our Then and Now Cookbook, a compilation of our family recipes (thanks Beth!). You can find the cookbook at the online store under the shop tab. I will put her recipe on one side and then on the other side, I’ll put what I have changed to suit my husband’s “I have a sweet tooth the size of a golf ball” taste buds. Either way, it is great and is what I use on the yogurt parfaits in the previous post. Enjoy the granola, and as you savor its crunch, you could retreat to the fantasy of youth and pretend that you are a horse masticating its sweet feed. However, be aware that it would mean you’re kind of weird! |
|
Beth’s Recipe: 1 box of rolled oats (1 lb 2 oz) 1/2 cup sunflower seeds 1/2 cup sliced almonds 1/2 cup honey 1/2 cup vegetable oil 1 tsp cinnamon 1/2 cup raisins |
My Changes and Additions 1 box rolled oats (1 lb 2oz) 1/2 cup sunflower seeds 1/2 cup sliced almonds 1/2 cup chopped pecans 3/4 cups honey 1/2 cup vegetable oil 1 tsp cinnamon 1/2 cup dried/sweetened cranberries |
|
Oklahoma Pastry Cloth™ Company on Facebook
|


Strawberry Yogurt Parfaits
Friday, May 21st, 2010
 |
|
The sun is shining and the Oklahoma Pastry Cloth™ Company’s world is absolutely gorgeous. This morning’s haul of strawberries completed one of my favorite breakfast treats – strawberry-yogurt parfaits. They are gorgeous for light desserts and brunch when entertaining. We have had a bumper crop of strawberries this year and it is so fun to find the red fruits peeping from under their green canopies like ruby gems hidden from would be thieves – slugs, turtles and birds. These lucious fruits have been plump and juicy; the products of an unusually cool Spring. |
 |
|
Of course, what comes with a great crop of strawberries is strawberry shortcake, strawberry smoothies, strawberry topped cheesecake and strawberry muffins with homemade strawberry jam. Freezing and drying strawberries also gives the opportunity to enjoy these treats in the winter too. And then, there is the strawberry-yogurt parfait. Ours are made with homemade yogurt, homemade granola and freshpicked strawberries. You can do any variation that you like, but I thought that I would explain how I put ours together and I suppose I should throw in how to make yogurt too! For the parfaits, I use ice cream cups that you can get cheaply at any discount store, including Walmart and Dollar Tree. For each cup, I layer a total of 1/2 cup of sweetened strawberries and 1/2 cup of yogurt. Crumbled granola goes on top. If you don’t make homemade granola, the Nature’s Valley granola bar works great when broken in the package and then sprinkled on top. You can garnish with a strawberry, mint leaves or anything else your creative mind can concoct. |
 |
|
Yogurt is very simple to make. I use a Salton Yogurt maker that I’ve had for years. You can find them online and I know that there are always some on ebay. Mine is the Cosmopolitan style and holds five 8 oz jars. However, if you do not have access to a yogurt maker, you can use your oven just as easily. You will need an oven thermometer to double-check your oven temp. You will also need a candy/jelly thermometer to place in the milk as you heat it and cool it. The following are the ingredients to gather together: 4 cups of milk (I use skim for nonfat yogurt) 1/2 cup instant nonfat milk 3 tablespoons plain, unsweetened yogurt vanilla sweetener like sugar, splenda or stevia 5 – 8 oz jelly jars used for canning 5 rings and lids Place the jelly jars onto a cookie sheet. Preheat oven to 110º. You can test the temperature with an oven thermometer. Place the milk and powdered milk into a saucepan and whisk until powdered milk is well dissolved. Continue stirring as you heat the milk to 180º. Do not bring the milk to a boil because you are just scalding it. At this point, some people cool the milk down quickly in a pan of ice water but I just let mine cool slowly until it reaches 110º. When the milk has cooled sufficiently, you can add sweetener and vanilla to your taste, or if you would like to have a variety of flavored and unflavored jars, you can add 1 tbsp sugar, 1/2 tbsp splenda or 1/4 tsp stevia to each of the jars that you wish to sweeten, and then put 1/4 tsp of vanilla as well. You will stir these once you put the milk into them. Back to the milk…it has now cooled to 110º. In a glass jar or cup, place 3 tbsp yogurt and pour in about 1/3 cup of the warm milk. Stir with a plastic spoon until nice and smooth. There may be some small lumps. Pour this back into the pot of warmed milk and stir to incorporate throughout. Now you can pour the milk into each of the jelly jars. Place a lid and a ring over each jar and tighten. You can reuse the rings and lids for each new batch of yogurt, because you are not sealing the jars, just protecting them from contamination. Place the cookie sheet supporting the jars into the oven and leave overnight or for 8-10 hours for tasty and tangy yogurt. Remove from the oven and place in the refrigerator. |
 |
 |
 |
|
Leave Comments below |
|
Oklahoma Pastry Cloth™ Company on Facebook
|
Okie Quiche
Friday, May 7th, 2010
|
~~A recipe follows~~ 
|
|
I have a certain soft spot in my heart for the French language. I took five years of French in school and feel sure that after all of this indepth study, I might be able to find the train station – la gare, a bathroom – salle de bains, flatter any waiter as “my little cabbage” – mon petite chou and wage war – la guerre, if ever I make it to that city of cities; Paris. I can read signs fairly efficiently, however, reading and speaking are two different things. I may be able to decifer words on a sign, but when speaking off-the-cuff, I eventually descend into a mixture of English and French with a voice growing ever louder as if the object of my discourse is deaf. Most Americans assume that if one does not understand English, the only problem is that the English is not being pronounced slowly or loudly enough. One of my most memorable excursions into the world of translation occurred when I was in high school and I had finished my third year of this Romance language. We were visiting the Quebec Province of Canada, in a little town where nobody spoke English. Now, if you are honest with yourself about this know-it-all age of 14-18, you will admit that you thought yourself far superior to any adult with a college education and/or work experience. You were in high school and what you were learning was new and different and more advanced than anything adults could have possibly gotten when they were in school! I could regurgitate French phrases to a teacher, and noone else in my family could! Therefore, I was special. I was the authority when it came to coping with menus and the poulet, the bœuf and the jambon. It was with this air of superiority that I announced to my mother, who was anxious about all of our dirty clothes, that I would speak with the motel clerk and get directions to a laundramat. I want to add here that I distinctly remember the price that we paid for our rooms. We had gotten three motel rooms in this tiny town, to accommodate my father and mother and then two each of us four girls in each room. The grand total of the bill for one night was $18. Even then, in the early ‘70’s, that was pretty incredible. It must have been, to have made such an impression on me. Anyway, I left our suite of rooms to traipse across the lawn to the motel office, little sister in tow. I had already looked in my English to French dictionary to make sure that I knew the word for “laundry”. Since there was no word for “laundramat” I decided that laundry – blanchisserie – was the next best thing. I entered the office and spoke to the nice lady behind the counter. My little sister looked up at me adoringly. I gathered all 5’4” of my high school ignorance and said, in perfect pronunciation – I must say – “Où est une blanchisserie?” The young woman looked at me quizzically. She said, “Blanchisserie?” I said, “Oui.” My little sister was all the more impressed. We were having a conversation! The woman studied for a moment and then said, “Ahhh!! Oui!” and disappeared into the back room. The next thing we knew, she was bringing me a tall stack of extra towels and sheets with the definitive statement, “Blanchisserie!” I grimmaced and said, “Non. Non. Blanchisserie!” and fell into my best pantomime of washing clothes on a washboard. An air guitar expert had nothing on me. I washed the pretend clothes, wrung the pretend clothes and then hung them on a pretend line. The woman watched my antics with a frown, trying to discern the French words that I was spelling out in theatrics. “Ahhhhhhhh!” she finally said, with the joy of having figured out the answer to a game show question. “Une laundramat!” She drew me a map and I sheepishly took it to my mother and father. I couldn’t gloss over the incident and pretend that I had intelligently conversed with a native so fluently as to have obtained the directions we needed. There were two young eyes who witnessed the whole thing. The good Lord knows how to take us down a knotch. So, it was with a continuation of that lesson learning, that I have discovered in my research that one of my favorite dishes, Quiche, did not originate in France. All of these years, I have taught my children that Quiche was created in the Alsace-Lorraine region of France, although it could be argued that it is logical that it was named after some Lorraine lady who love to eat it. Not so, mon frère! How will I ever be the brilliant authority figure in my progeny’s lives again? According to foodreference.com, Quiche originated in Germany. I bet you didn’t know or care that the Alsace-Lorraine was actually part of Germany until the late 1500’s! That is one of those things that we all should know. At that time, the area was known as Lothringen. The word ‘quiche’ is based on the German word for an open pie filled with an egg/cream custard and smoked bacon, ‘Kuchen’. The crust of this pie was made from bread dough. The French changed it to a pie crust, added cheese and onions and voila, came up with Quiche Lorraine. It didn’t become popular here in America until the 1950’s, after WWII, when eggs were no longer $1000 a dozen. With that enthralling bit of information under your belt, you’ll find my recipe for Quiche below. For the base, I use my pie crust recipe that you can also find on the blog. Quiche is great for any meal – breakfast, lunch or dinner – and is fast and easy. You can even make it the night before, leave it in the frig and bake it the next morning. Now that you know the real history behind this tasty dish, we can no longer say that real men don’t eat Quiche. All men eat eggs and all men love pies, therefore, all men eat egg pies. See? I learned deductive reasoning in high school too! |
OKIE QUICHE
That Won’t Clog Your Arteries
|
Pie crust 6 whole large eggs 2 egg whites from large eggs 3 tbsp flour 1/2 tsp sea salt pepper to taste 4 spears asparagus in 1/2″ pieces |
1 cup spinach leaves chopped (optional) 4 baby carrots sliced thin 3 mushrooms thinly sliced 1/4 cup diced onion 1/4 cup Hormel bacon bits or 4 slices cooked bacon 4 slices Swiss cheese 1 1/2 cup skim milk |
Note: If you want a creamy, amazing Quiche, you can use half and half instead of milk or 1 cup half and half + 1/2 cup heavy cream. However, don’t blame me if your doctor puts you on life support.

|

|
 |

|

|
 |


All You Ever Wanted To Know About Valentine’s Day – A Recipe!
Monday, February 1st, 2010


It is February 1st and aside from the fact that two of my sisters, my husband and two of our presidents’ birthdays are celebrated this month, we do have a holiday coming of all things lovey-dovey – Valentine’s Day.
Now, here in Oklahoma, we consider Valentine’s Day the next best excuse for eating chocolate since the previous excuse comes nearly two months earlier at Christmas and the next one isn’t until the Easter season. After that, it is every man – or woman – for himself in the rationalization department! If you are looking for some unique and exquisite chocolates that have a real story, Google Bedré Chocolates which are owned and produced by the Chickasaw Tribe right here in Oklahoma. They are the only chocolates produced by an American Indian tribe. They are delicious!!
Being a retired home school parent, I know the unwritten law in the unwritten book of home schooling that states, “Make every opportunity the opportunity for a teachable moment.” I shall do so now. Hence, follows all you ever wanted to know about Valentine’s Day:
According to the World Book Encyclopedia – that bright red number copyrighted in 1989 (yes, I still have it on our book shelves) – there are different theories about how Valentine’s Day came to be. Some trace it to an ancient Roman festival called Lupercalia. Others insist that it involves a certain saint in the Christian church and others equate it with an old English belief that birds mate on February 14. The ancient Romans held the festival of Lupercalia on February 15 to ensure protection from wolves. This appears to be an appropriate celebration, today, for most young women who find themselves chased by “wolves” on a continual basis. In Rome, the celebration was marked by young men hitting people with strips of animal hide. Even back then, they recognized that the real wolves walk on two feet! The women took the blows because they thought that getting struck made them more likely to have children. It is my informed opinion that this practice was then passed down to those very children, using switches from a nearby tree and women have been blessing their children with such switches ever since.
The Christian church disputes this origin because it is known that within the Church, there were two saints named Valentine. According to one story, young men were forbidden, under Roman Empire law, to marry because they made better soldiers if they weren’t tied to a family. A priest named Valentine took it upon himself to secretly marry star-crossed lovers who didn’t care a whit about the law and who had all read Shakespeare’s Romeo and Juliet. Yet another story says that the other Valentine made friends with many children as HE knew the story of the Pied Piper. This made the Romans mad and they imprisoned Valentine (Of course, it is possible that the fact that he refused to worship their gods might have had something to do with this). The children missed him so much that they tossed loving notes, produced by Hallmark Cards, to him through his jail cell window. We have been giving Hallmark Cards on Valentine’s Day ever since.
So there you have the history of Valentine’s Day in an abbreviated form. I am including the recipe for an original, wonderful, simple and fail-safe breakfast treat that you can make for your Valentine or Valentines to start the day off right. Happy Valentine’s Day!!!
1 whole egg, separated
2 egg whites
1/4 cup Kraft sharp cheddar Easy Cheese in a can (yep!) or any other brand of sharp cheese in a can
2 tbsp shredded asiago cheese
4 small cocktail croissants (about 1 oz each)
1 slice bacon
3 tbsp Hormel Real Crumbled Bacon with Picnic Bacon
1/2 cup skim milk or 1/2 and 1/2 if you want to get dangerous
1 pat butter
1 cup fresh spinach chopped
1/4 tsp onion powder
1/4 tsp salt
2 mini springform pans or medium ramekins


Place springform pans or ramekins onto a cookie sheet. Slice croissants in half lengthwise. With a rolling pin, roll 5 of the halves flat. In the two springform pans or ramekins that have been sprayed with Pam, press two croissant halves into each bottom, filling any gaps with pieces of the extra half.


In a blender, put egg yolk, Kraft Easy Cheese, milk, one of the whole croissants, onion powder, and salt and blend until smooth.


Place egg whites into a bowl and beat with mixer until fluffy and white.


Add Hormel ham and bacon bits and spinach to whipped egg whites, folding them in gently, without stirring.

Pour 1/2 mixture into each pan and sprinkle with asiago cheese and place
1/2 of the final croissant half and 1/2 slice of cooked bacon on top with
1/2 pat of butter.

Bake at 350 degrees for approximately 25-30 minutes until set.

Add whatever fruits and garnishes you choose to say, “I love you!”
|
|
 Homestead Revival
 Paratus Familia
 Rural Revolution