 The internet has been down for two days. Hence a late post. So sorry – but that’s technology for you!! Fall has finally made its way into Oklahoma and we are all breathing a sigh of relief. The triple digit temps are gone and it’s just hard to remember how it felt. We got 2 – 4 inches of rain in our area over the past couple of days and it’s even hard to remember the drought. But the fact of the matter remains that we have been in a drought and we have had triple digit temperatures and we did lose our garden and a couple of fruit trees. And worst of all, for the first time ever, we had no tomatoes. Now that’s just plain sad not to have tomatoes. Tomatoes go with everything and in everything so I have always canned boatloads of tomatoes for the winter. None this year. But have no fear!! Red Gold® tomatoes came to the rescue. First, I have to tell you about my new “love affair” with the Red Gold® Tomato company. I have most often used that brand of tomato ever since I first discovered it. I can not tell a lie though, if Surefine goes on sale, I snatch those up too!! But the Red Gold® tomatoes are by far the best canned tomatoes on the market – as close to fresh as you can get. So trust me, I had been using them long before I ever had any contact with them. However, about two weeks ago I got the nicest email from a Cristy with the marketing firm that handles the Red Gold® Tomato Company. She said that she had come across the blog and that she thought we would be a perfect fit for one of their Red Gold® Tomato Giveaway packages. The only request? Try some of the recipes in their new cookbook that would be included. I willingly agreed and also offered to post what recipes I will try every now and again. Then I promptly forgot about it.  Last Wednesday, this awesome cardboard box arrived that had a big tomato with the Red Gold seal on the outside. I opened it to find another box even cooler. It looked like a crate of gorgeous red tomatoes.  I finally got that box opened to find all kinds of neat items….a variety of canned tomatoes, refrigerator magnet, clip magnet, cookbook, key ring, a thumb drive with a tomato on the end (that is now the official Oklahoma Pastry Cloth™ thumb drive) and a lovely red canvas Red Gold® Tomato shopping bag coincidentally in the Oklahoma Pastry Cloth™ red. And evidently, they had gotten word that Mr. Fix-It loves cars, including model ones, because included was a to scale, heavy-duty special edition model of a 2004 Chevrolet SS Convertible – yellow with a Red Gold® emblem. Now what man couldn’t love that?! And to beat everything, Red Gold® has put their canned tomatoes on sale for “Buy 10 and get $5 off At The Register.” The sale goes off here in Okieland after Tuesday, October 11th. But you can continue to make use of their coupon that you can print off at the Red Gold® website for $1 off of three cans. Think of that. If you use that at Homeland, where coupons are doubled, you get 10 cans of tomatoes for $2.50 minus $2 off from the coupon, which leaves you with 10 cans of tomatoes for 50¢!!! You had better believe that I took advantage of that sale and rounded up cans of their different kinds of tomatoes to be carried out in my own, matching Red Gold Tomatoes Grocery bag. I was just too, too shopping coordinated! As far as a recipe, I decided to try this particular one in the cookbook. It calls for fresh, spring veggies, but you can use frozen if fresh is not available. I did and it was delicious. And it calls for fresh ravioli like you buy in the cooler case at any store. However, since I am the “make it yourself if you don’t have it since you live way out in the country kinda gal” I did just that. So here you go and I won’t be doing a printable recipe this time since it is from their book that can be purchased online: 2 tsps olive oil 1 cup fresh green beans, cut into 1 ½” pieces 1 small yellow bell pepper (green is fine too) 1 (14.5 oz) can Red Gold® Diced Tomatoes Italian with Basil, Oregano and Garlic ½ tsp salt 1 pound package fresh cheese ravioli ½ cup sour cream 3 tablespoons basil pesto 2 tsp grated lemon zest Substitutions: 4 oz fresh asparagus cut into 1” pieces and 4 ozs snap pea pods instead of green beans. For ravioli, use Noodle Dough recipe here at the blog.  Once noodle dough is mixed, put it onto a floured surface – preferably an Oklahoma Pastry Cloth™ – and gently flour to form a ball. Cut the ball in half to form two balls.  Roll each ball out into about a 6″ x 12″ rectangle  Place 1″ squares of Asiago cheese onto one rectangle, three across and four down  Place other rectangle of dough over the rectangle with cheese and allow to sit in the open air until the dough is slightly dry. This makes it easier to cut.  With a ravioli cutter or a knife, cut between rows of cheese squares to form ravioli. If using a knife, crimp edges with a fork.  Drop raviolis one-by-one into a two quart pot of salted boiling water with a tblsp of olive oil added to the water. Cook for 10 – 15 minutes until done and slightly chewy.  Heat two teaspoons of olive oil in a skillet and add green beans and yellow pepper ( I had to use a green pepper) Sauté for 5 minutes, stirring frequently, until crisp-tender.  Stir in undrained can of Red Gold® tomatoes and salt. Stir and cook for 3 minutes, stirring occasionally.  In a bowl, combine sour cream, pesto and lemon zest and mix well.  Add sour cream mixture to the tomato and green bean mixture and stir until incorporated  Gently add cooked ravioli and stir  Serve garnished with shredded parmesan or asiago cheese and accompanied by garlic toast and a raspberry vinaigrette salad with fresh raspberries! Oh yeah!! Tasty, tasty!! And the leftovers are good too!!  |
|
|
Oklahoma Pastry Cloth™ Company on Facebook
|
|
 |
|
|
Posts Tagged ‘Green Beans’
Spring Ravioli in the Fall
Monday, October 10th, 2011
Step-by-Step to Canned Green Beans
Sunday, July 12th, 2009
I’ve been out in the garden gathering green beans and processing them for the winter. The plants are huge this year and the leaves are so large, there is no more distinguishing rows. I always plant Bush Blue Lake beans because they do not have to be staked and they produce stringless beans. This year has offered a bumper crop with the cool, early, summer temps and late arriving heat.

There is nothing more relaxing than sitting on the porch or in the den with a big bowl of beans in your lap, snapping them into another bowl. Pop – pop – pop! You get into a rhythm and your mind is soothed by the tempo. And that fresh smell!! Every so often, you just have to sample one of the sweet, juicy pods and you eat the whole thing raw! Can’t get any healthier than that!
Below, I have dedicated this post to a pictorial demonstration on canning green beans using the raw pack method. Because beans have a low acidity, all beans must be pressure canned at 10 lbs pressure for at least 65 minutes. A pressure canner with a guage or a weight is required. They can be purchased at hardware stores, WalMart and other similar stores and online.
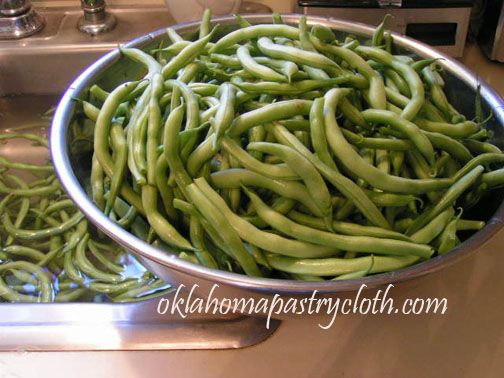
Step 1: Wash green beans several times until all dirt, sand and old flowers are removed. Snap the pods to create uniformly, bite-sized pieces.
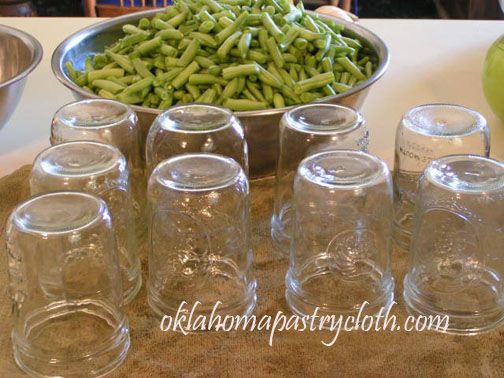
Step 2: Wash all jars and lids in very hot, soapy water and rinse in hot water. Dry.

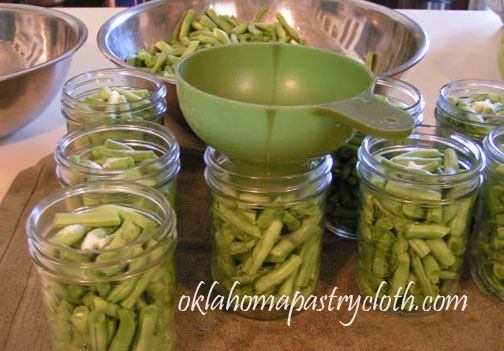
Step 3: Put raw green beans into jars to within 1/2″ of the top of the jar and include 1/2 teaspoon of canning salt or uniodized salt if desired. Shake the jars as you put in the beans to make the beans gravitate to the bottom evenly.
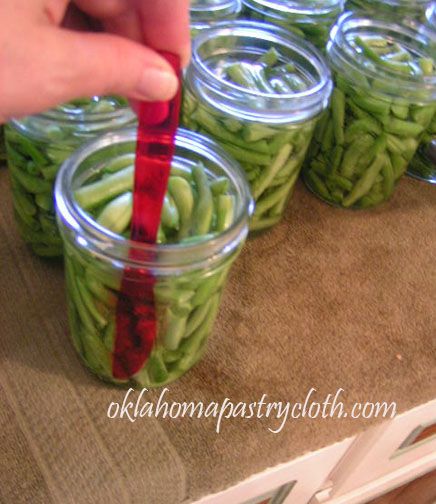
Step 4: Pour boiling water into each jar and over the beans to within 1/2″ of the top of each jar, leaving a 1/2″ head room. Run a plastic knife down the inside side of the jar to remove any air bubbles.
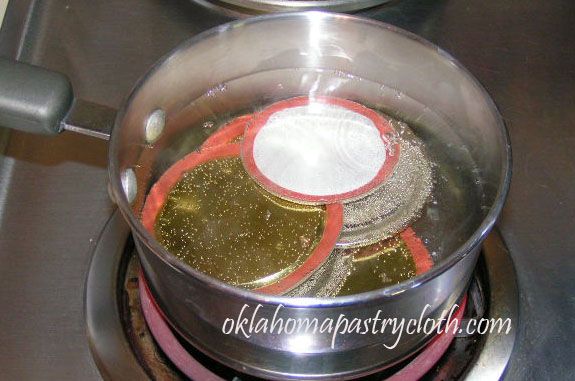
Step 5: Use a clean, damp cloth to wipe the edges of the jars. In a saucepan, cover the lids with water and bring them to a boil and remove from heat. Using tongs, carefully place the hot lids on the jars and put a ring in place. Tighten the rings just enough to call them tight. Too tight can cause problems!
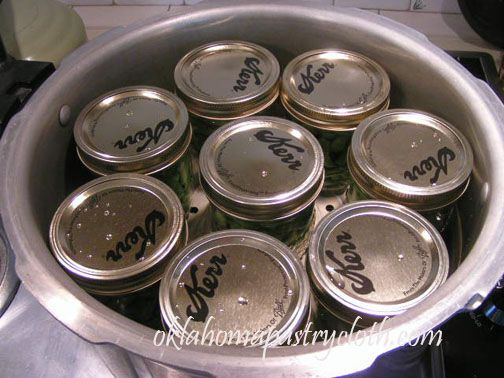
Step 6: Place about 2 inches of hot water in the canner and place the rack on the bottom. Fill the canner with jars according to the capacity of your particular canner. Tighten the cover and if a weight is used, put the weight in place. I like a canner that uses a weight because it is more accurate and does not need to be adjusted. If using a canner with a gauge, please follow the instructions that come with your canner. Turn the heat on high and wait until the weight begins to jiggle. At this point, reduce the heat to medium-high and monitor the weight, which should jiggle about every minute or so. Set the timer for 65-75 minutes and continue to monitor the pounds of pressure by listening to the weight.
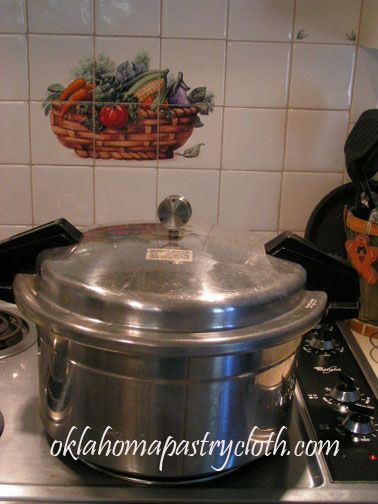
Step 7: When the beans are finished processing, turn off the heat and allow the canner to cool, unmoved, until the pressure has completely dissipated. It is very easy to get very severe steam burns if the canner has not been allowed to cool properly. When the canner has depressurized, remove the lid and carefully remove the jars, using jar tongs with one hand and holding the bottom of the jar with an oven mitt on the other. Soon, the pinging pop of jar lids completing a seal makes you smile because you know that you have been successful.
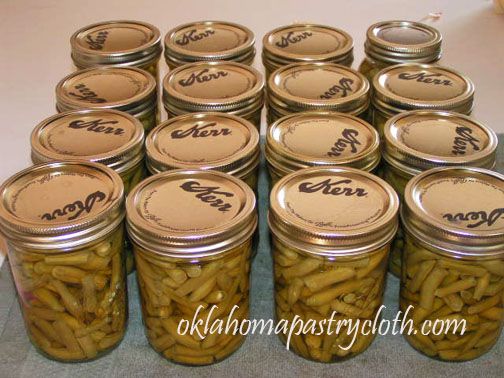
There is something very satisfying in neat rows of freshly canned produce in sparkling jars with golden lids. These are ready for the pantry and will be enjoyed for sure this winter!! I hope that you will take a stab at canning beans. If you don’t have your own garden, the local farmer’s market, health food store or grocery store has fresh beans that will work fine. Just make sure that they are crisp and not limp. Happy canning! It’s bean fun. 🙂

 Homestead Revival
 Paratus Familia
 Rural Revolution