 This post is going to be a little different. I’ve been thinking and that is always dangerous. I tend to wax a little philosophical when I think and that’s not always a good thing. However, it’s possible this time I might have stumbled onto something that I can actually pass along. I have discovered that I am WOMAN and that all other ladies are too. You may be asking at this moment whatever prompted me to this absolutely astounding discovery. And of course, you KNOW I’m going to tell you. Well, it started like this: Yesterday, I had the pleasure of entertaining some friends from Tennessee who were passing through on their way home from dropping off a military son at our nearby Army base. These are friends from wayyyy back and we’ve shared many jokes, hijinks and dinners over the years. The wife is mucho talented in sewing, embroidery and interior design. Her sense of color is just amazing. I’ve always been in awe of her seamstress abilities and have learned so much from her to apply to my own sewing projects.  This husband and wife entered the OPC™ digs and immediately noticed the row of freshly canned beef stew and dog food lined up on a towel from the soapy washing I had just put them through before storage. The first question was, “What’s that?” and then the second was, “Why?” I explained how I make stew and soup for the winter, as well as other tasty concoctions (this does NOT include the dog food) and we began talking canning and dehydrating which then led into grain grinding and bread baking. The long and the short of it is that, while my little group then visited with another friend on the same topics, the friend commented that I can do anything and my two friends from Tennessee nodded their heads in serious agreement, as if they could not. Now I know..I take that as a compliment. HOWEVER, I don’t do everything and the truth is that all of them and all of you can do anything you put your energies toward. The secret is having the desire to try. I have to say that it is so gratifying to hear this desire in so many of you readers and it excites me to no end. When I have an email from you with questions or with excited descriptions of your successes, it just makes me grin. You teach me too and I am discovering all kinds of wonderful projects compliments of readers. Each of us has unique talents, but all of us also have the ability to learn new things. When we branch out into new and out-of-our-comfort-zone adventures in homemaking, we add a whole new dimension to what others try to paint as “hum-drum”. To me, there is nothing more exciting than learning how to do things that provide for family and friends. And for me, in my walk with God, it is one of the ways that I can honor Him – by honoring other people through homemaking skills. There are two scriptures that are the basis of this particular desire in my life and those are Titus 2 and Proverbs 31. Titus 2:3-5 is easier for me because I’m older (check), I love to talk and teach (check), although I am quick to give my not-so-important opinion even when it isn’t wanted (not an attribute sanctioned by that particular scripture!), and I truly want to do for younger women what older women did for me when I was young. Proverbs 31, however, used to make me feel like the worst female on earth. The Proverbs 31 woman is Superwoman. Then I realized that I was looking at her the way my friends were looking at me the other day. I have all the makings of a Proverbs 31 woman and just have to be willing to let God guide me in trying all of those things that will make me His Proverbs 31 woman. I may not sell “purple” but I can paint a purple flower and sell it!! She is a guide – a map – not a checklist. So, put on those aprons, or pearls, or overalls or dresses and dive into something new. And be sure that after you learn to do that something new, pass the knowlege on to someone else. Teach, encourage and lift up! I am WOMAN! Hear me roar! I can hear you roaring too!! 🙂  And now I am going to do a shameless commercial. I’d like to introduce you to what can be done with my Aberdeen Shortbread Cookie Mix! You can find it at the shopping page.  All you add is melted butter to the mix  And mix it  I’m using ceramic molds here and have liberally oiled them. You can use cookie cutters or plastic molds to shape your cookies.  Then the ceramic molds are floured and the cookie dough is pressed into each one  After baking, the cookies are cooled and the edges gently smoothed  Decorate and give as gifts. Or purchase a bag of our Aberdeen Shortbreak Cookie Mix and tie a cookie cutter with a ribbon to it and give that as a cute gift. |
|
|
Oklahoma Pastry Cloth™ Company on Facebook
|
|
 |
|
|
Archive for August, 2011
Cookies and Counsel
Thursday, August 11th, 2011
Popovers
Monday, August 8th, 2011
  Don’t you just love to go through old family albums, giggling over moments frozen in time through a cameral lens, stretching your brain to the limit while trying to remember dates, places, faces and what you were thinking when you were sure colorful striped bellbottoms with a plaid, ruffled shirt made you look like an Ives St. Laurent model? The camera had to be one of the best inventions of all time – well, next to chocolate. At my age, I’ve seen cameras evolve exponentially. Movie cameras too. Note: I have movies – 8 millimeter mind you – that show a third grade me dancing around with my sisters in our ’60’s dresses (we wore dresses alot back then) pretending we were the Three Little Pigs. There is no sound and every second or so a flash of yellow or green runs across the picture indicating aging film. Among my vintagge pictures are the 3″ x 3″ photos from my dad’s Argus camera, a heavy black and chrome metal invention, housed in a real leather case. He bought it when he got home from the army after WWII. I used that camera in college and now my daughter has it. Remember the Brownie cameras? – Oh! Oh! And the Polaroids. Now those were cool. The photographs were nearly instant and you didn’t have to wait a week while the film was being developed! There was such excitement, pulling the film paper out of the camera and counting the minutes before carefully pulling back the cover sheet to reveal a very over-exposed likeness of your cousin making faces. Polaroids went by the wayside and I can’t imagine why. Slides were a big deal in the 1960’s and it was every television sitcom’s joke for a family to be invited to dinner only to be imprisoned on the couch while the host presented a slide show of the family vacation to Disneyland. “Yep. That’s Carol kissing Goofy. No, that’s Goofy on the left. Carol is the one on the right!” The guests would endure 40 gazillion slides of everything from standing in line at the Flying Teacups to standing in line for an ice cream cone and then the guests would look at their watches and say, “Oh dear! Look at the time. We have to let the cat out!” I remember the projectors where the slides were placed one at a time in a rack and then pushed into the projector to view. Then came the carousel projectors and we thought those were amazing. They were even remote controlled. When my family got one of those, I thought we were Up Town. 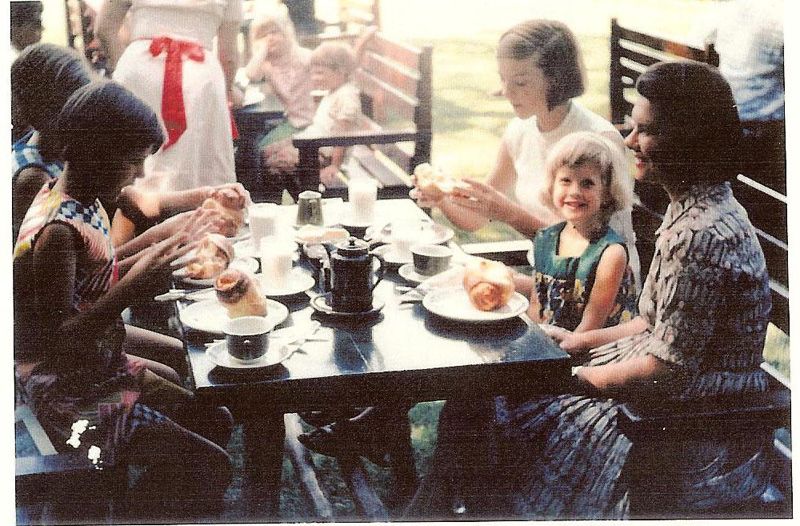 My parents were so wonderful to take tons of pictures of our childhood and our family life in general. We really do have a grand collection of memories on film. One of my favorite memories includes a tea house that my family frequented many a summer. My father was a college professor and during many of the summers of my growing up, he taught at the University of Maine as a visiting professor for the summer sessions. He and my mother introduced us girls to a treat with which we absolutely fell in love – the Popover. The tea house at Jordan Pond at Acadia National Park was our first experience with these hot, puffy pockets of air and the eating was only made more fantastic by the rustic outdoor tables overlooking a gorgeous lake with mountains in the background. Hot tea, coffee or milk accompanied our orders, as well as fresh strawberry jam and fresh butter. Delightfully, the tea house is still in operation and we were able to gather there again during a family reunion for my parents’ 50th anniversary a number of years ago, making memories with our own children. Of course, at that point I had to learn how to make popovers so that I can now eat them anytime I choose right here in Okieland. I thought I’d share what I learned with a recipe and directions. 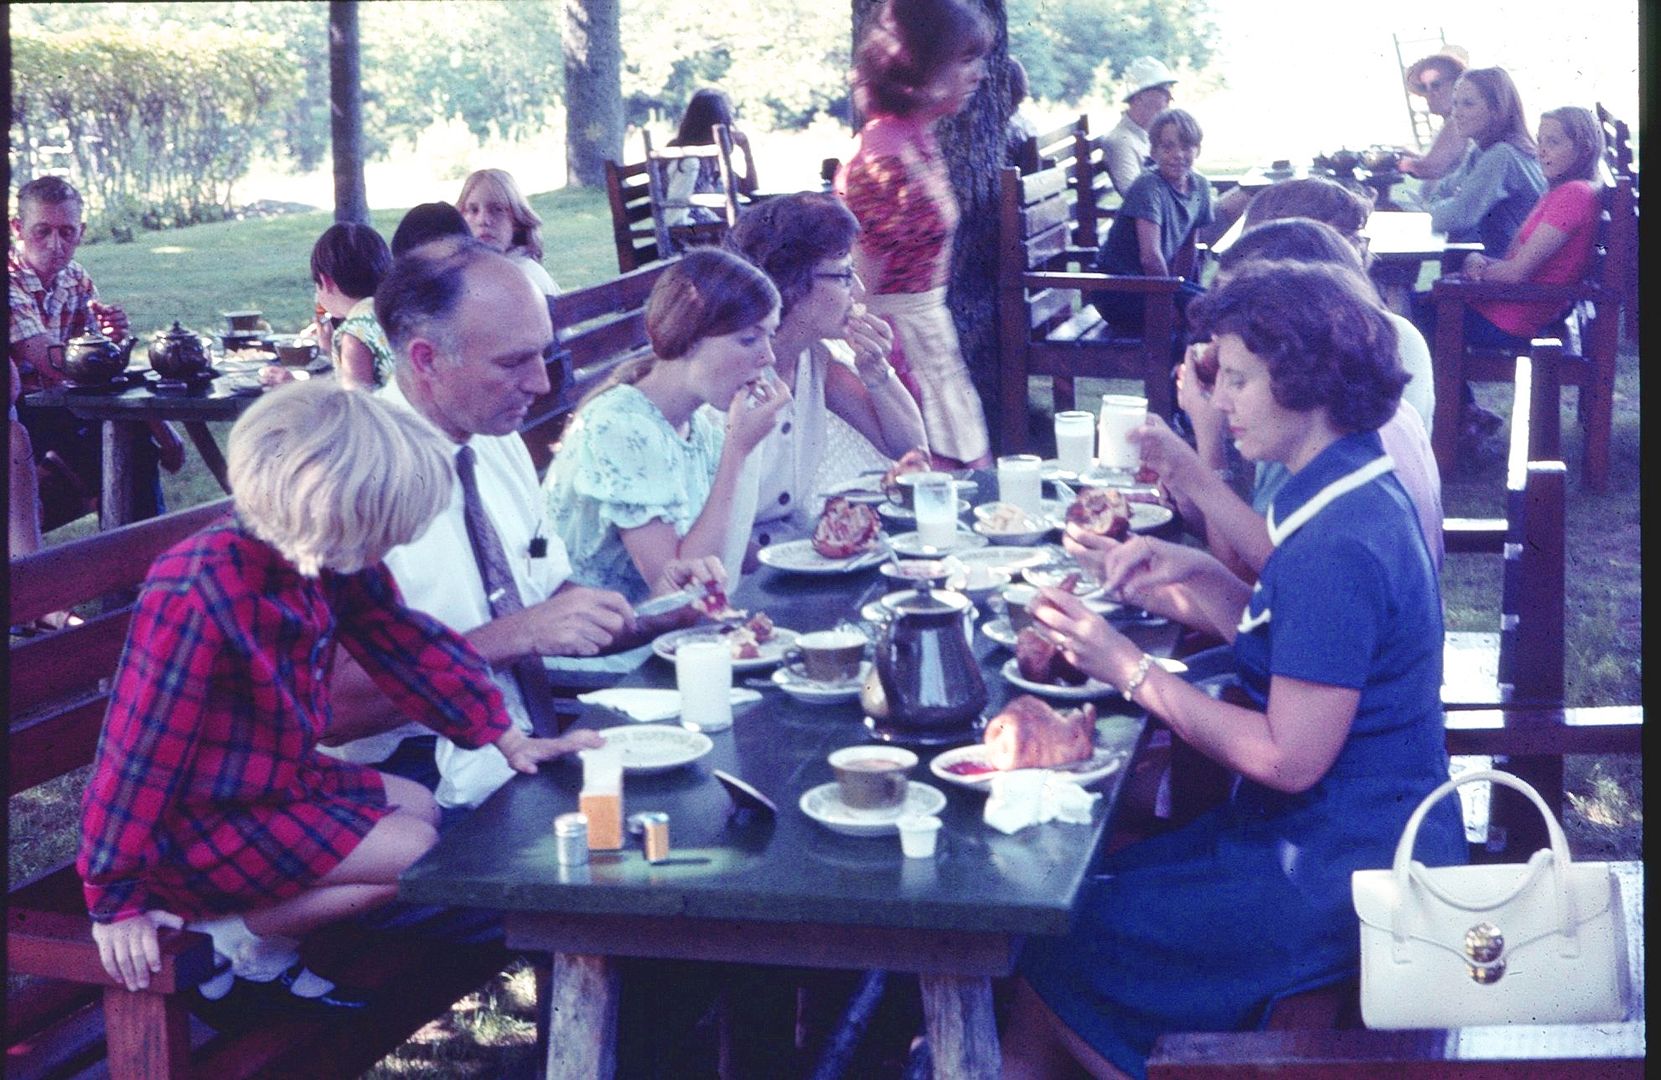 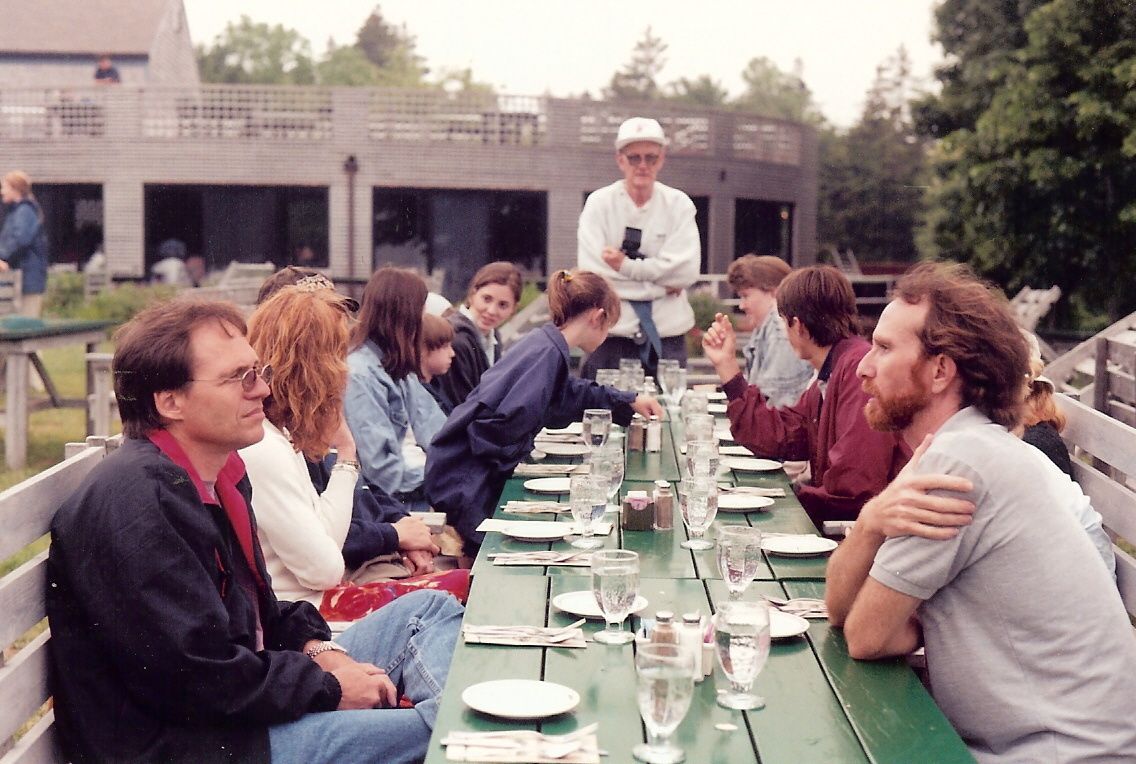 Of all the things my parents gave me, my memories with family are what have stay with me to this day. Those memories are made more vivid by the lovely photographs and movies taken by my parents and grandparents. They have been given to me and to my sisters to share recollections with our children and grandchildren, in the same way that our parents shared with us from their childhoods. It is a way to stay connected with our heritage. Take time to make memories with your family. Take trips, have picnics, sing songs and laugh together. All of the trinkets in the world will never be remembered like time spent together.
 Preheat oven to 425º and lightly grease a 6 cup popover pan with either shortening or butter. You can find popover pans online and I found a very inexpensive one for you to check out here. JUST A NOTE: You CAN put all of the ingredients into a blender and just blend the fire out of the batter. But if you do not have a blender or would rather use the more traditional method, follow the directions below: 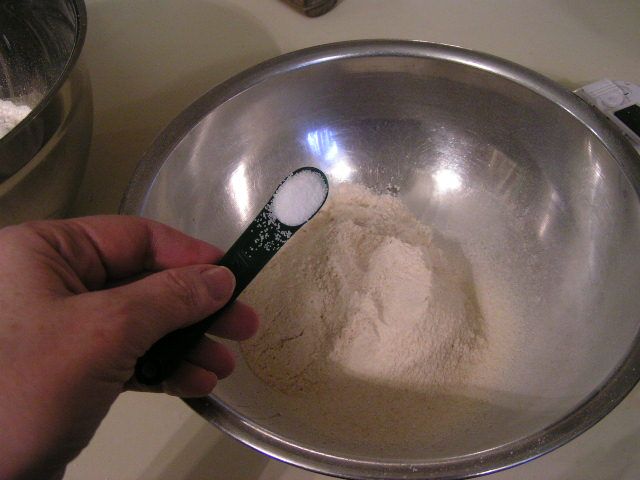 In a shallow bowl, add flour and salt. Set aside. 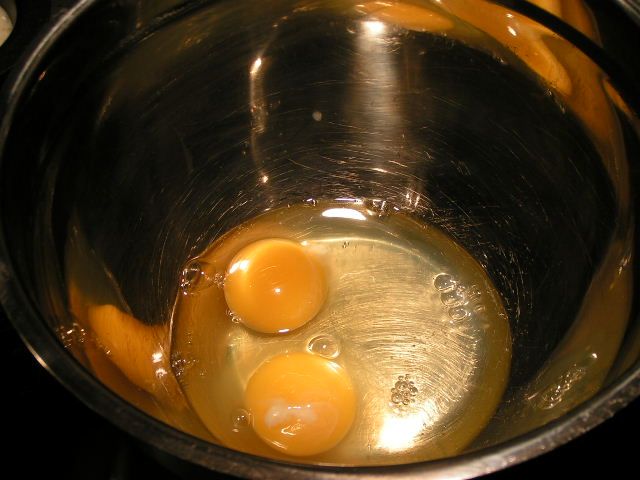 In another shallow bowl, break two large eggs that have sitting at room temperature 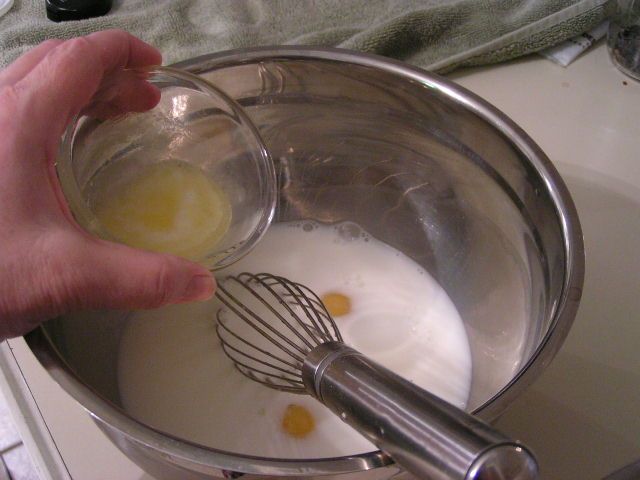 Add milk or half and half and melted butter 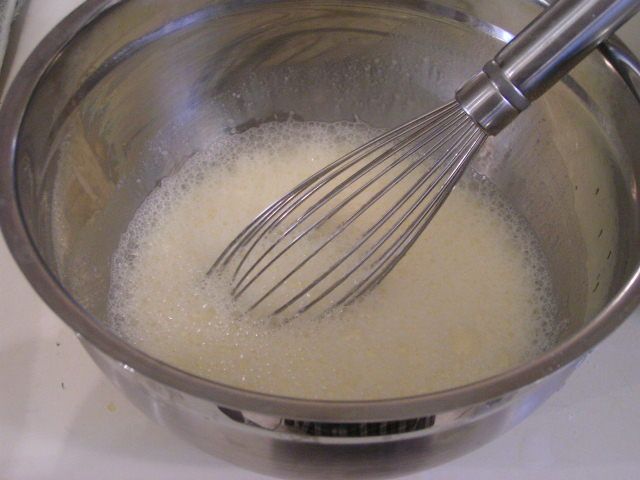 Vigorously whip the egg mixture until it is light and frothy. 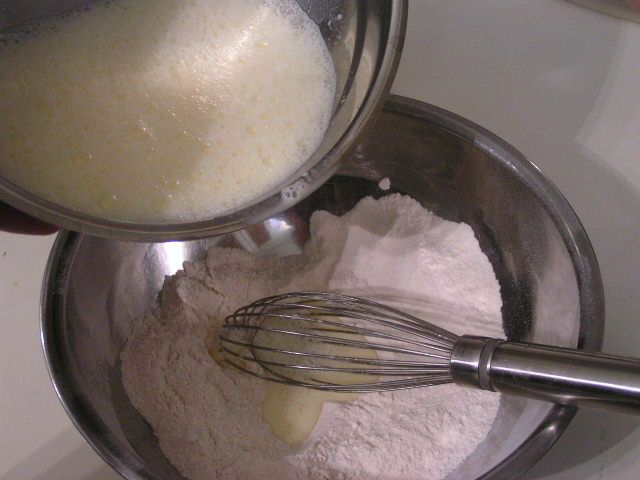 Add whipped egg mixture to flour mixture 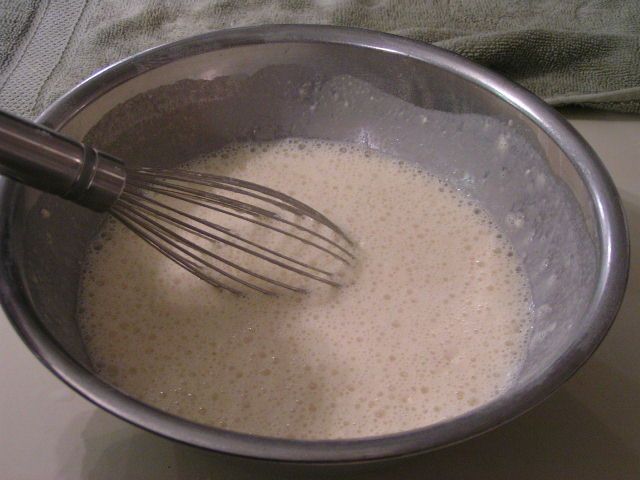 Whip the fire out of the batter! 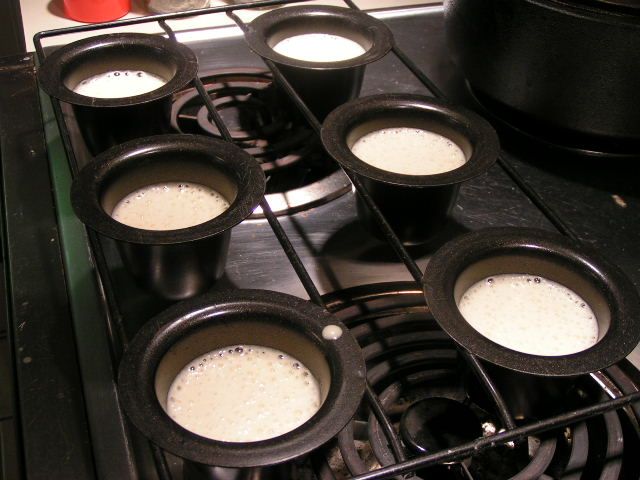 Now here, you can try both methods and see which works best for you. Some people heat the popover pan in the oven for 5 minutes and then pour the batter into the hot cups. Or you can use a cold pan and evenly pour the batter into the greased popover cups 1/3 to 1/2 full. 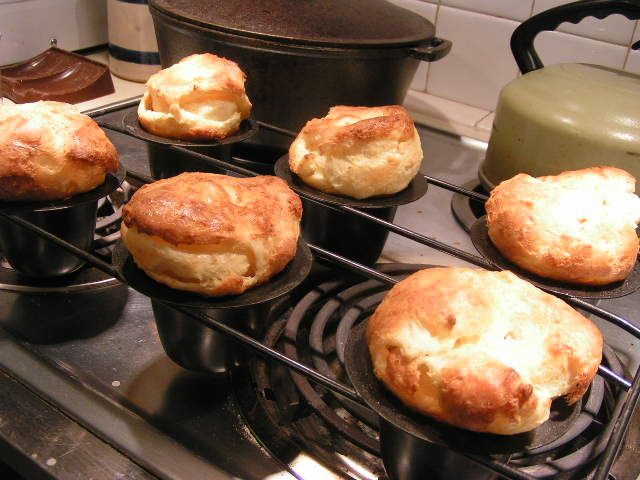 Bake on the center oven rack for 15 minutes and then turn down the oven temp to 350º and contine baking for 20 – 25 minutes until golden brown. Turn off the oven. Using a sharp knife, pierce the top of each popover to allow the steam to escape. Leave in the oven 30 seconds. 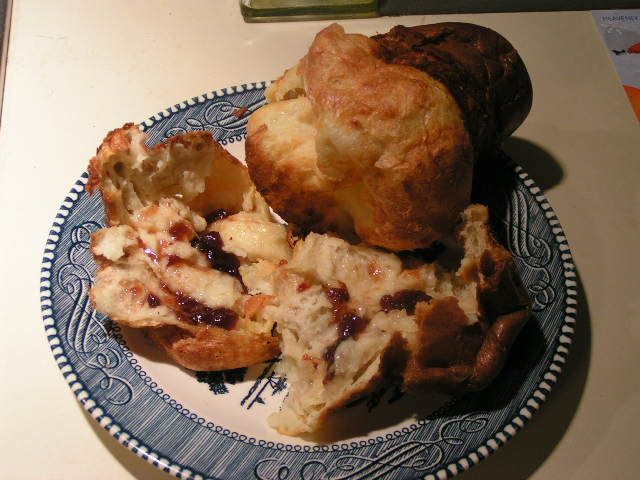 Serve immediately with butter and jam. Great for breakfast. |
|
|
Oklahoma Pastry Cloth™ Company on Facebook
|
|
 |
|
|
Eggs Benedict From Scratch!
Thursday, August 4th, 2011
 OK. Put on your white gloves and your pursed lips and practice your hoity-toity vernacular – you know, like “Raww-thuh!” and “Well, ah say!” and “Candlelight Suppahh”. It’s time to chow down – oops, I mean – partake in the breakfast delicacy called Eggs Benedict. I’m sure you know that ALL Oklahomans consider this to be a staple of Okie cooking. Why, just the other day I heard a camouflage-clad gentleman tell his wife, “Honey, I invited Benedict ta come real early fer breakfast before gettin’ out to the deer stand. Let’s have eggs.” Eggs and Benedict in the same sentence – what’d I tell you? This favorite-of-mine breakfast dish is also great as a brunch treat or a light luncheon surprise and Mr. Fix-It and I like it for dinner on 113 degree evenings!! I promise, if you fix this, your family and friends will think you’ve been sneaking out to the local culinary institute. They’ll have no idea that you’ve really been hitting the Dunkin’ Donuts across town. For the best flavor and the most impressive effect you must make this dish from scratch. However, if you are a weenie or tired or frustrated, have worked all day, have screaming children, did not sleep well the night before, have broken your leg or have just found out that the moon landing was totally staged, there is “store-bought” for most of it to make it easier.  The trick to any meal like this is to have your breads made ahead of time. Many people have “baking day” where they make the different breads, desserts and other baked treats that will be used for the week. Patrice Lewis at The Rural Revolution did a lovely picture study of her baking day of English Muffins, pies and quiches. For Eggs Benedict, you need those English Muffins. It’s ok if you want to use those old, sorry, dry, tasteless excuses for bread from the store, but if you want REAL taste, make your own. My recipe and picture directions are found HERE This recipe makes anywhere from a dozen to 14 muffins. Put them in a plastic bag in the frig and they are ready for you to use when you need them. First, I’m going to give you the recipe and instructions for the Hollandaise sauce needed, which can be used on more than just the eggs. Asparagus, broccoli and other steamed veggies are great with this topping. The recipe is easy and takes just minutes. Leftover sauce can be stored in the refrigerator or in the freezer and reheated with a little water to thin. However, if you are in a hurry, McCormick’s makes the best substitute and you can find it in most groceries on the mixes isle. (And it’s low in calories) Finally, I’ll give the instructions for putting the Eggs Benedict together.  So get out your chef hats and let’s get started: Serving for 4
 Melt butter in a bowl in the microwave or in a small pan on the stove. Set it aside to cool slightly.  You can use a double boiler and I have one, but I prefer to do a shallow, stainless bowl over a pot of boiling water because it makes it easier to whip the eggs and there are no crevices that can’t be reached. In either case, fill the lower pan to halfway with water and bring to a slow boil.   Place egg yolks into a bowl or into the top section of the double boiler. HINT: Freeze egg whites in ice trays and pop out when frozen, storing in a freezer bag. You can thaw them for meringue, to add to eggs for scrambled eggs or to use in recipes.  Add cold water  Scramble the eggs and water until light and frothy  Place the bowl or double boiler top over the pan of boiling water and immediately begin whisking vigorously. When the eggs start to thicken begin slowly adding melted butter, continuing to whisk to keep from lumping. If there are any lumps, just keep vigorously whisking.  Continue to slowly add butter  Whisk until light and smooth. Turn the heat down to low  Add lemon juice 1 teaspoon at a time and continue stirring. Taste between teaspoons to check the flavor. You may not like as much lemon as I do.  Add chicken bouillon and stir until dissolved. Cover the sauce with plastic wrap and leave over warm water on low.
 Poach eggs. I am using a vintage Salton poacher here, but you can actually poach them by just pouring a large egg into boiling water that you have stirred quickly. I am only doing two eggs here, but there is enough sauce for four.  Meanwhile, using a fork, split English Muffins  Either toast them or butter them and place them butter side down on a hot skillet. Cook until golden brown. Place muffins on plates.  Fry Canadian bacon or smoked ham on a hot skillet for 15 – 20 seconds on each side and then place on one side of each English Muffin  Place egg on top of Canadian bacon or ham  Pour sauce over the center of the egg and down the sides of the muffin. Pepper to taste. Serve with fruit and other muffin slice, buttered and with jam if you like. |
|
|
Oklahoma Pastry Cloth™ Company on Facebook
|
|
 |
|
|
Making Bagels
Monday, August 1st, 2011
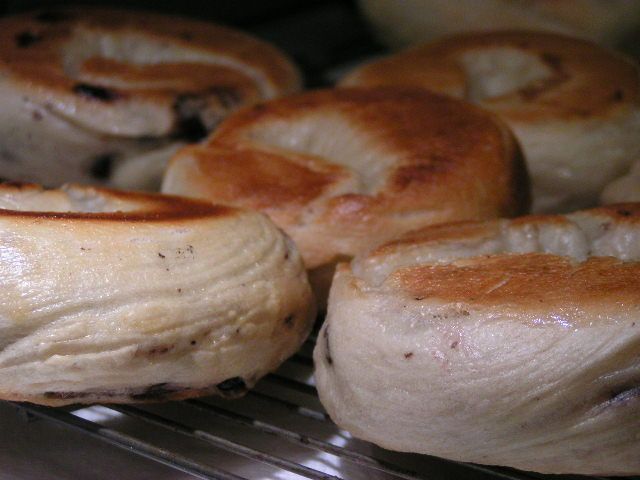  This morning, I am munching on a toasted bagel with butter and strawberry cream cheese. Let me tell you. There is absolutely no bread on earth, in my book, that is more gratifying and fun than the toasted bagel. And the taste. Oh my. Crunchy/chewy on the outside and soft and yummy on the inside. The only thing that comes a close second for me is an Aunt Annie’s garlic pretzel!!! Once you’ve eaten a fresh, homemade toasted bagel, you will never go back to the store-bought ones again. They are melt-in-your-mouth delicious. The fun thing about them is that they don’t take very long to make!! And the more you make, the better you get at forming them. Pretty soon you are ready for a window in front of a gawking crowd that’s watching you slap bagel ropes around your hand and wowing them as you deftly tuck the ends together to make a perfect circle, ready for boiling water. According to the Kitchen Project the legend about bagels runs something like this: “In 1683 in Vienna, Austria, a local Jewish baker wanted to thank the king of Poland for protecting his countrymen from Turkish invaders. He made a special hard roll in the shape of a riding stirrup – Bugel in German – commemorating the king’s favorite pastime and giving the bagel its distinct shape.” In Poland, bagels were given as gifts to expectant mothers and used as teething rings for the new babies. And in Russia, they were given as good luck charms with magical powers! Immigrant Jewish bakers brought the bread rings to North America and they were quickly a favorite. Today, while many bagel stores use automated machinery to produce large quantities of bagels, there are also stores where artisans ply their trade with the stiff dough and roll them by hand. That is the way that I do it. Below is the recipe for basic bagels and step-by-step instructions. Total time from start to finish is a little over an hour. You can add any of your favorite ingredients to his recipe. Oven temp: 425º
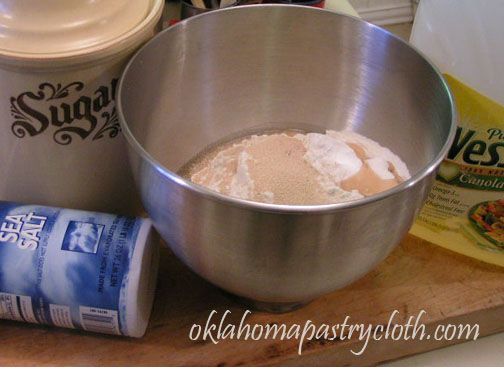 Place 1 tbsp sugar into a 2 cup measuring cup and add 1 1/4 cup warm water. Sprinkle yeast on top of the water and shake it until yeast starts to sink. Allow to proof for 5 minutes. Meanwhile, add all of the other ingredients to a mixing bowl. Pour proofed yeast in with the rest of the ingredients and mix with a dough hook on your mixer or mix by hand with a wide spoon. Knead by hand for 10 minutes or knead with a dough hook for 8 minutes on low. 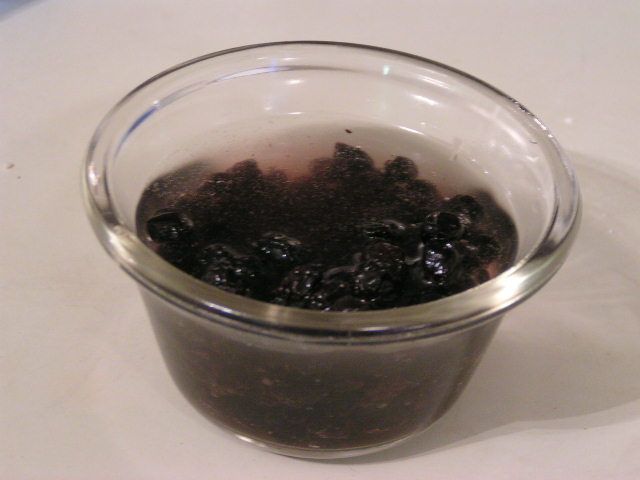 I reconstituted some dried blueberries overnight by pouring warm water over them and putting them in the refrigerator to soak overnight. I added these to part of the dough after kneading. I divided the dough, leaving part in the mixer and then added the drained blueberries to mix. You can add cinnamon and raisins or fresh blueberries, garlic and onion pieces, anything that you like in a bagel. 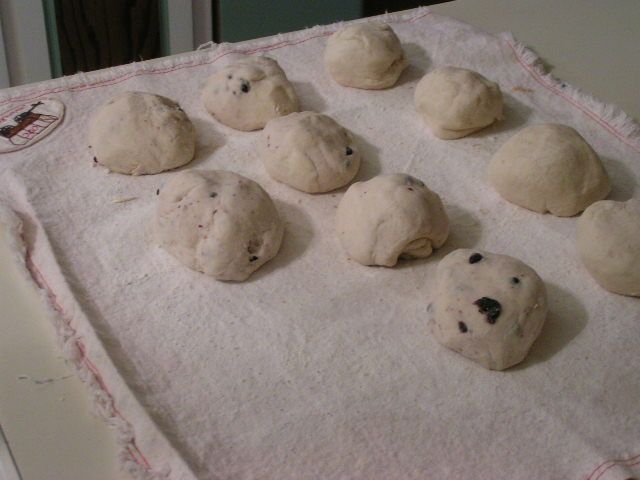 On a floured surface, divide the dough into 8 balls. I am using an Oklahoma Pastry Cloth™ here and it provides a wonderful surface on which to work with bagels. And cleanup is a breeze. Cover the dough balls with a warm damp towel and allow to rest for 20 minutes.  In the meantime, prepare a large pot with water to be boiled and oil a cookie sheet. 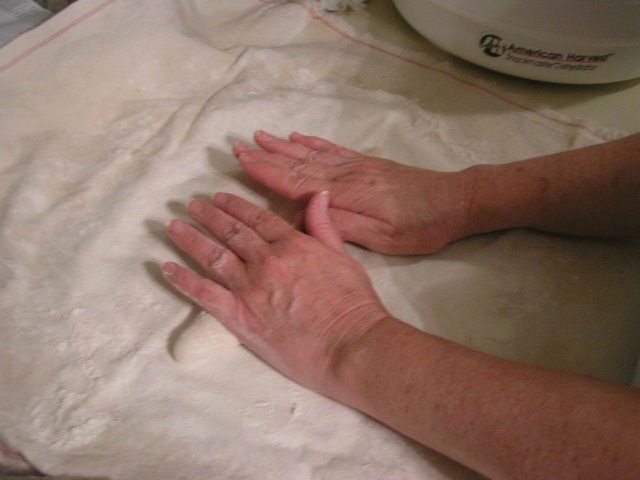 Remove damp towel from dough balls and flour the rolling surface. Roll each dough ball out to the length equal to the width of your hands placed side-by-side. 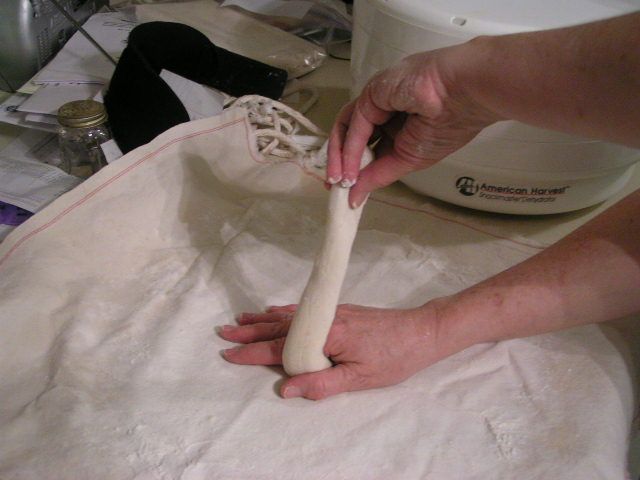 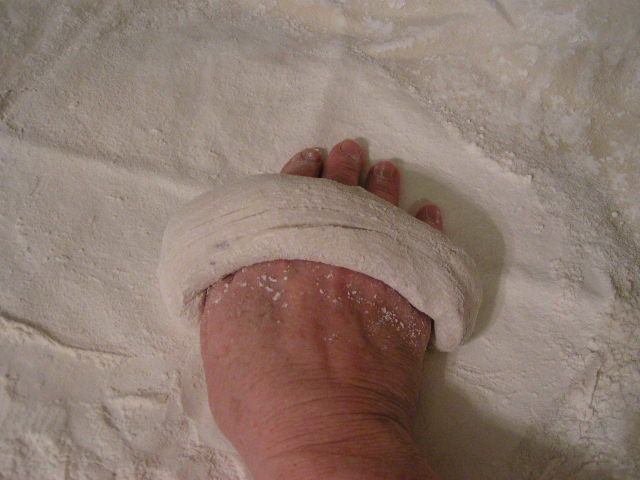 Place one end halfway under your less dominant hand and pick the other end in your other hand. Wrap the rope over the top of your less dominant hand and bring the end under your hand to match the other end. I have a bowl of water nearby where I can dip my fingers in and wet the surfaces of both ends so that they will join easily. 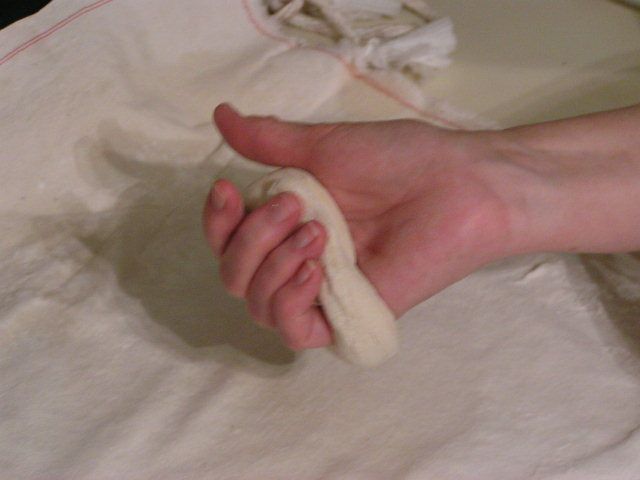 I flip my hand over and gently squeeze the ends together. Or you can press the ends together by pressing down onto the floured surface. At this point, I place the formed bagels back onto the pastry cloth, but the pastry cloth has been put onto a flat surface like a cookie sheet or pizza board. When all bagels have been formed, I cover them with the warm, wet towel again and then place in the oven that has been warmed to 150º and turned off, to rise for 20 – 30 minutes. They should look slightly puffy when they are done. You don’t want them to rise too much, but just have a nice, full shape. Meanwhile, start your water to boiling. 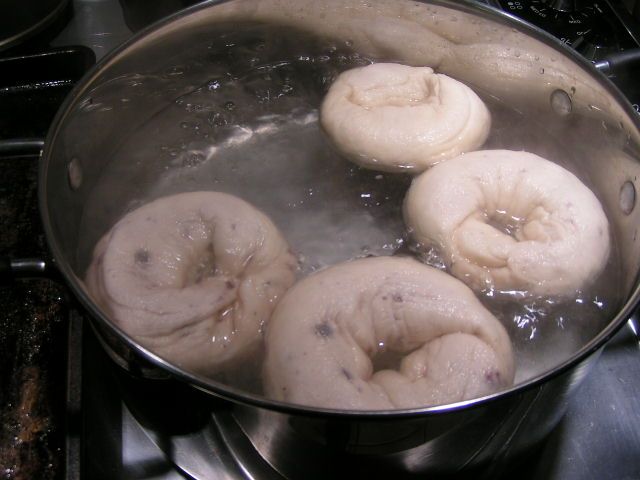 When the bagels have risen slightly, drop them into the boiling water for 1 minute on one side. 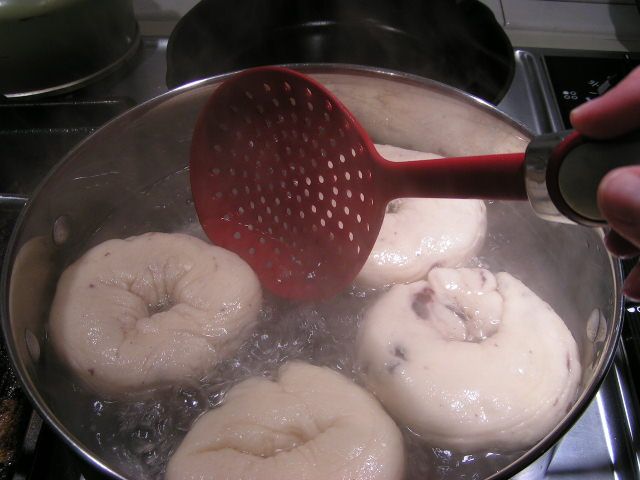 Using a large, slotted spatula, gently turn the bagels and let them boil for 1 minute on the other side. 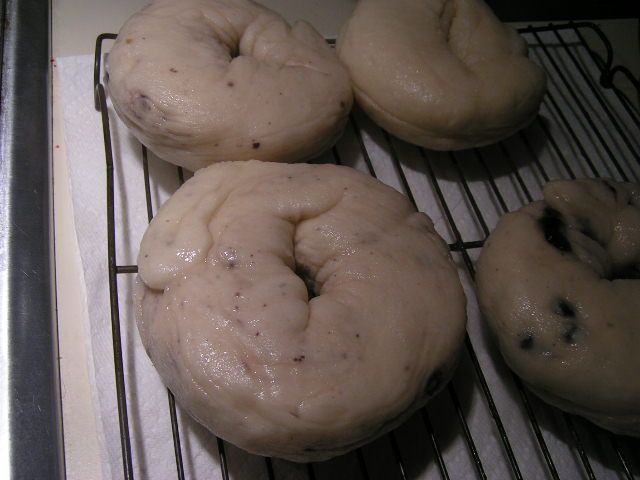 Lift the bagels out of the water and allow to dry for a minute on a rack. 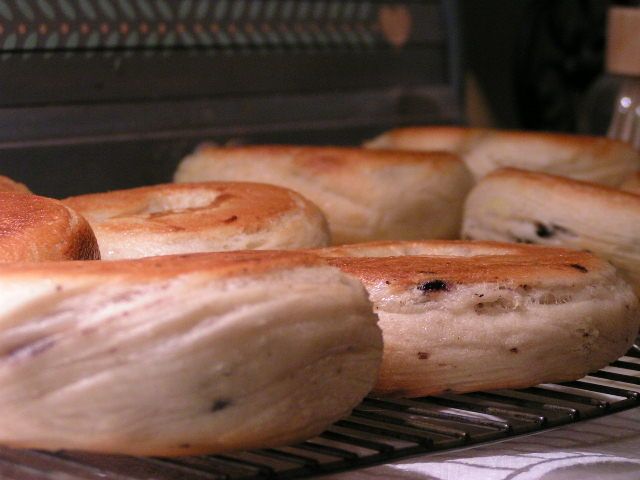 Then place them on the oiled cookie sheet. Bake at 425º for 20 minutes. If you like your bagels to be crispy on both sides, after 10 minutes of baking, you can flip them over to the other side and bake for 10 more minutes. 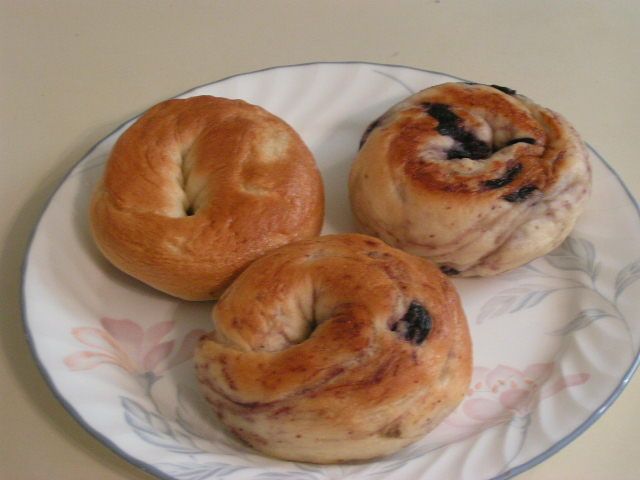 Just to show you the difference in appearance, the two bagels on the left were not turned and the one on the top right was flipped in the middle of baking. Slice bagels and toast in a toaster or toaster oven and serve warm. Extra bagels can be stored in a plastic bag and refrigerated for freshness. 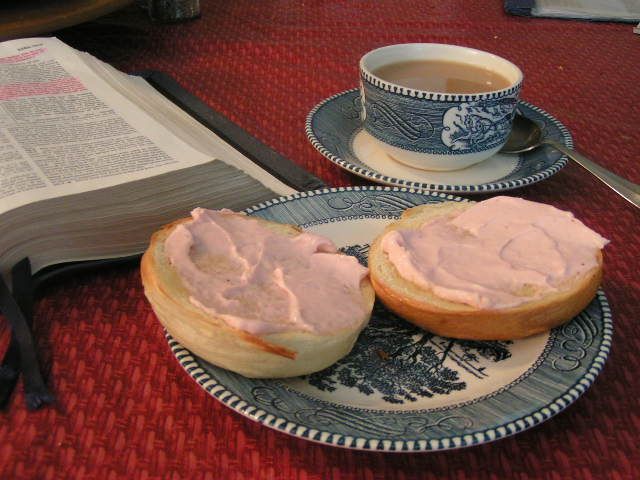 Bible study with a freshly toasted bagel slathered with butter and strawberry cream cheese accompanied by a nice cup of hot, Fortunes Blueberry Vanilla Tea found at the Shopping Page.  |
|
|
Oklahoma Pastry Cloth™ Company on Facebook
|
|
 |
|
|

 Homestead Revival
 Paratus Familia
 Rural Revolution